Tutorial: a rolling ball rig
Move a control across the floor and let the rig turn the ball for you. In this 3-minute lesson, you'll build that behavior by hand in usdview and Noodles: one control, a Matrix Mover, and a Float Math Mover. Every authoring step uses the UI, with no Python or script entry.
Watch the lesson
Watch or download the full movie (3:13, MP4). The viewport Move-tool demonstration starts at 2:52; the continuous gizmo drag starts at 2:58 and is shown at half speed so you can see the seams turn.
The 21 steps below match the movie's chapters. Each screenshot is a frame from that movie; its caption gives the capture time. Open an image for full-size node labels and connections.
Get the starting files
Use a working usdRig installation with its usdview authoring tools; see
Getting started. The lesson files are in
docs/examples/ in the checkout:
| File | What it contains |
|---|---|
| RollingBallLesson.usda | An empty root layer for your work. Copy it before starting. |
| BallAsset-unrigged.usda | The ball, floor, materials and camera, with no rig or rig variants. |
| textures/basketball.png | The ball texture. Keep it in a textures folder beside the asset. |
Open your copy of RollingBallLesson.usda in usdview. Keep it beside the
unrigged asset so the relative sublayer path resolves. The movie's working
copy is named RollingBallLesson-v3.usda; the name does not affect the rig.
The empty viewport is expected: you'll bring the ball in through the
composition tools next.
1. Choose the root layer — 0:00
Open Window → Layer Editor. Under Edit Target, choose Root Layer. Do this first, so the composition arc and every rig edit go into the file you'll save.
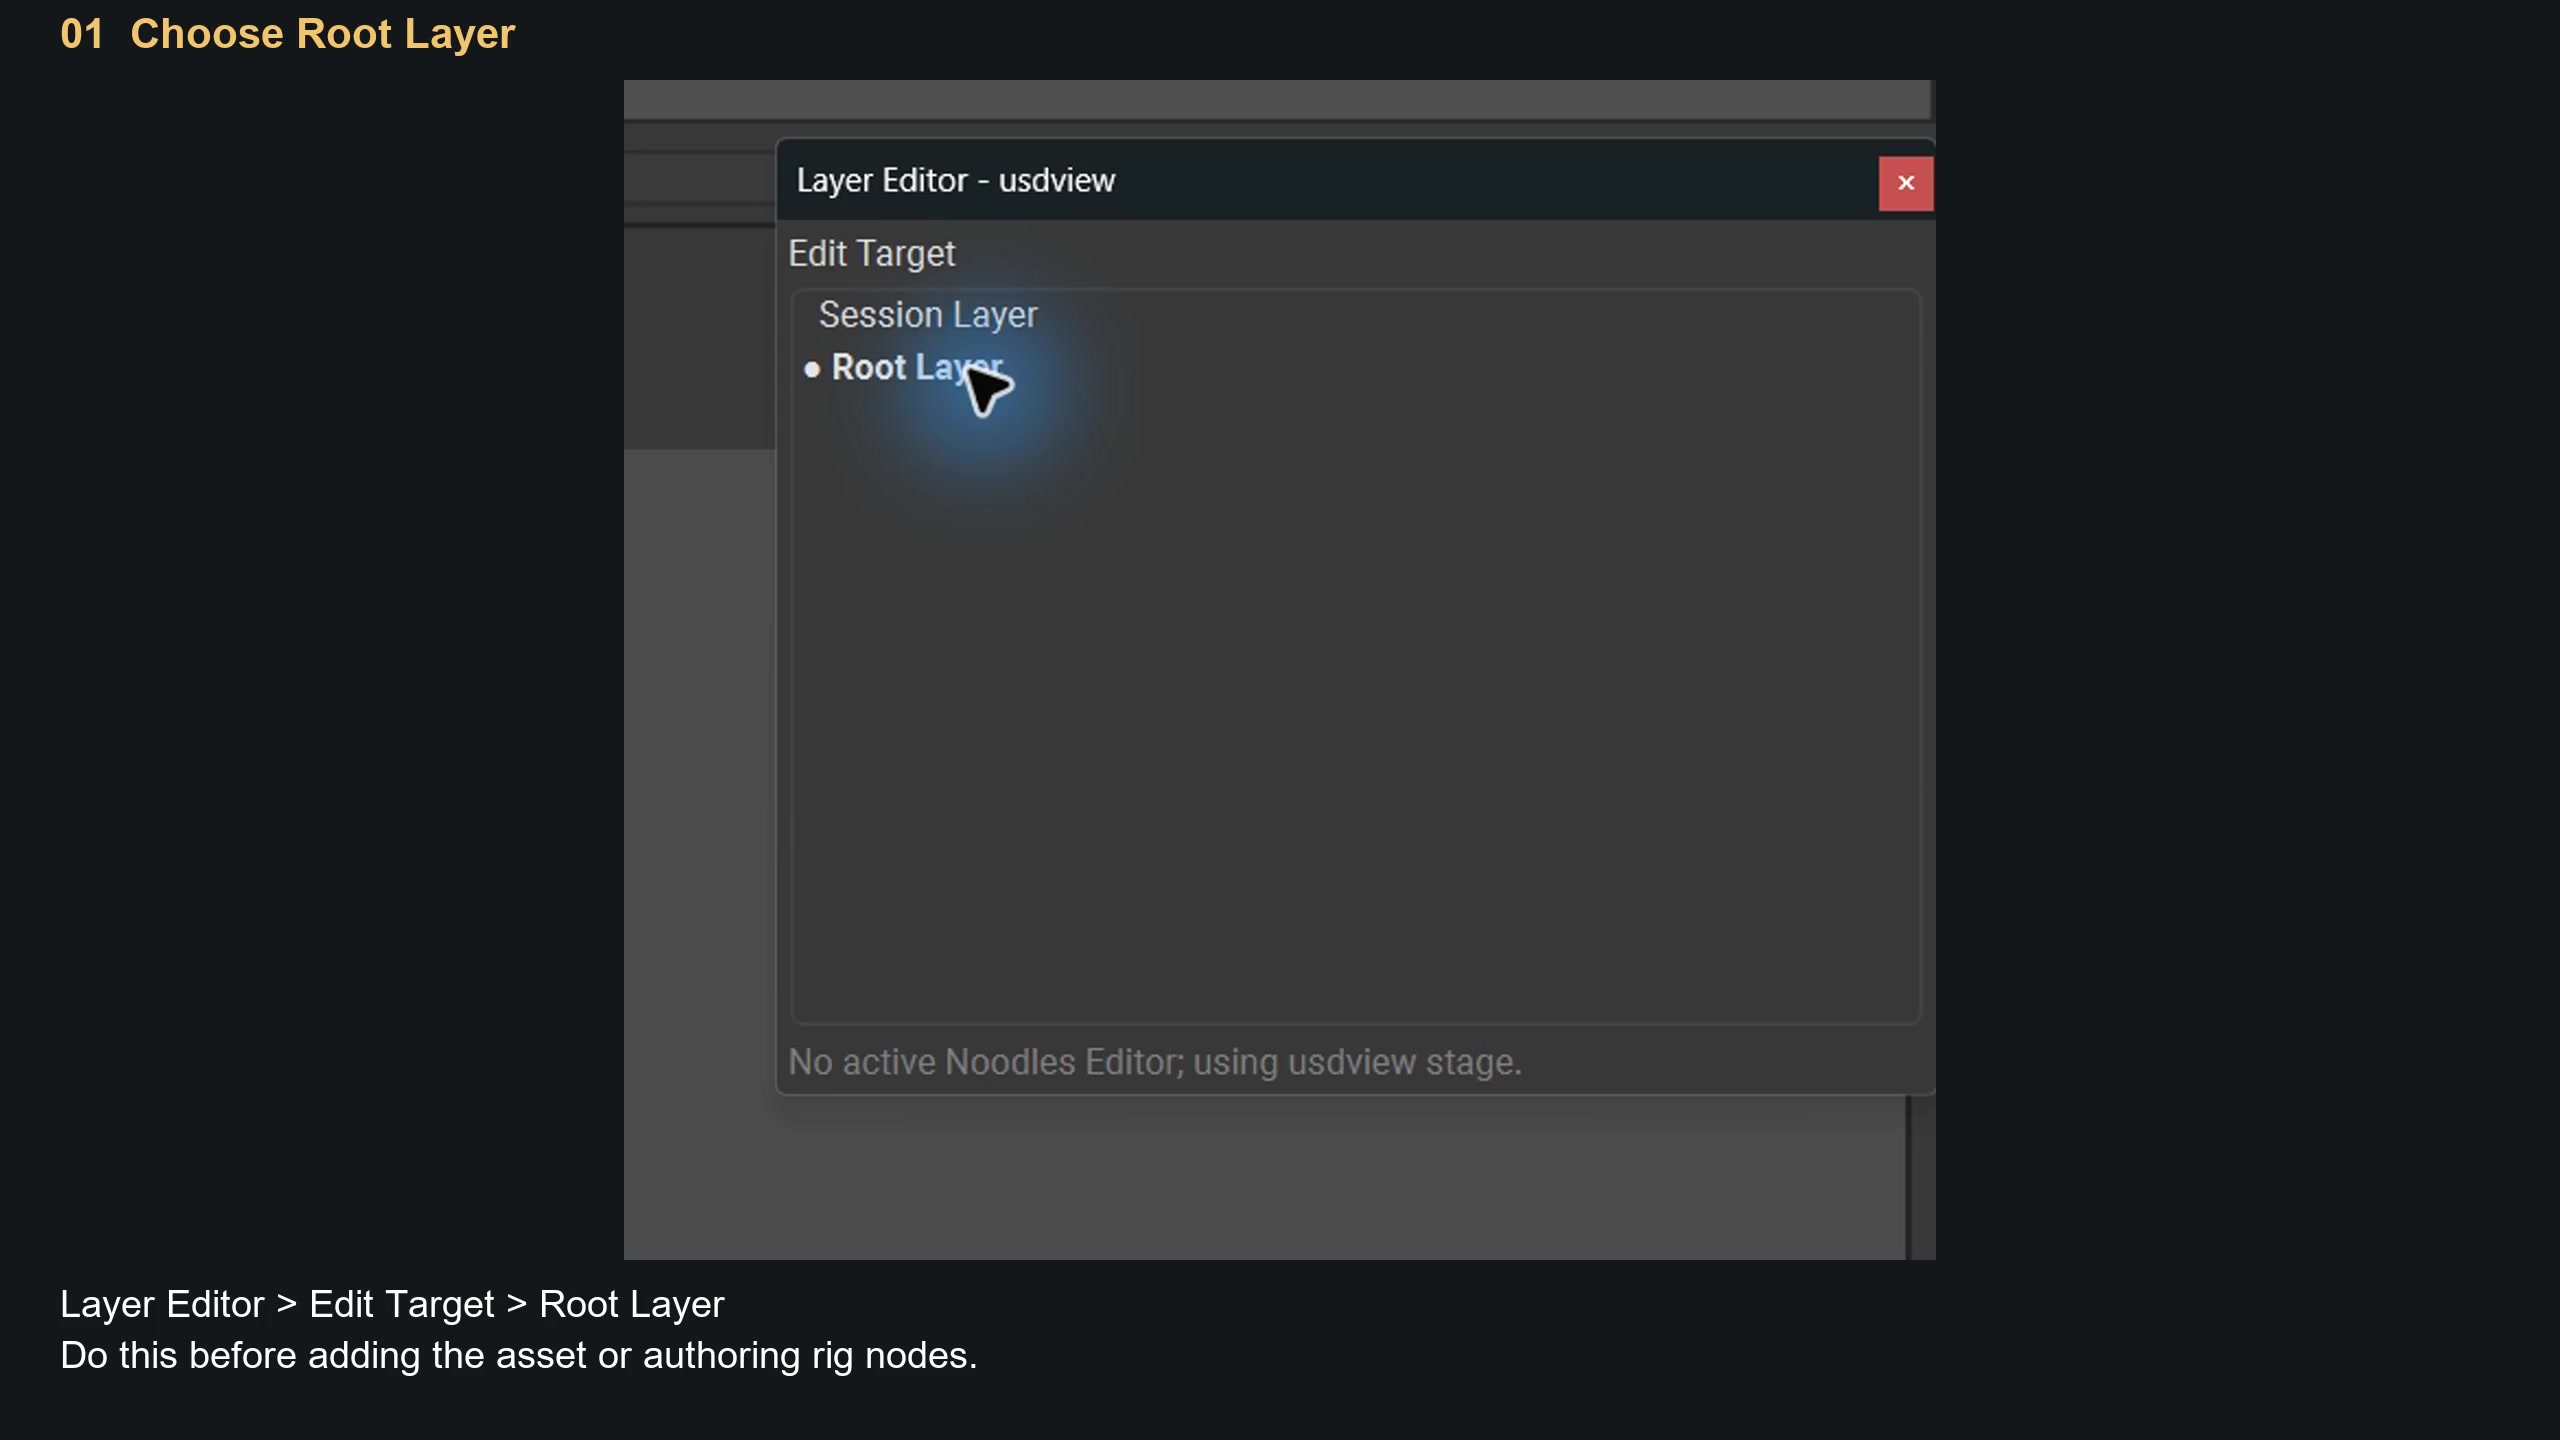
Movie frame: 0:06.
2. Add the ball as a sublayer — 0:07
Right-click the stage root in usdview's prim tree. Choose Add Composition Arc → Sublayer.
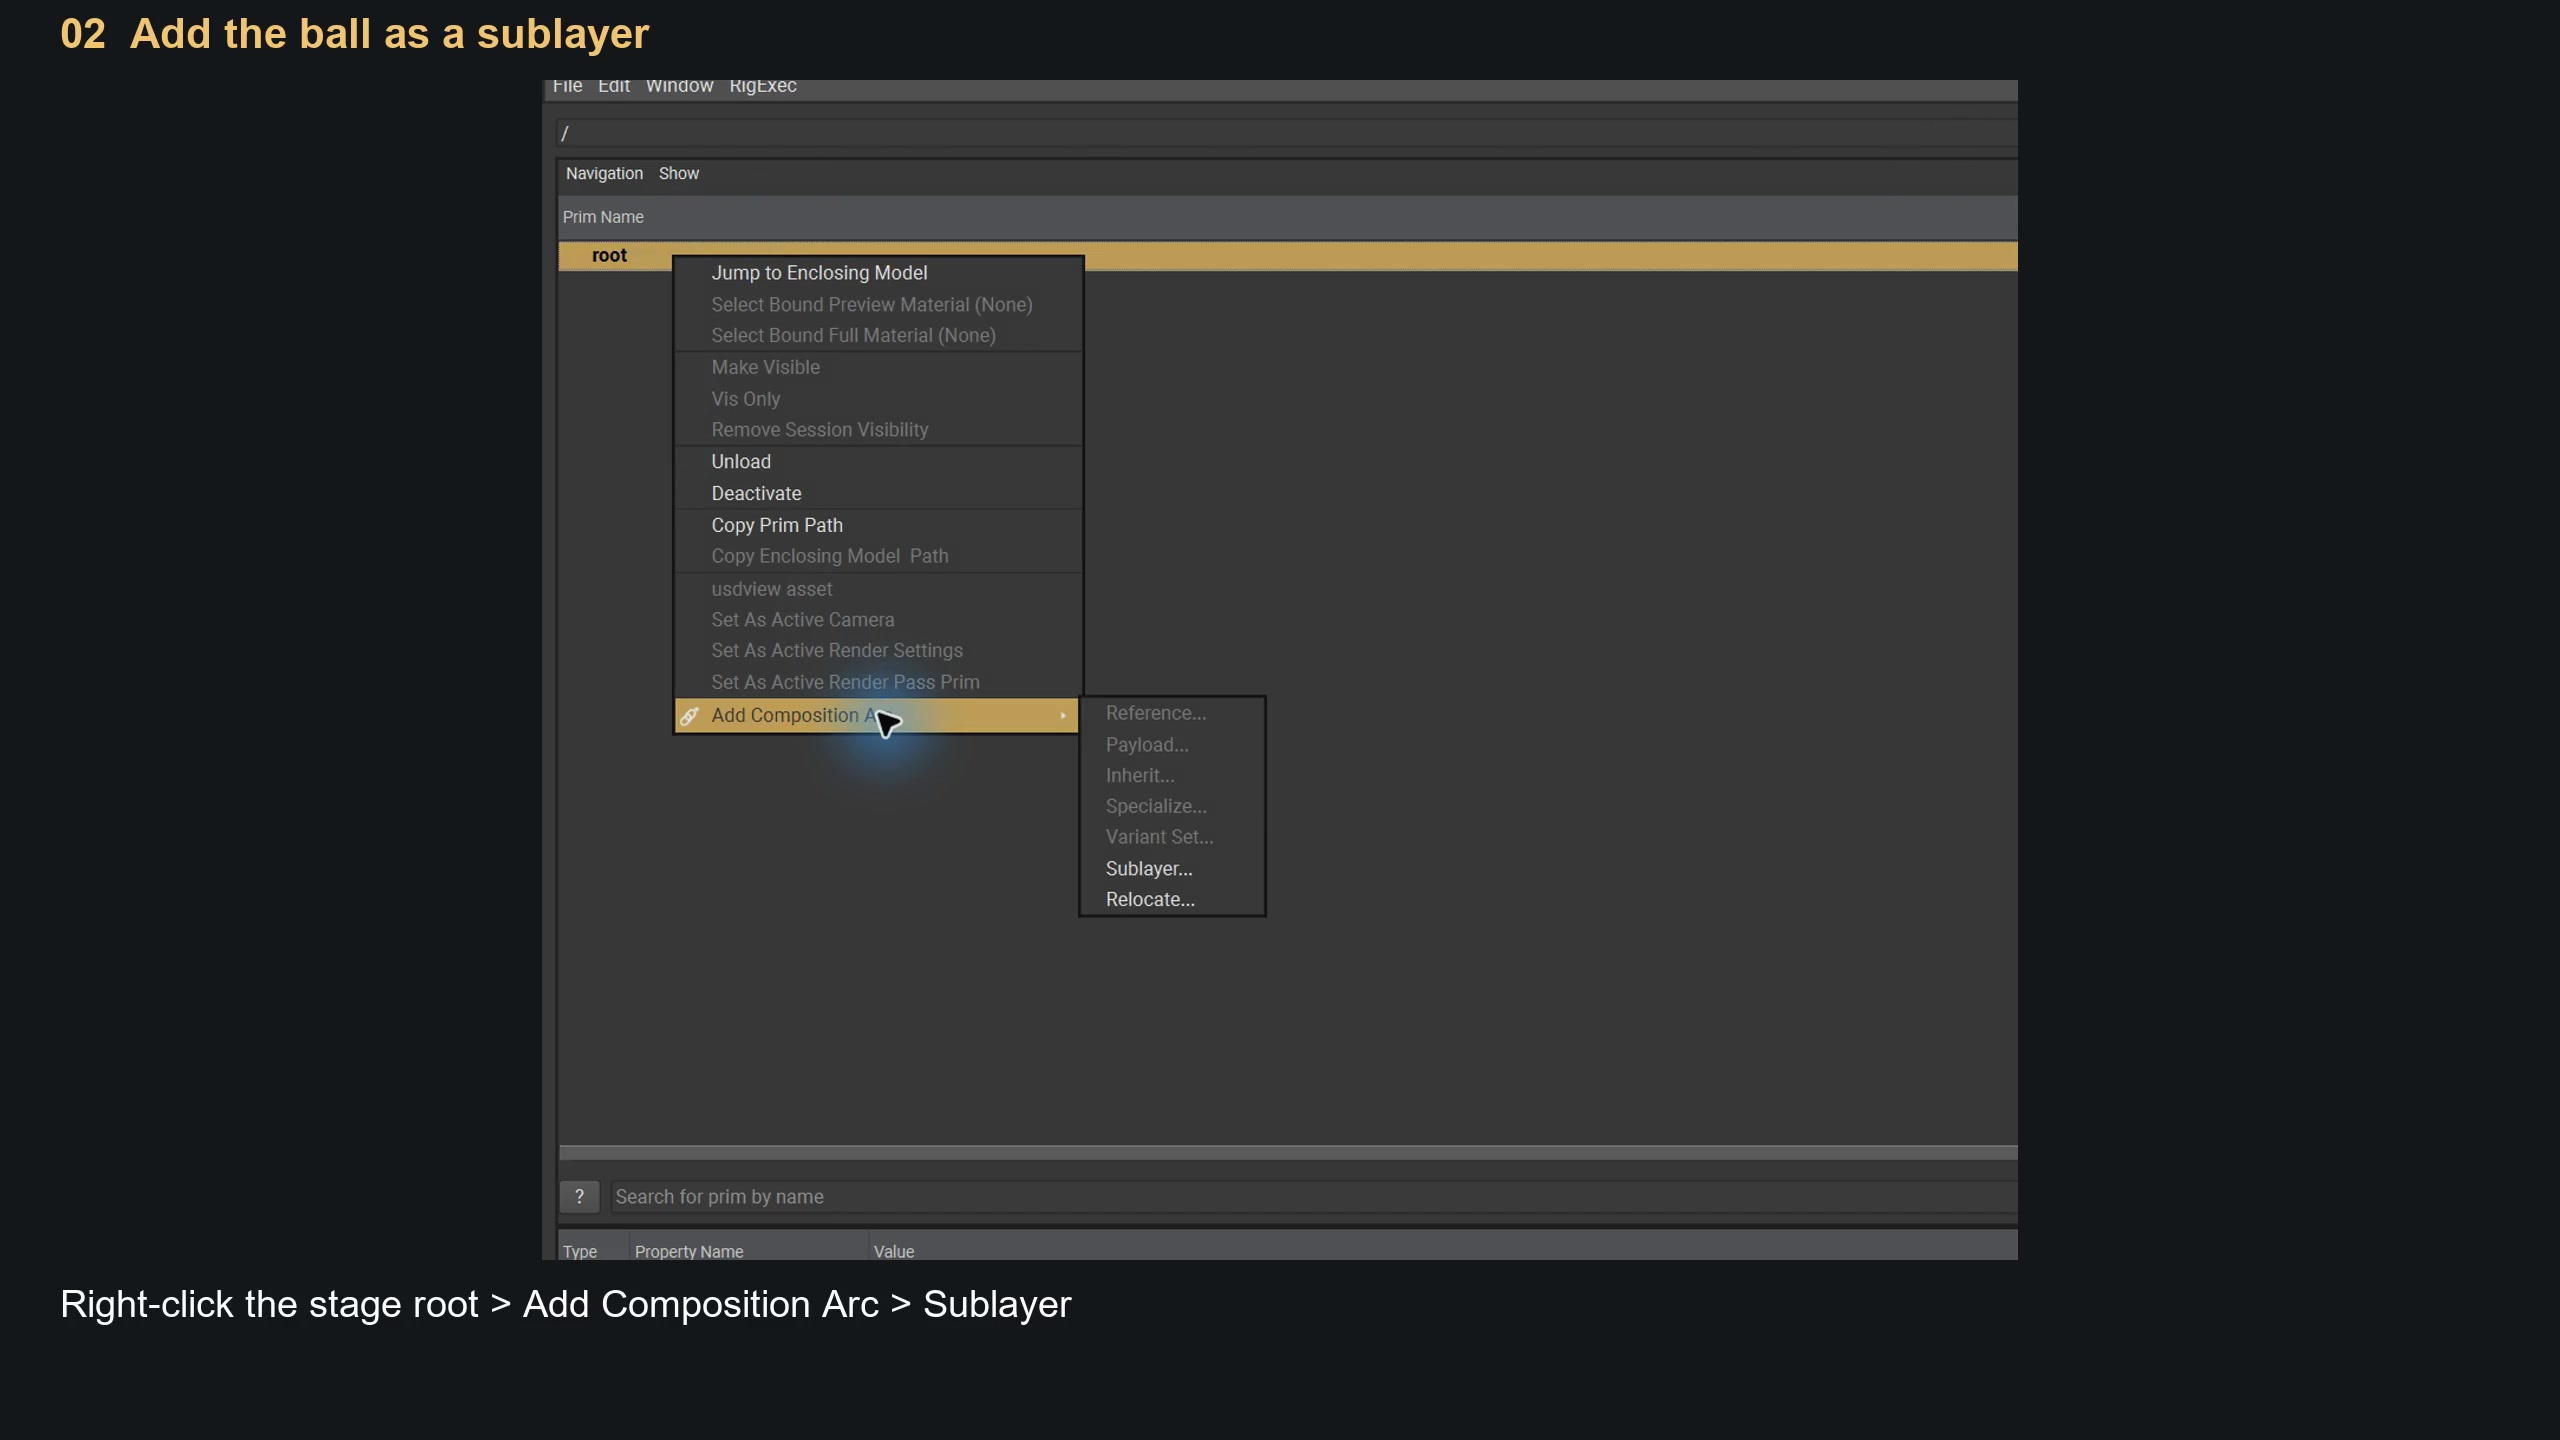
Movie frame: 0:13.
3. Author the composition arc — 0:15
Choose BallAsset-unrigged.usda. Leave Offset at 0 and Scale at
1, then click Author. This brings the geometry into your lesson layer.
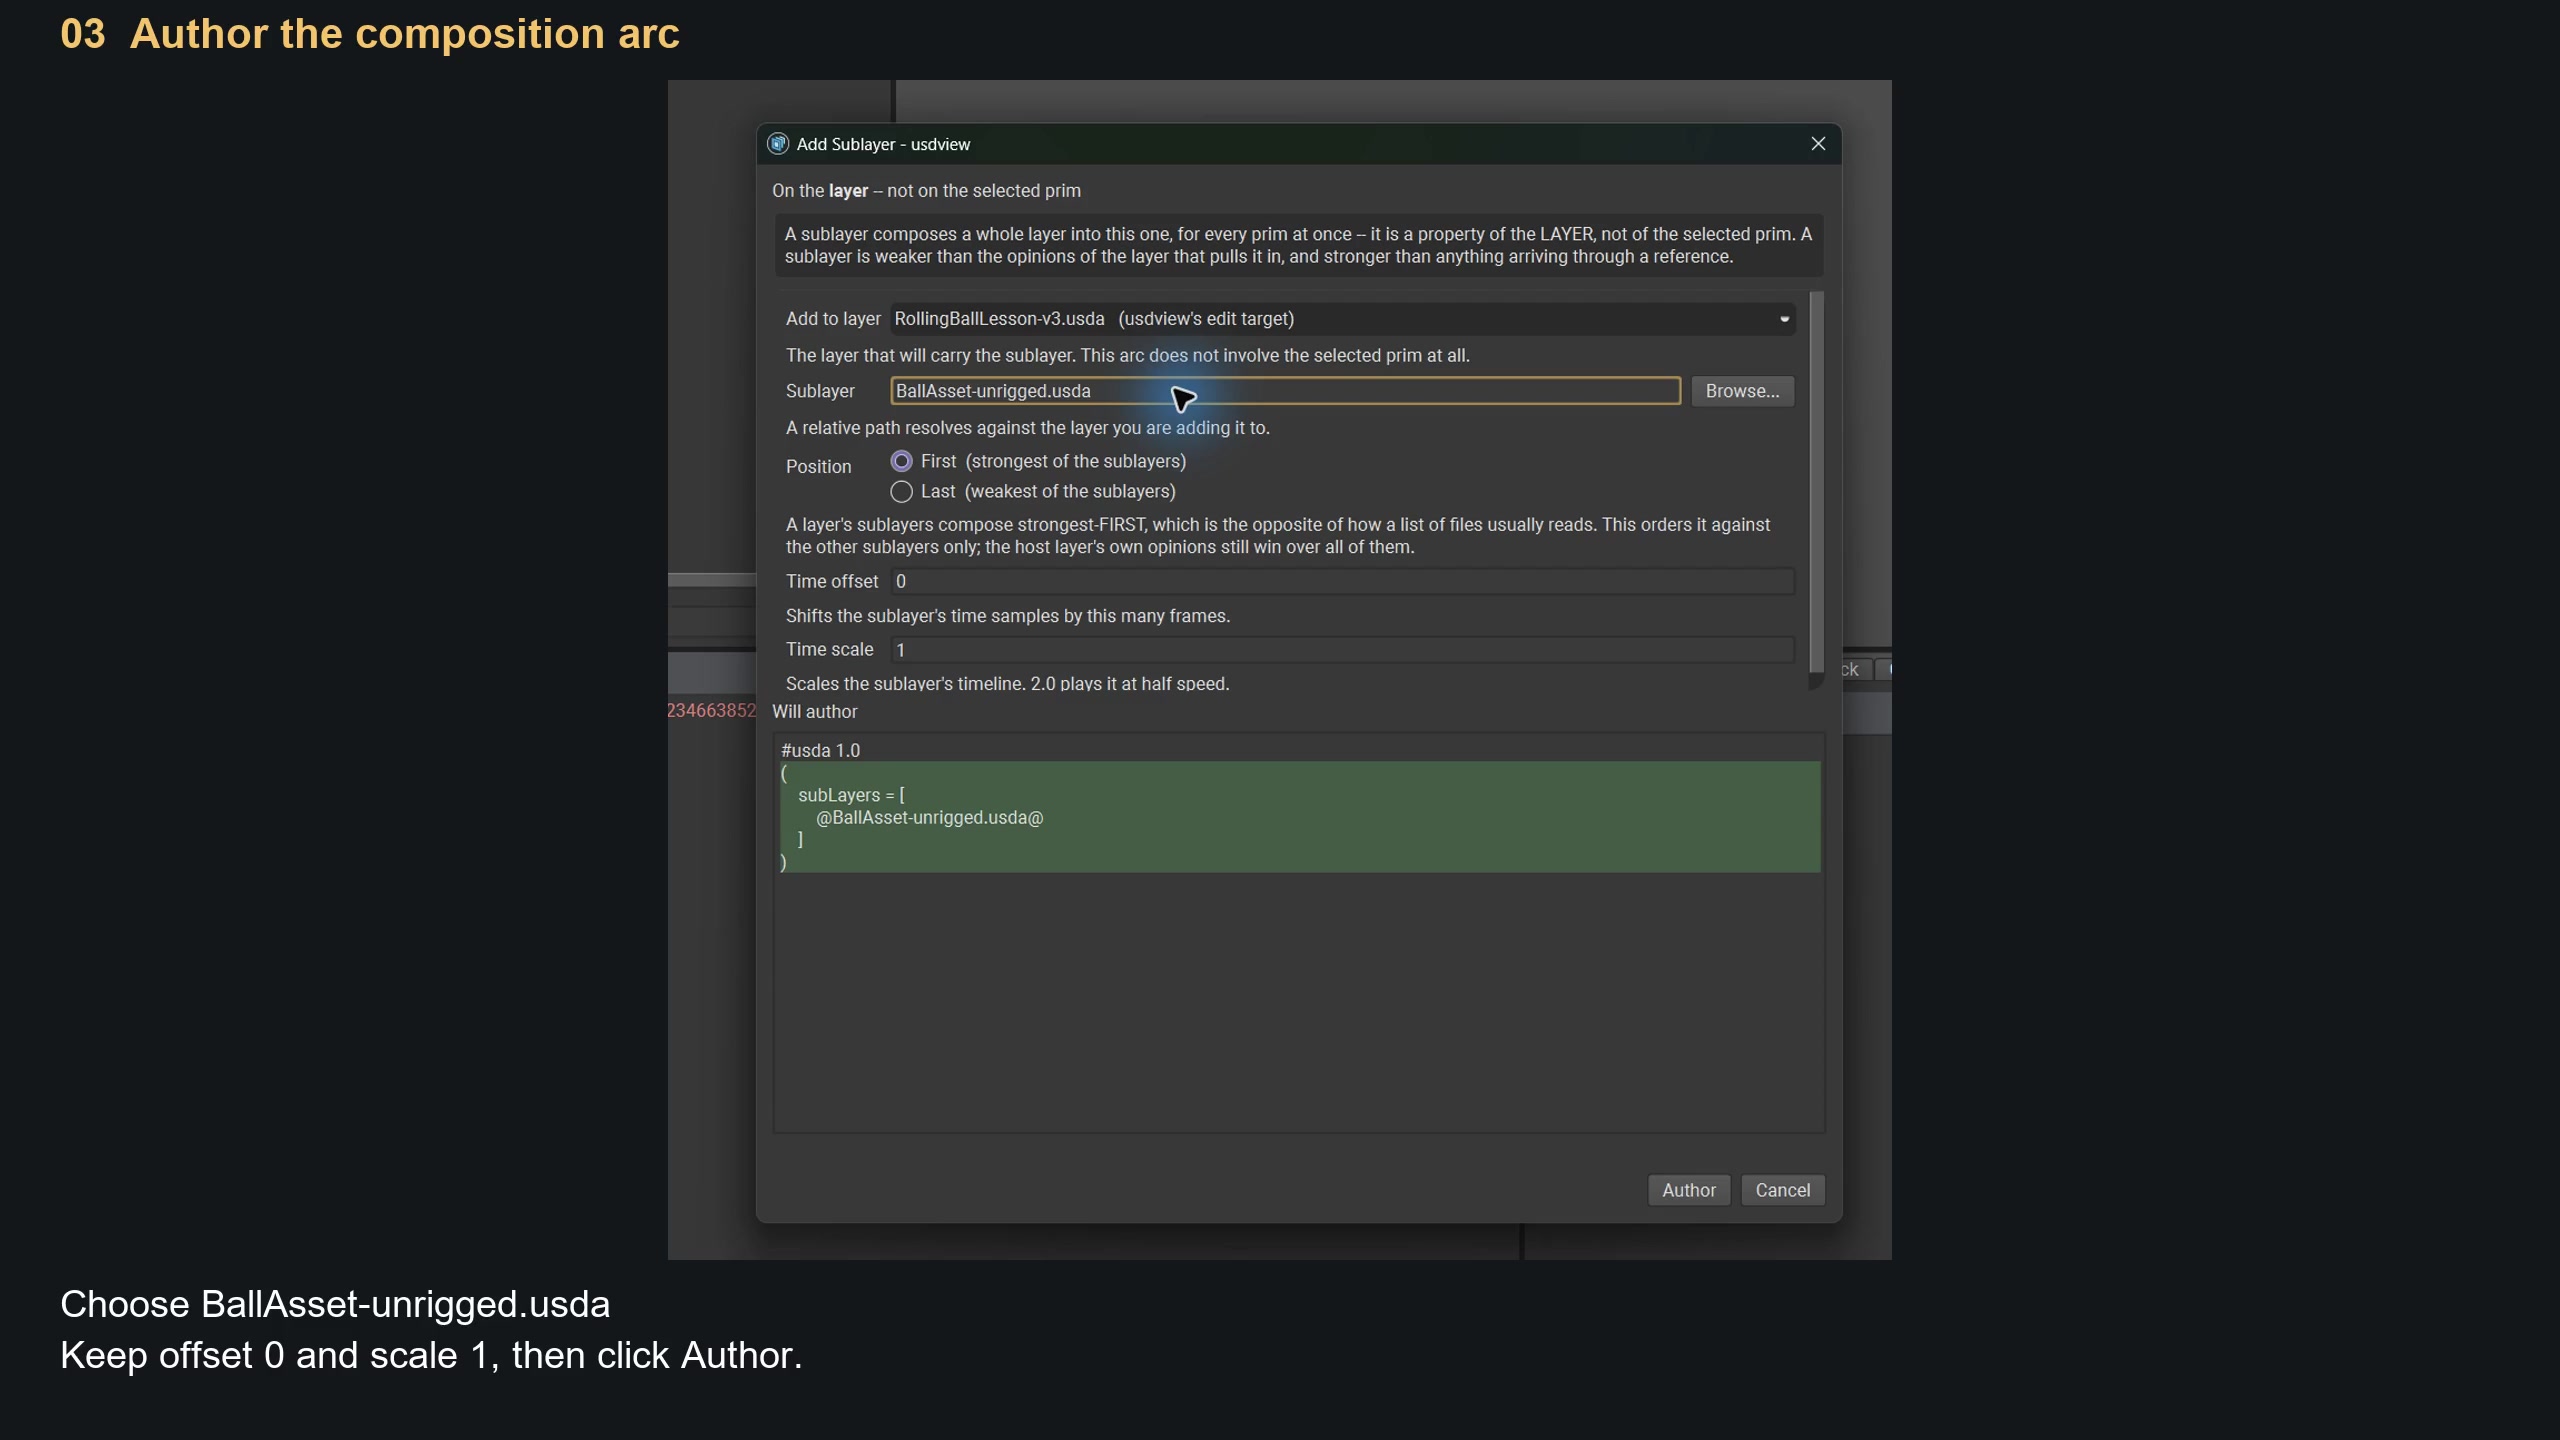
Movie frame: 0:20.
4. Check the unrigged asset — 0:22
Expand BallAsset. You should see Looks, Geom, and MainCam; there is no rig yet. Choose Camera → Select Camera → MainCam to frame the ball and floor as they appear in the movie.
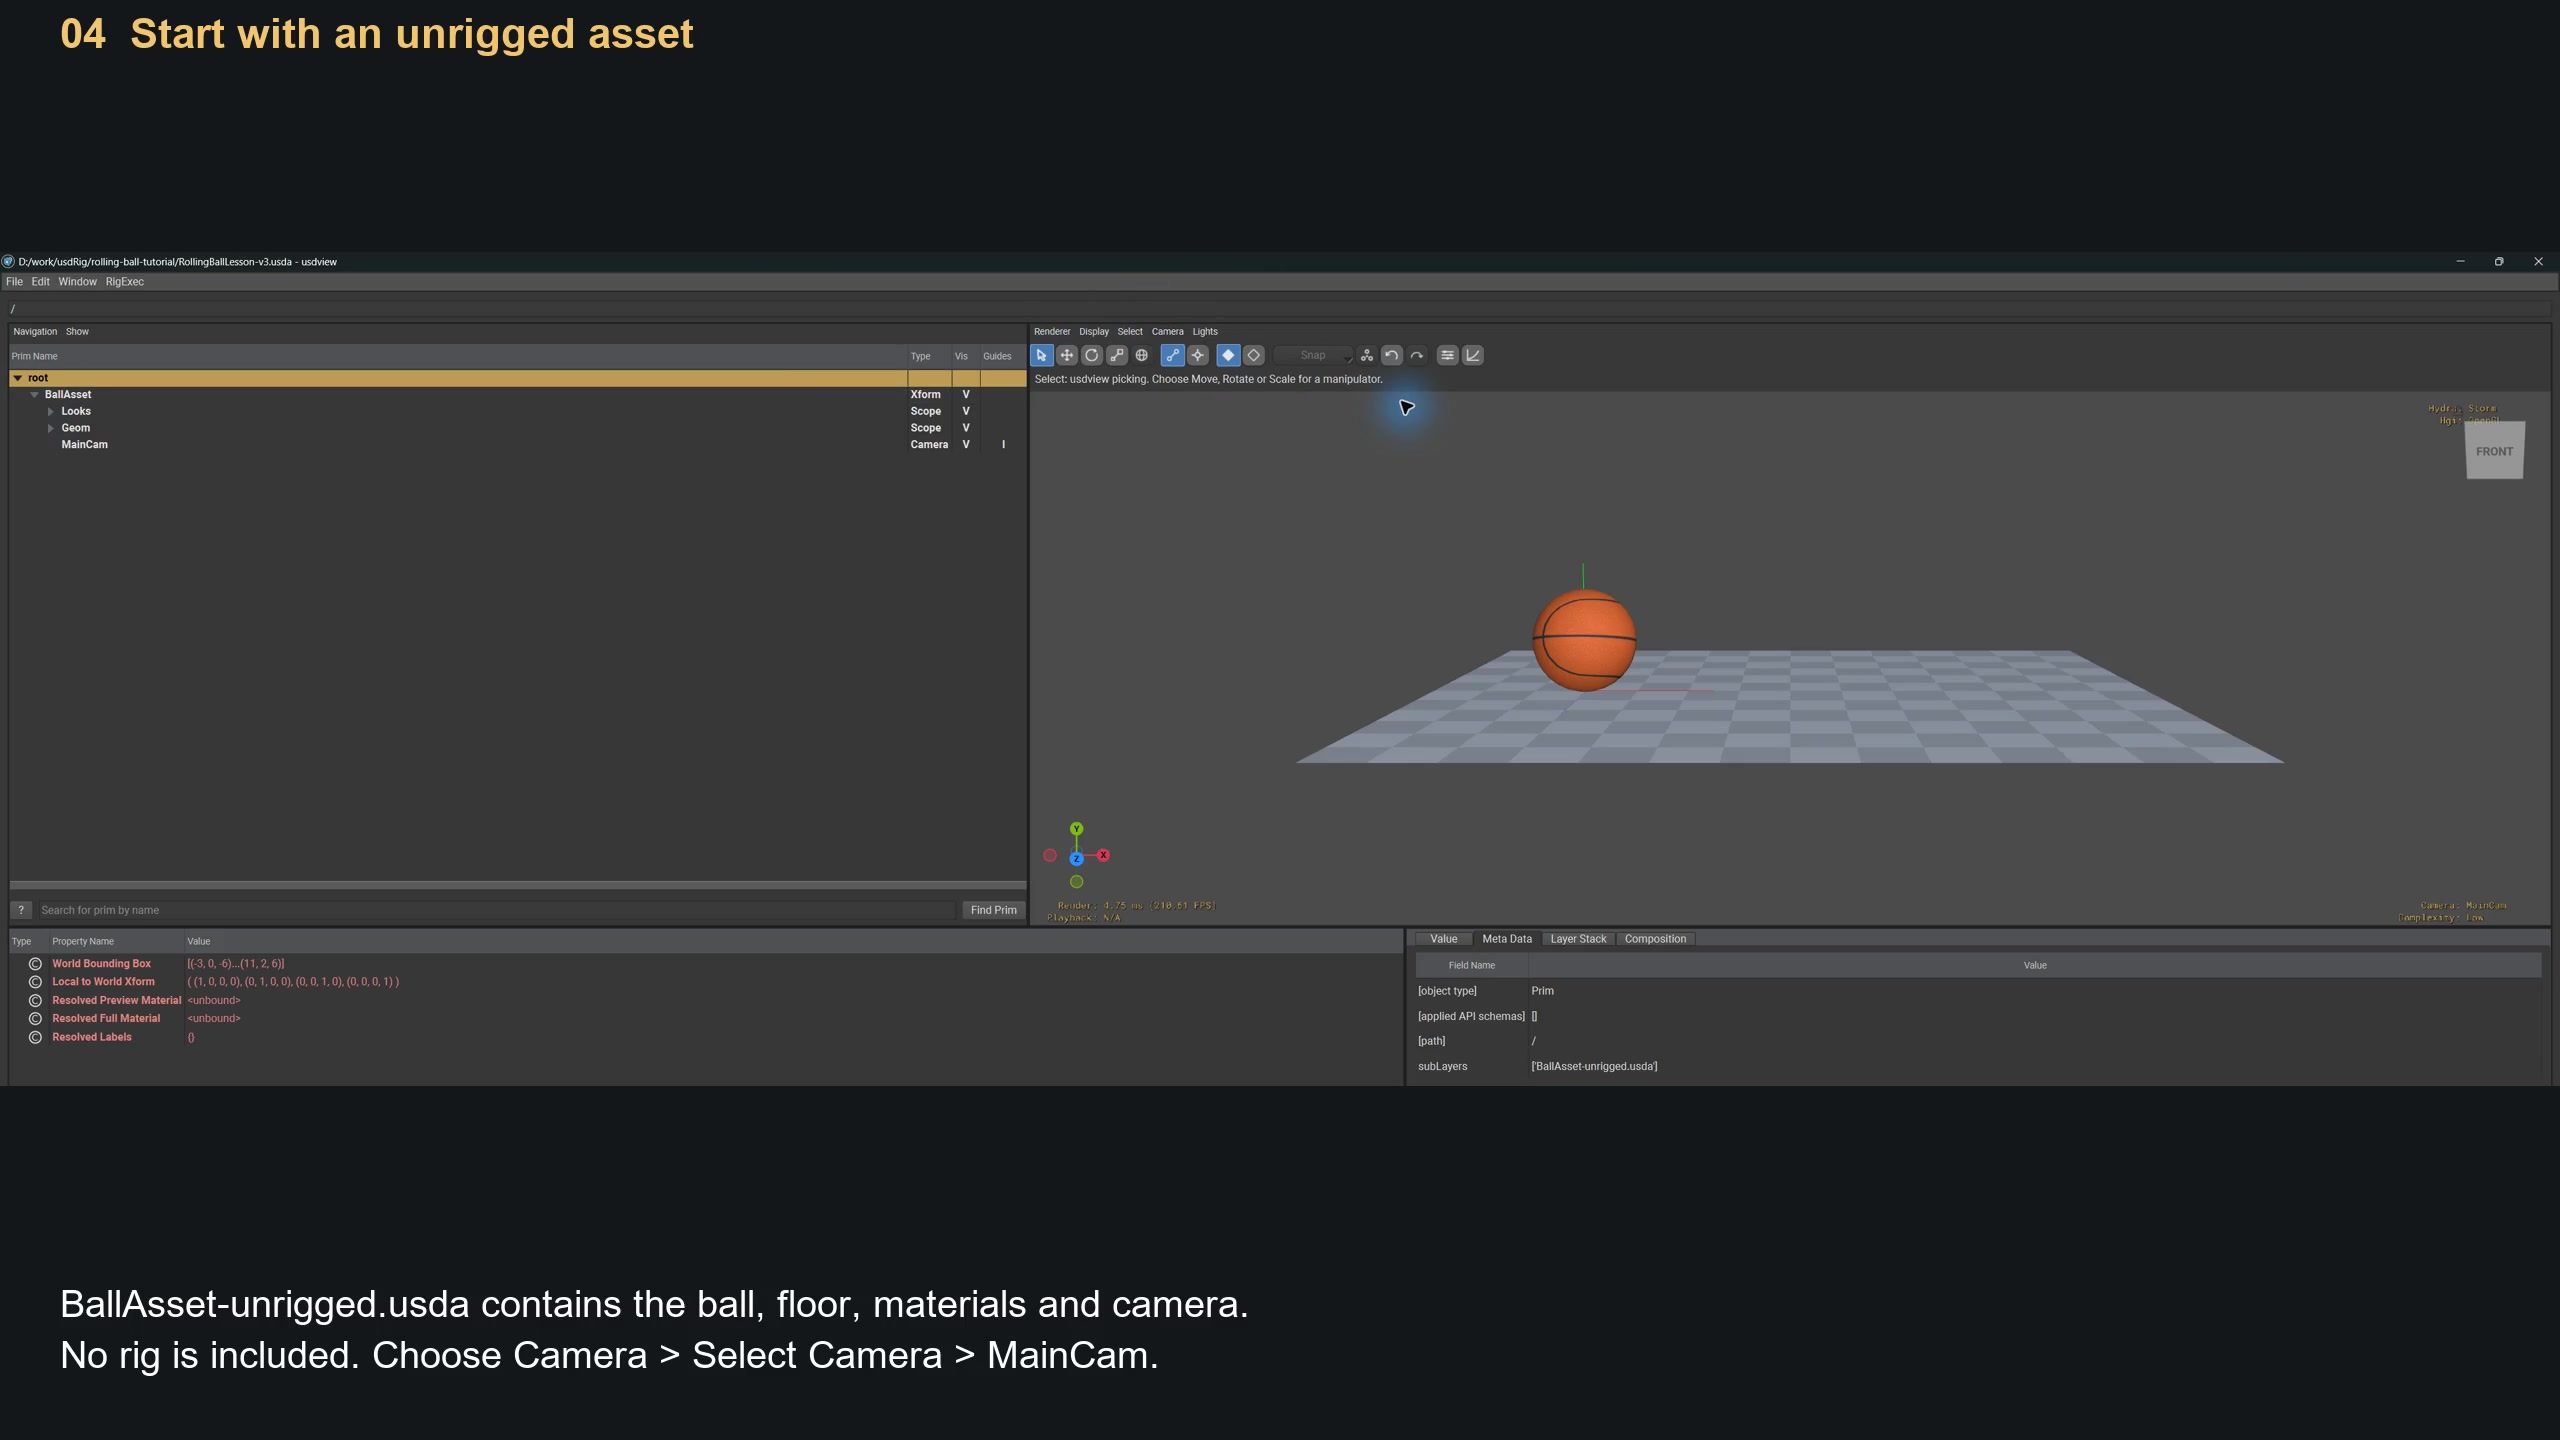
Movie frame: 0:31.
5. Open Noodles and create a rig root — 0:32
Select BallAsset, then hit N to open Noodles. Close the Layer Editor if it is covering the graph. Click inside the Noodles canvas to give it focus, then press Tab to open the node creation screen. Search for RigExecRoot and press Enter.
You'll get RigExecRoot1 under BallAsset. Keep usdview and Noodles visible side by side. For every Tab action below, click Noodles first so it receives the shortcut.
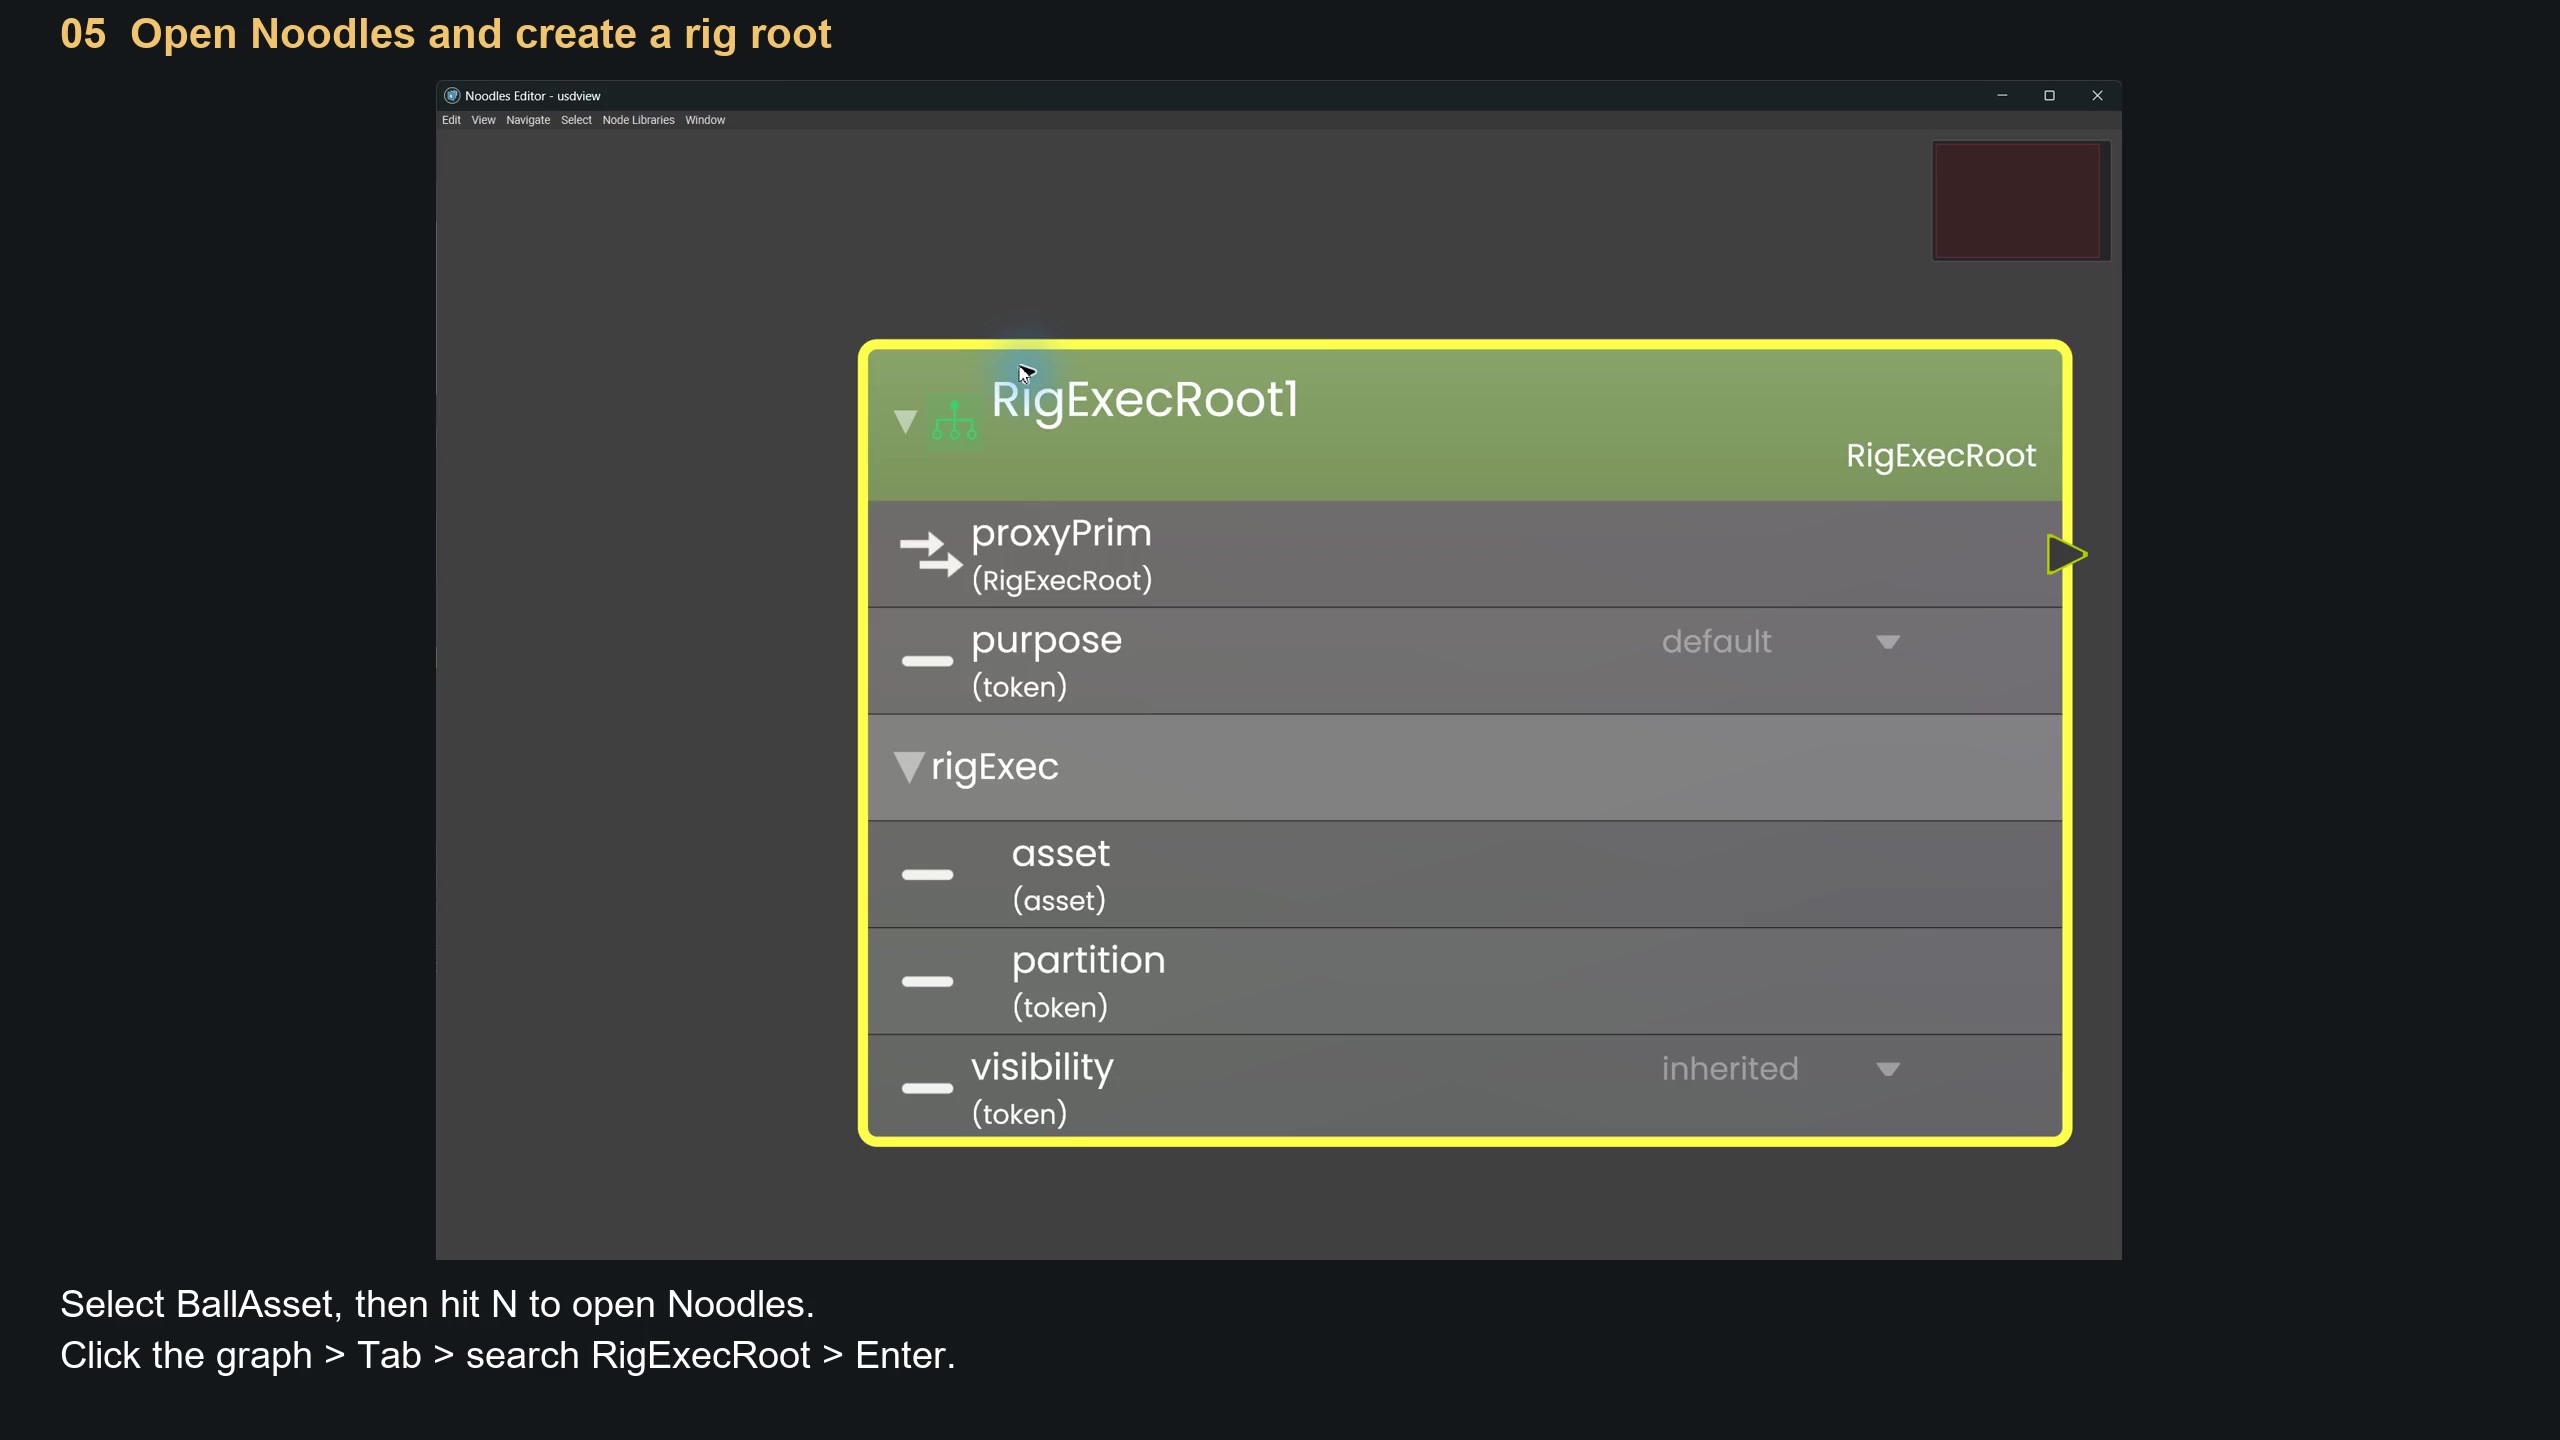
Movie frame: 0:43.
6. Create the ball control — 0:43
Select RigExecRoot1 in the prim tree, then focus Noodles and use Tab → RigExecControl. The new RigExecControl1 belongs under the rig root. This is the control you'll move to roll the ball.
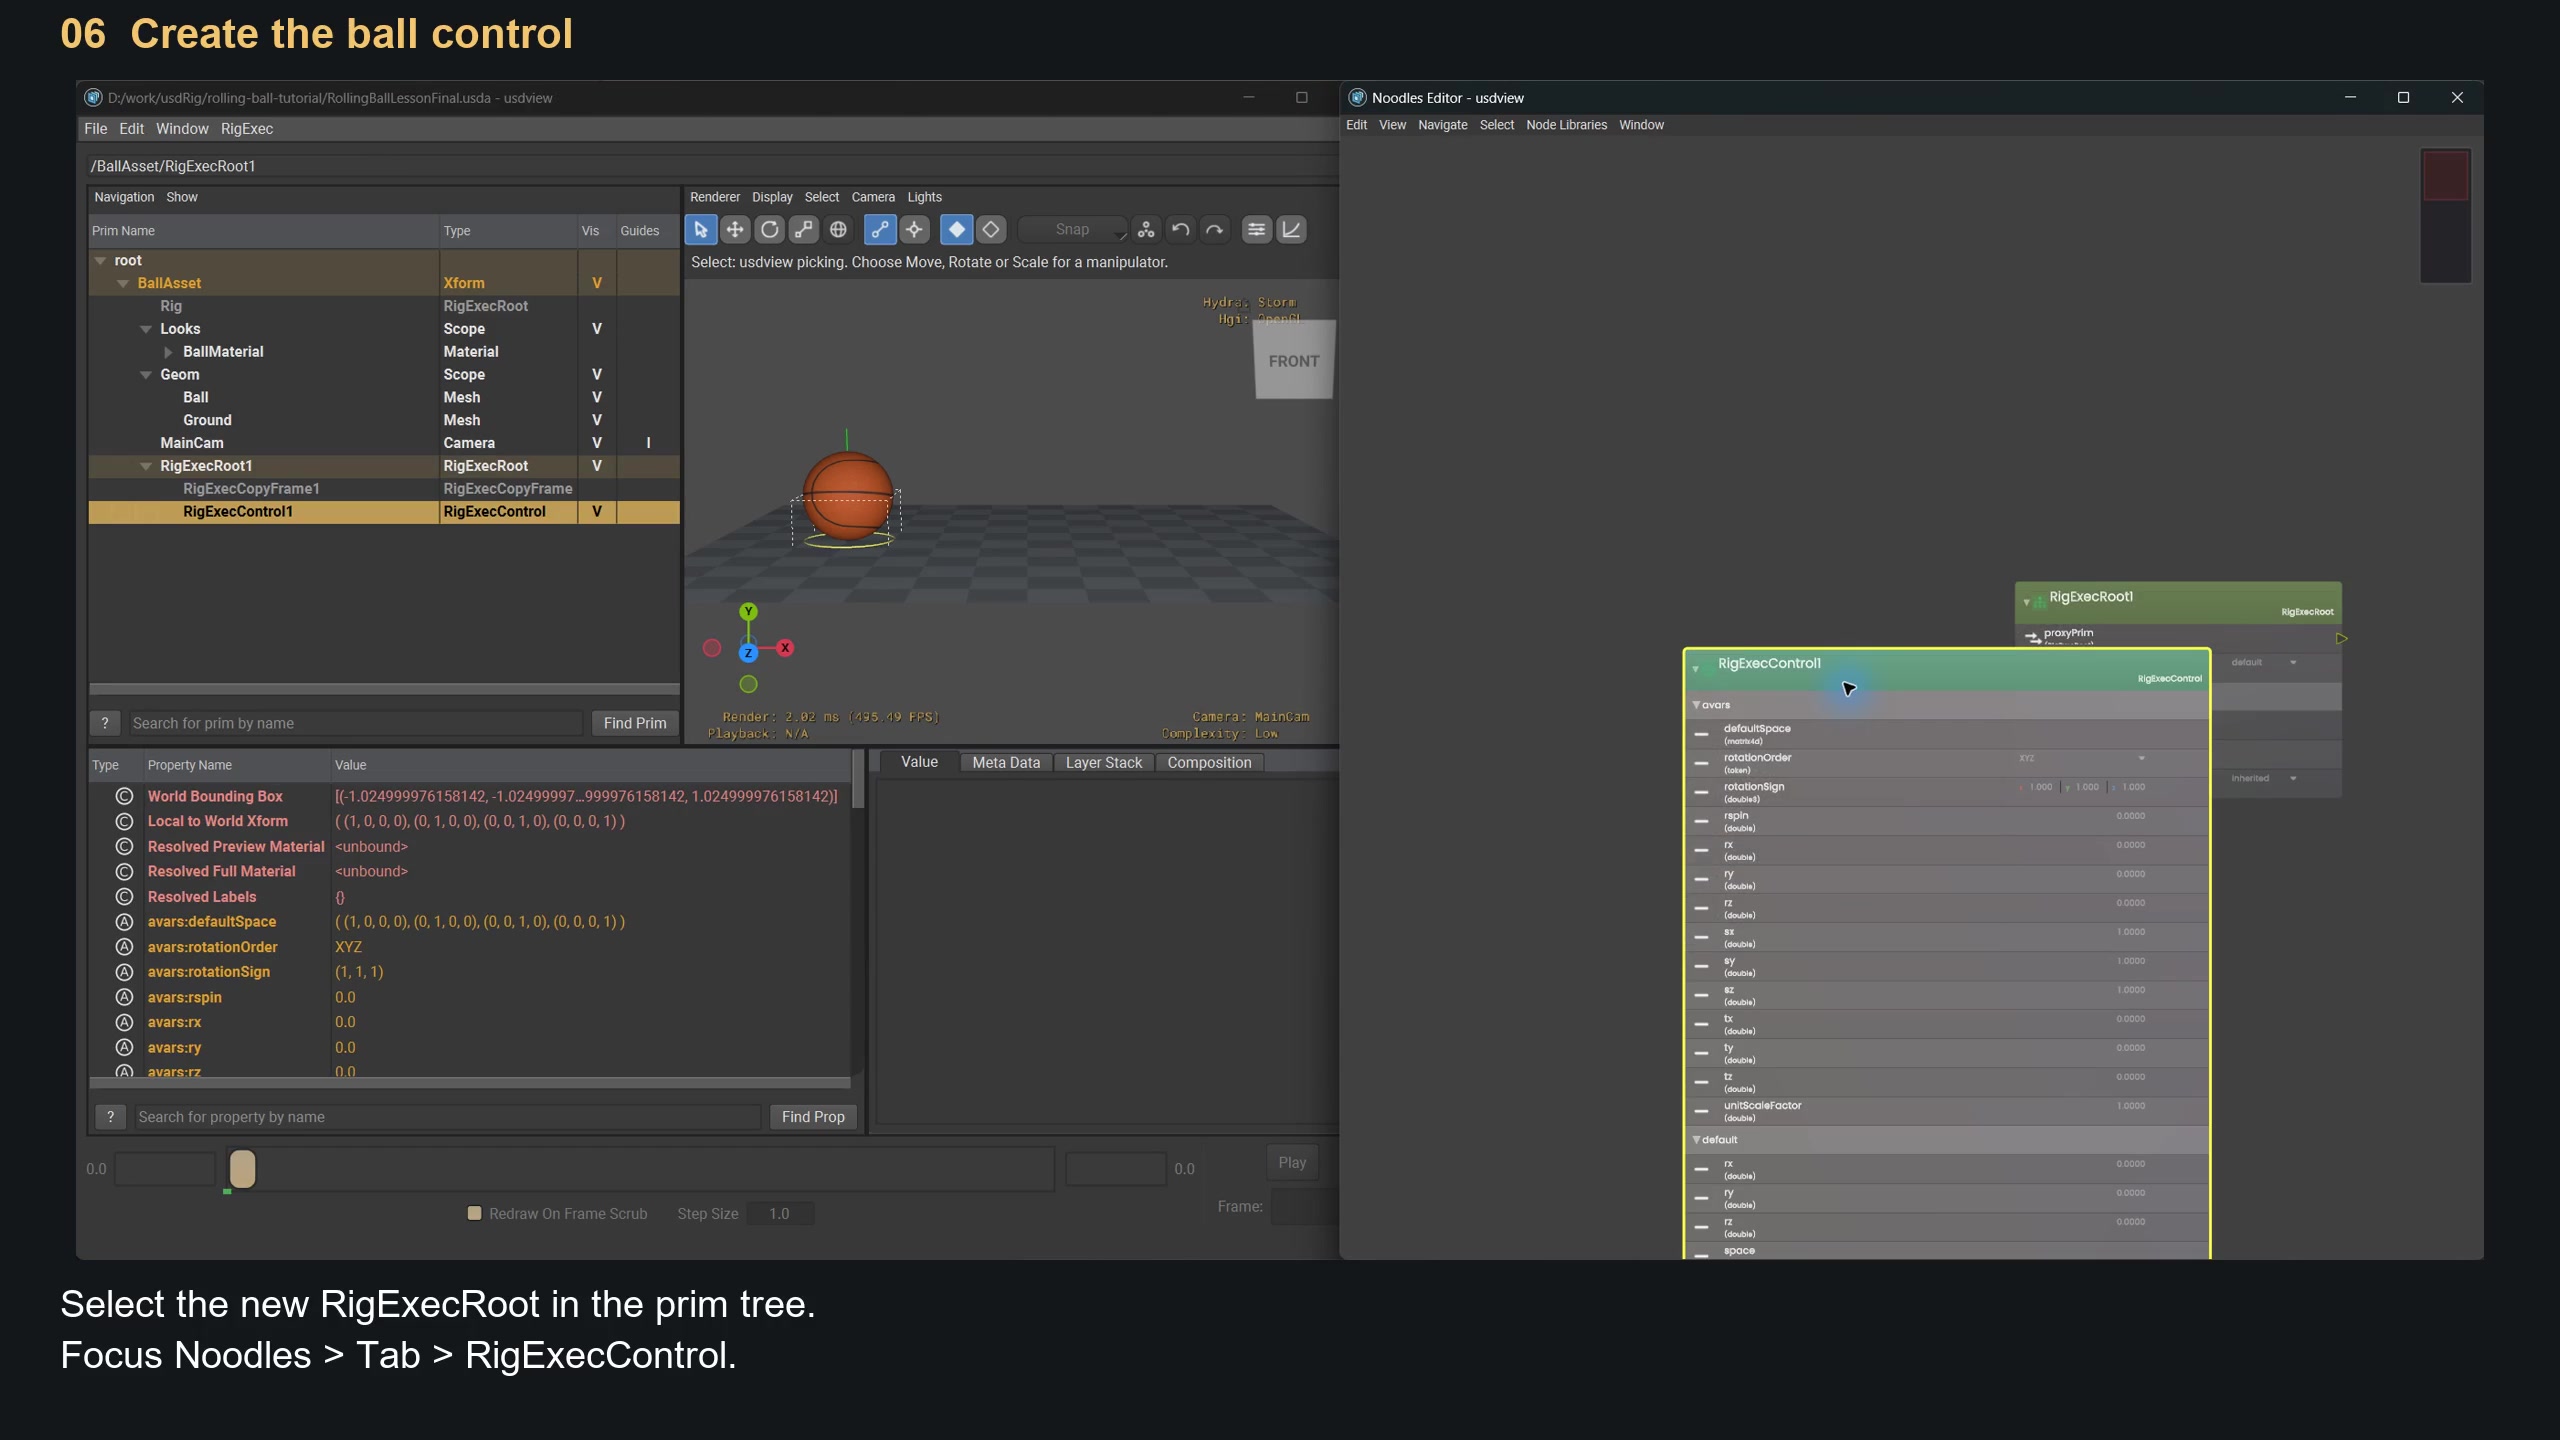
Movie frame: 0:50.
7. Put the rest pivot at the ball's center — 0:52
Expand the control's rest group. Set rest:ty to 1 and press
Enter. The ball has radius one and rests on a Y-up floor, so its center
is one unit above the ground. This makes it turn around its center.
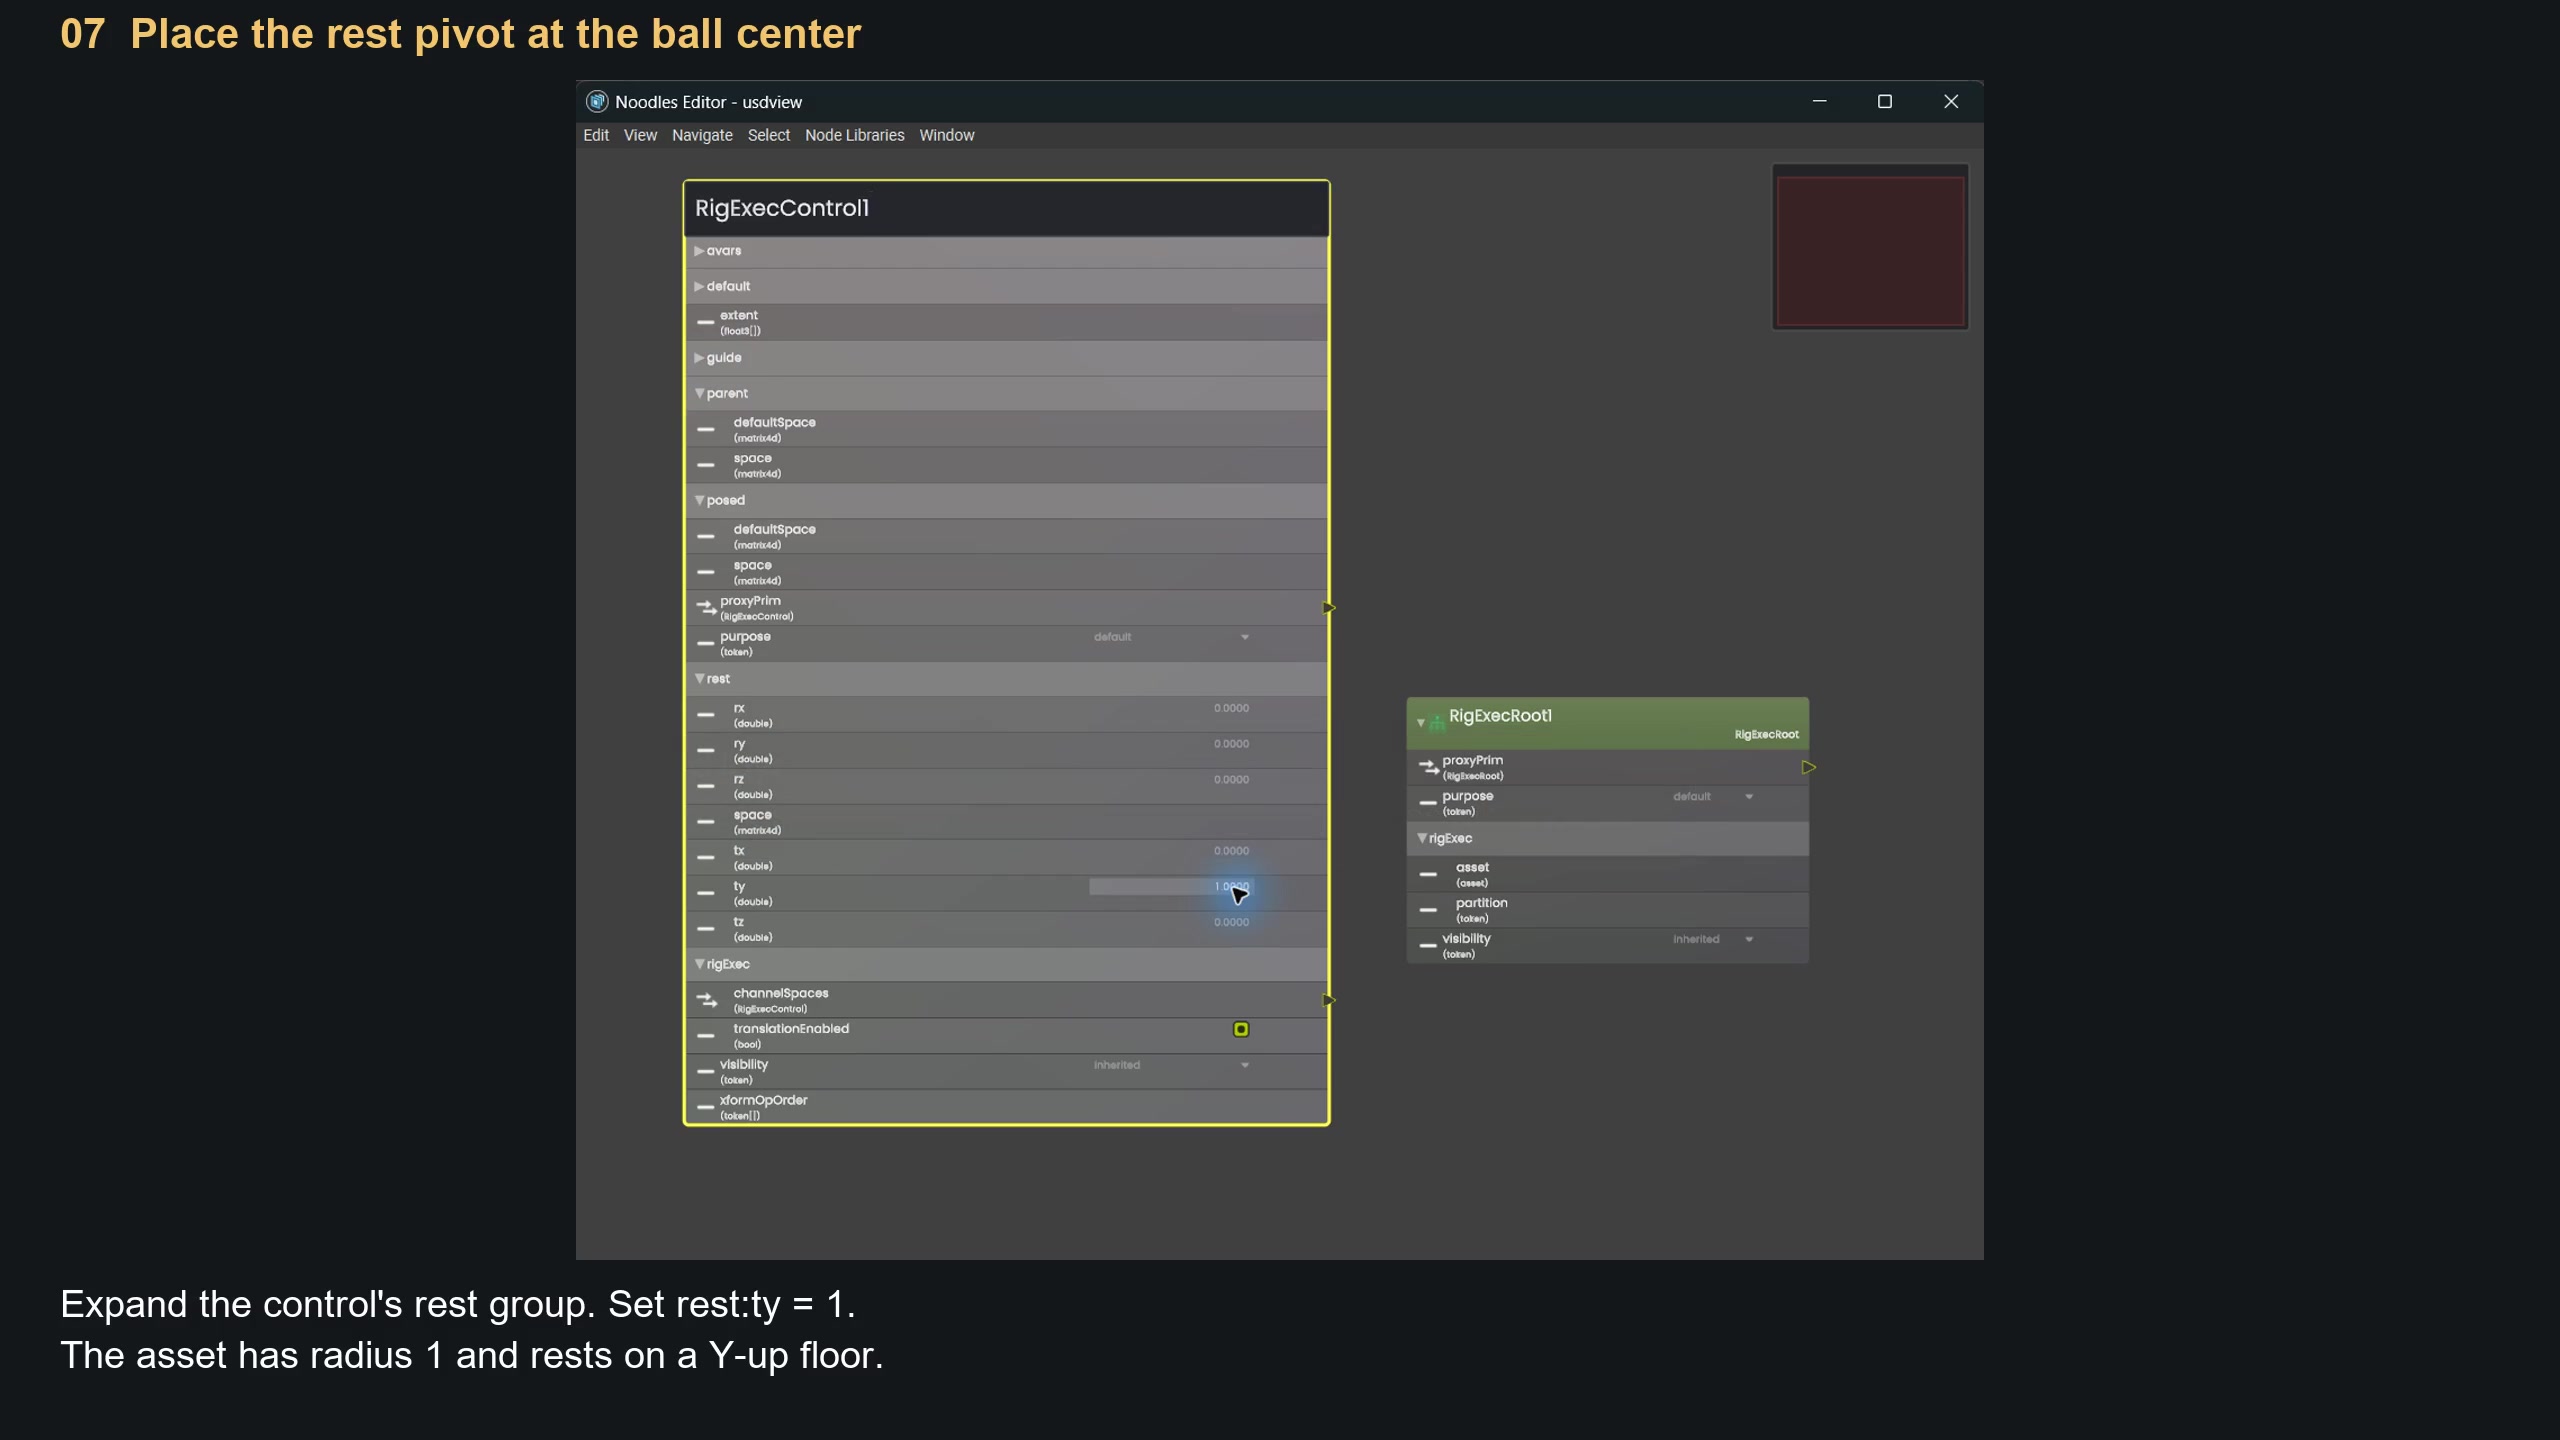
Movie frame: 1:00.
8. Create a Matrix Mover — 1:02
Select RigExecRoot1 in the prim tree again. Focus Noodles and choose Tab → RigExecMatrixMover.
This is the operation that moves the ball geometry and is driven by our control.
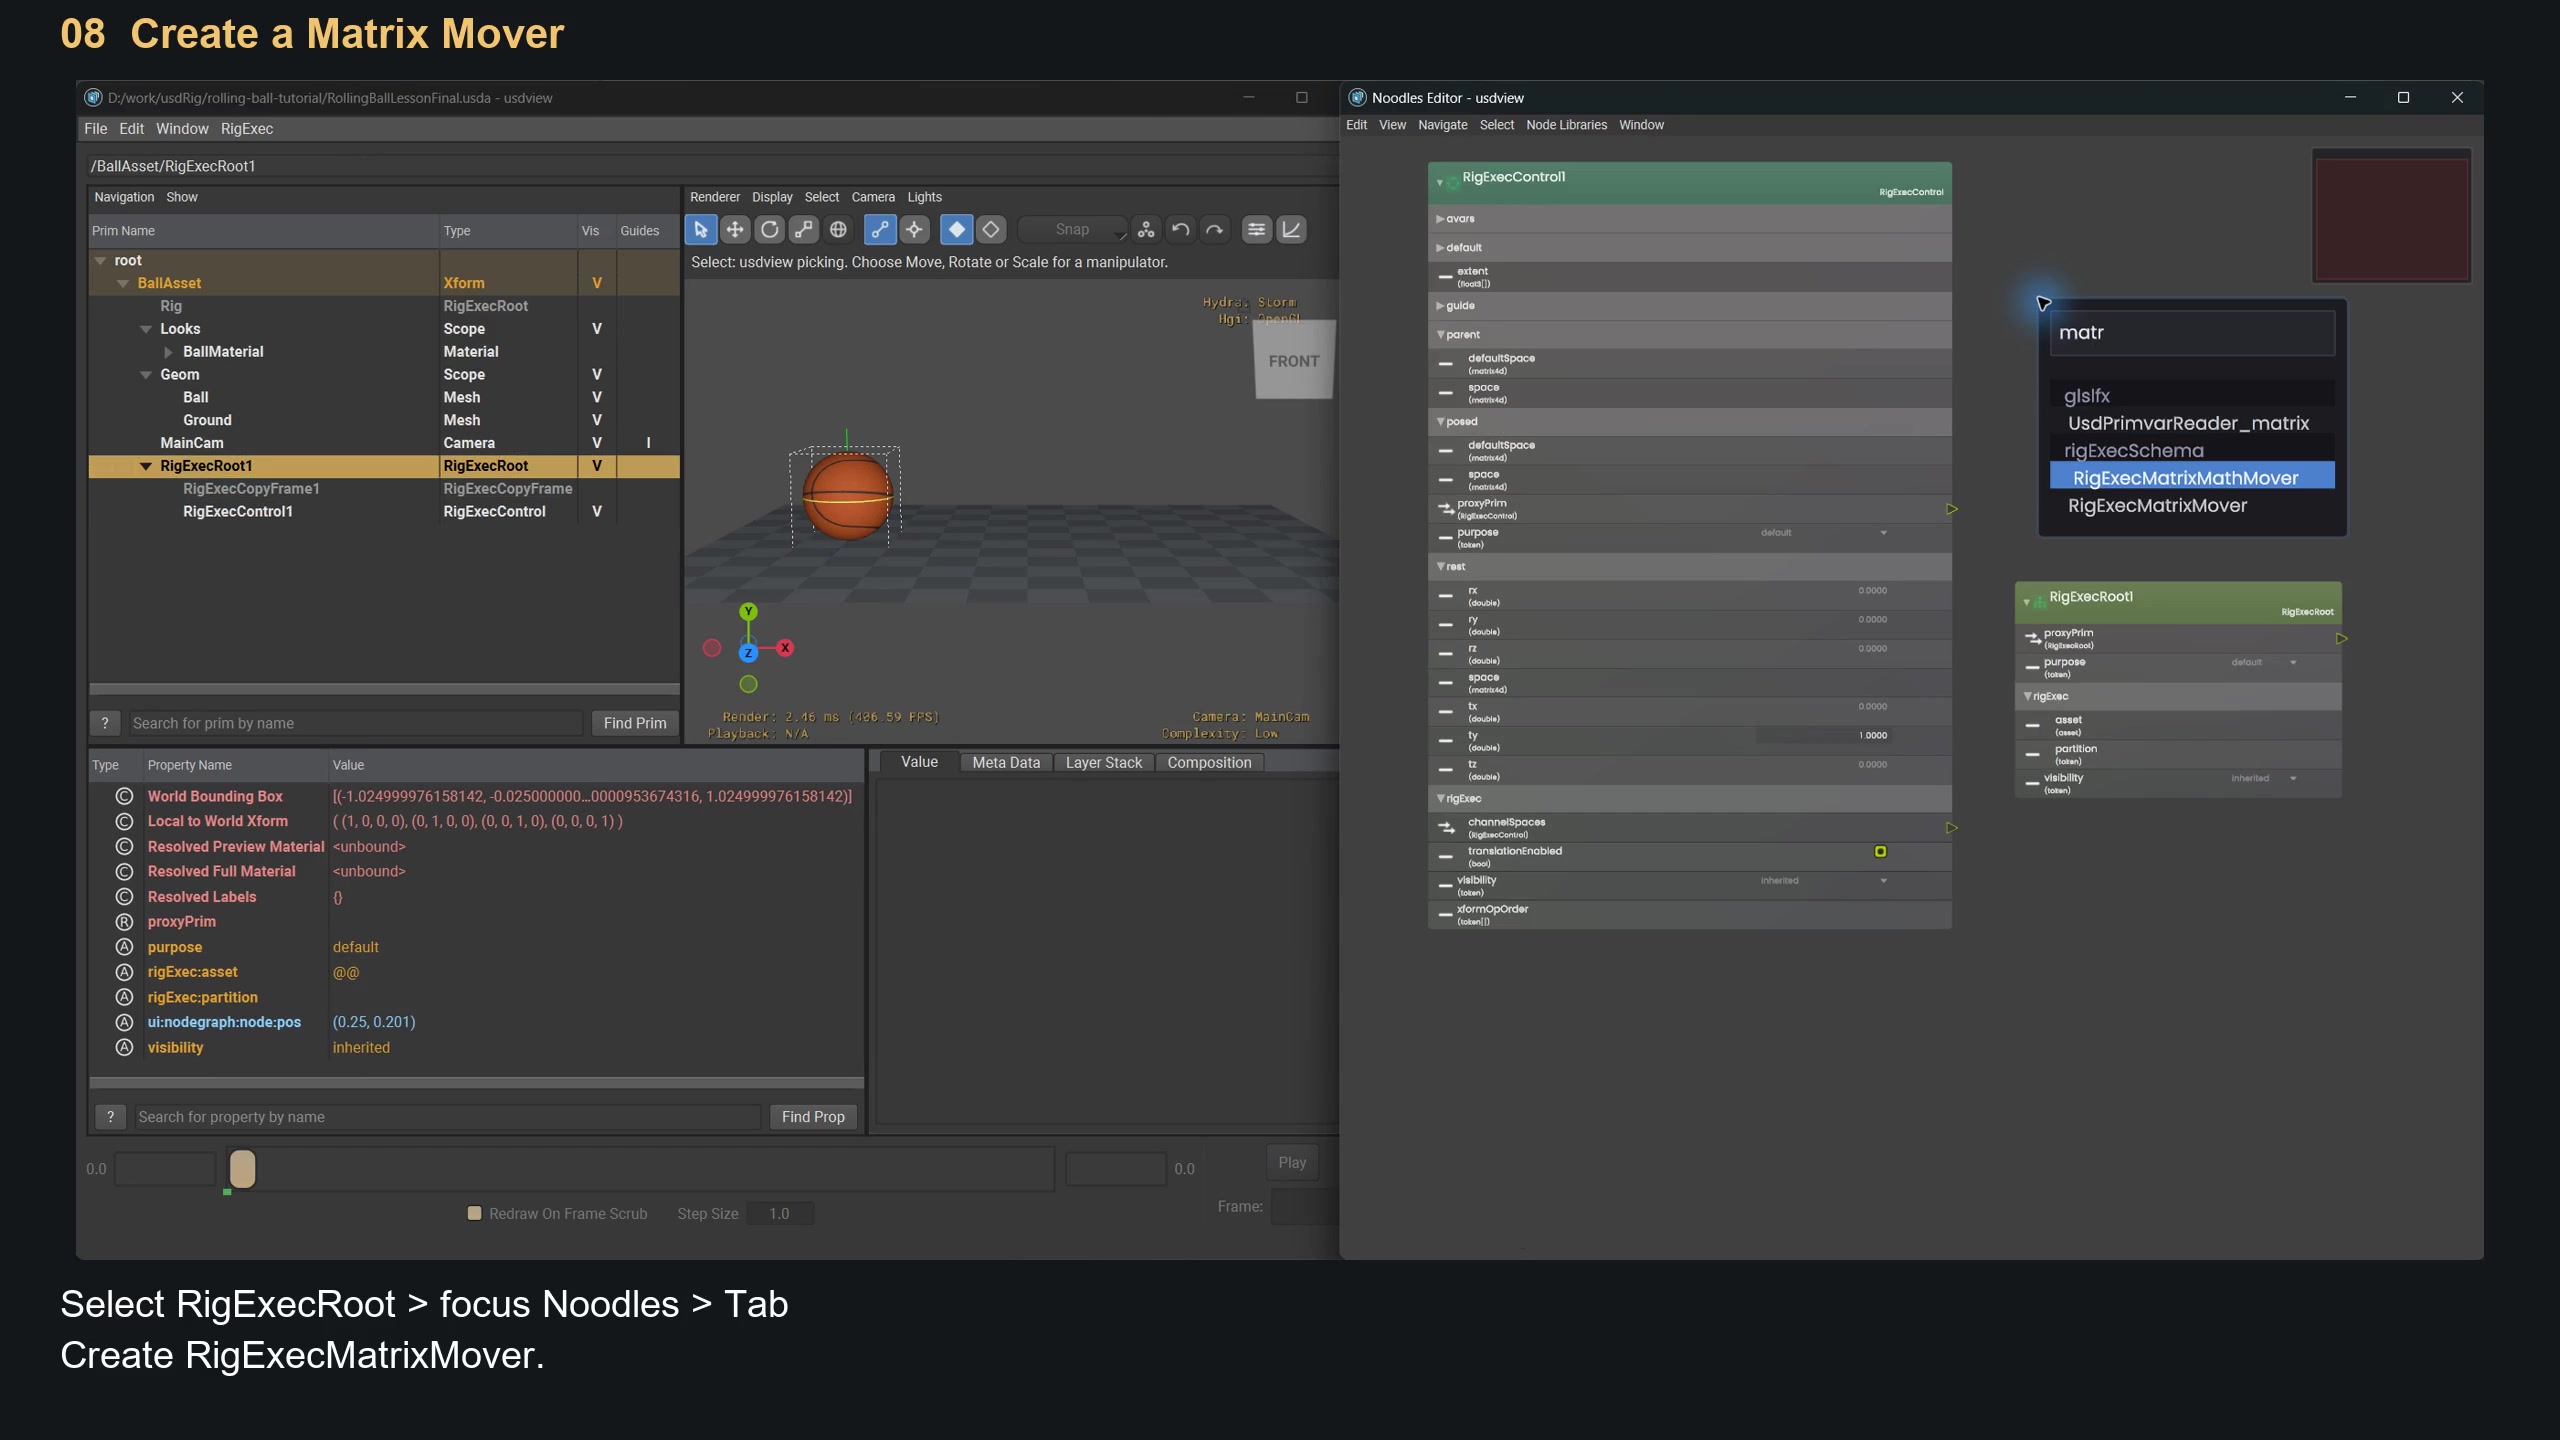
Movie frame: 1:09.
9. Apply the mover API — 1:11
Select the Matrix Mover node, then choose Tab → RigExecMoverAPI. This is required for all movers. It exposes the common mover properties, including rigExec:moves.
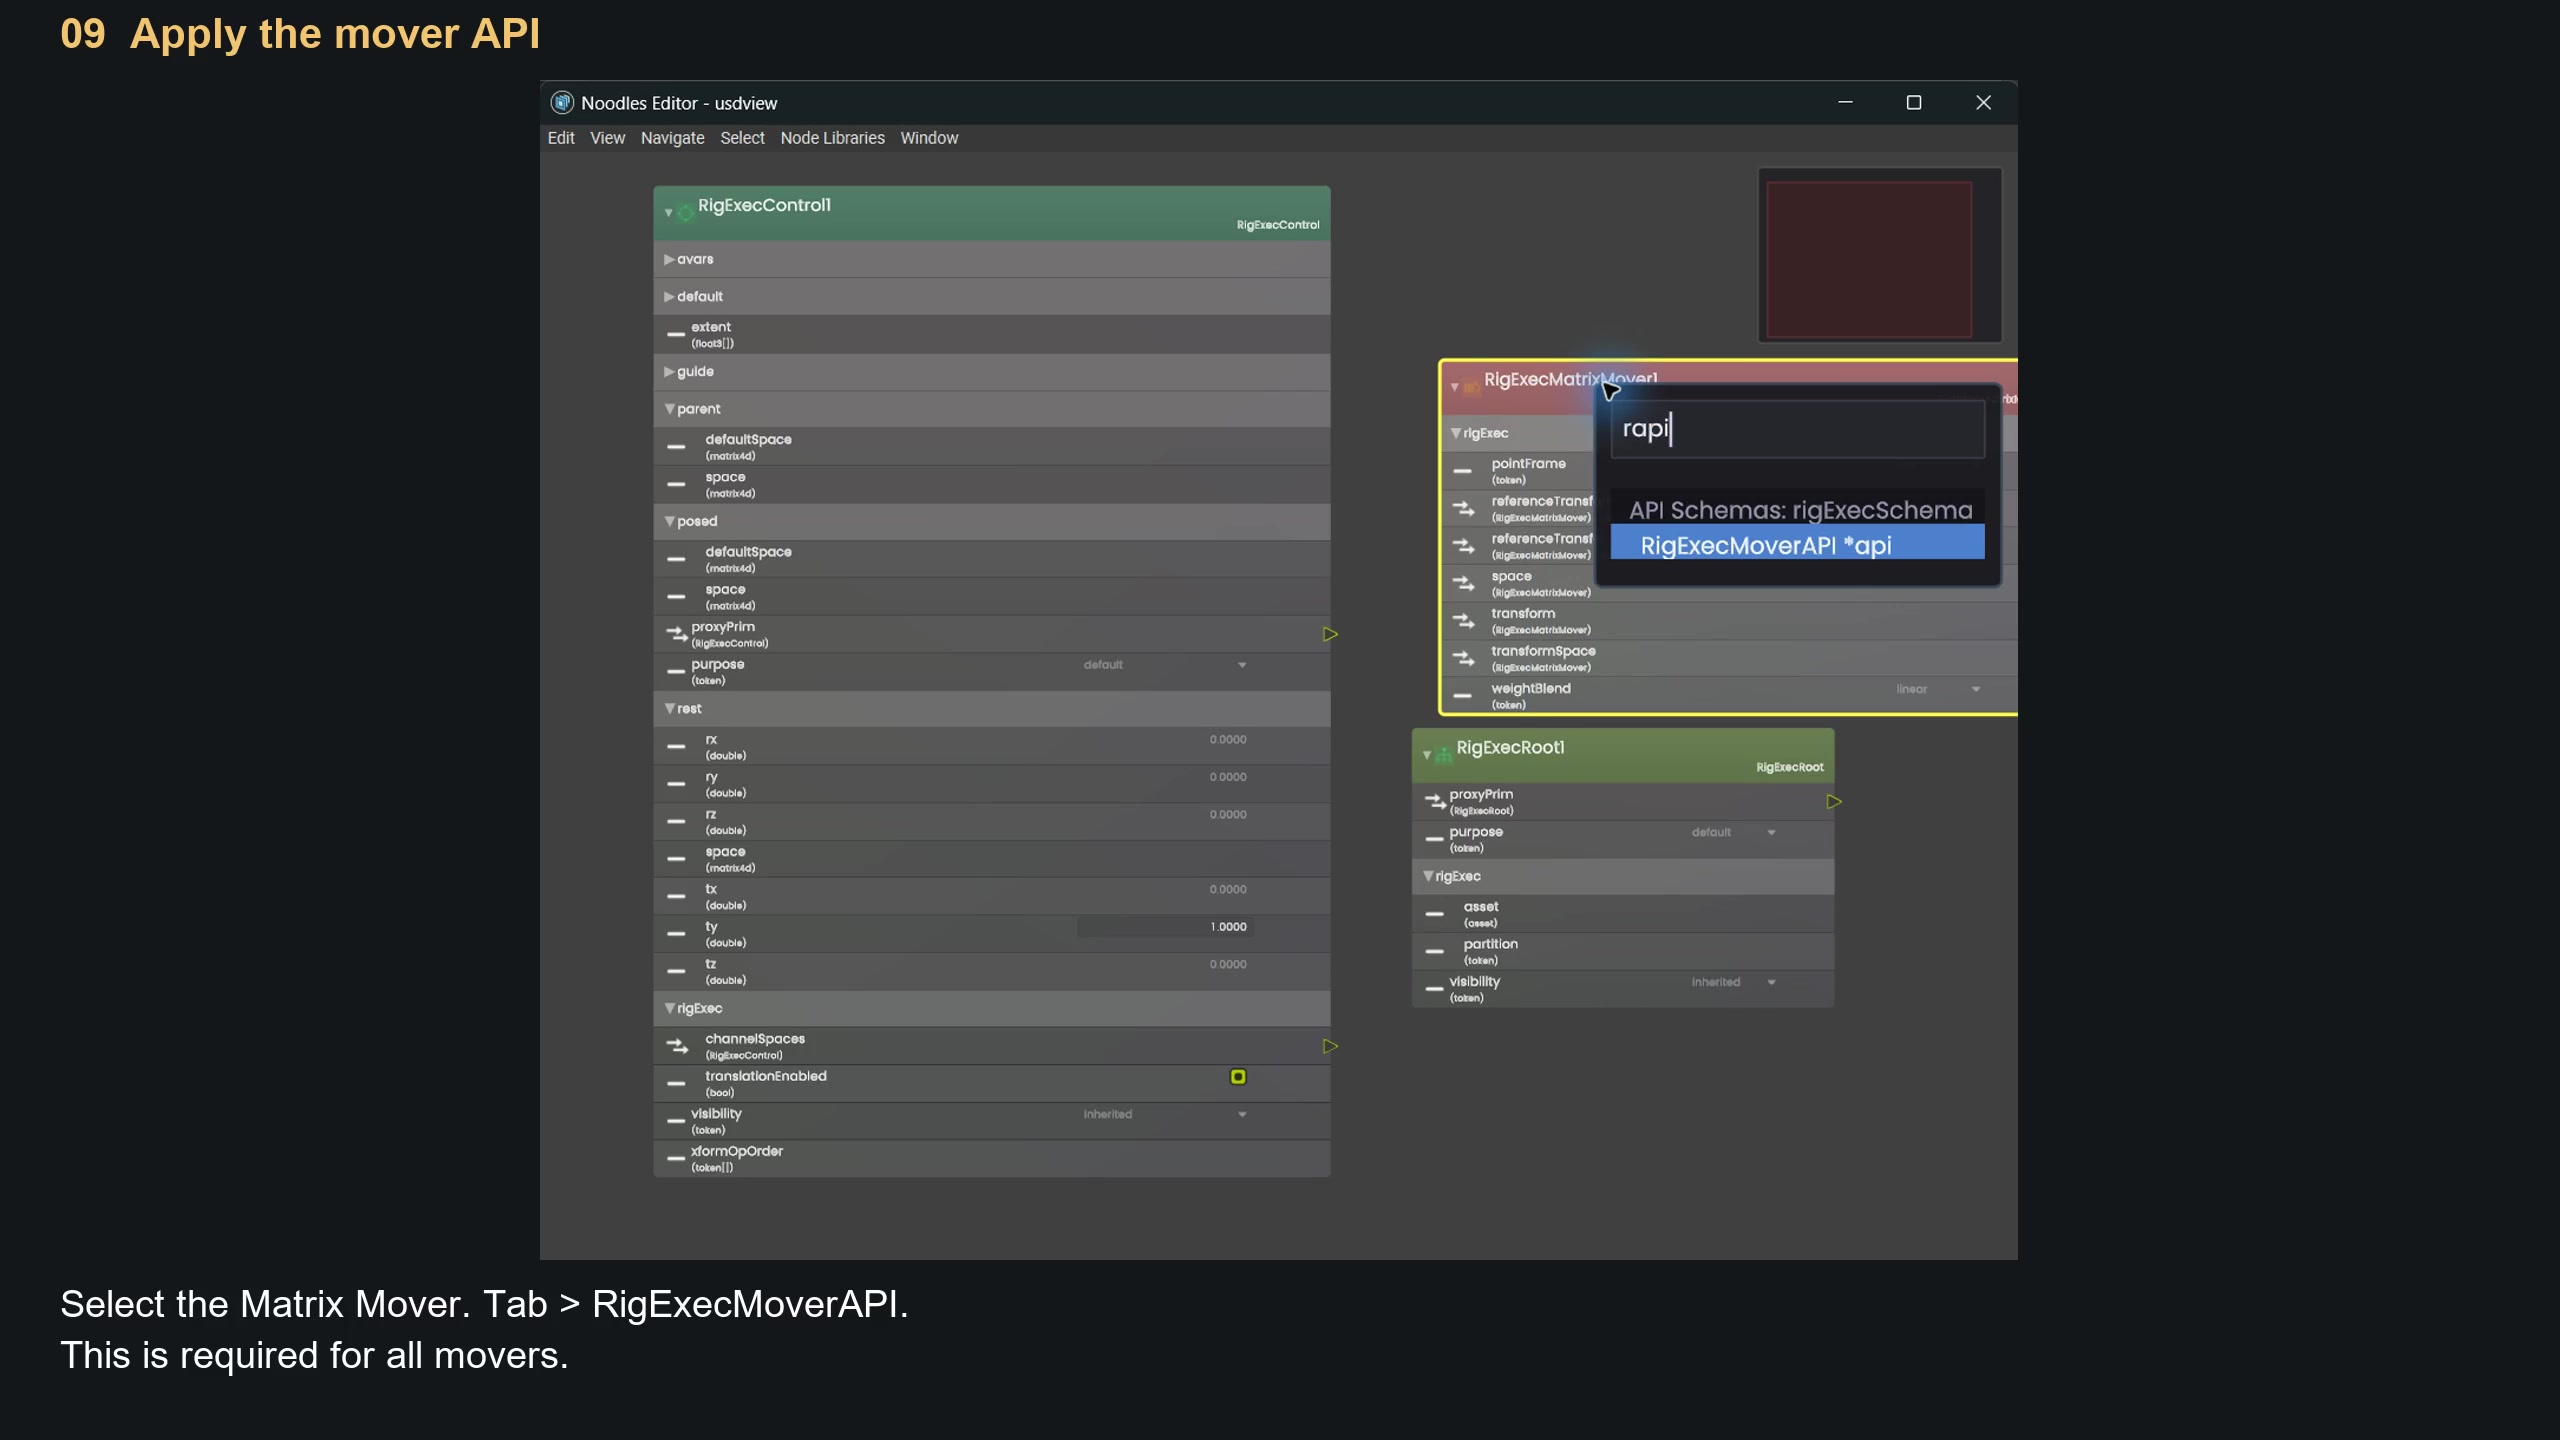
Movie frame: 1:16.
10. Connect the transform — 1:18
Arrange the Matrix Mover on the left and the control on the right so you can see both ends of the connection. You can collapse the control for this step. Drag the Matrix Mover's rigExec:transform socket onto the control's title bar. The red wire confirms the relationship.
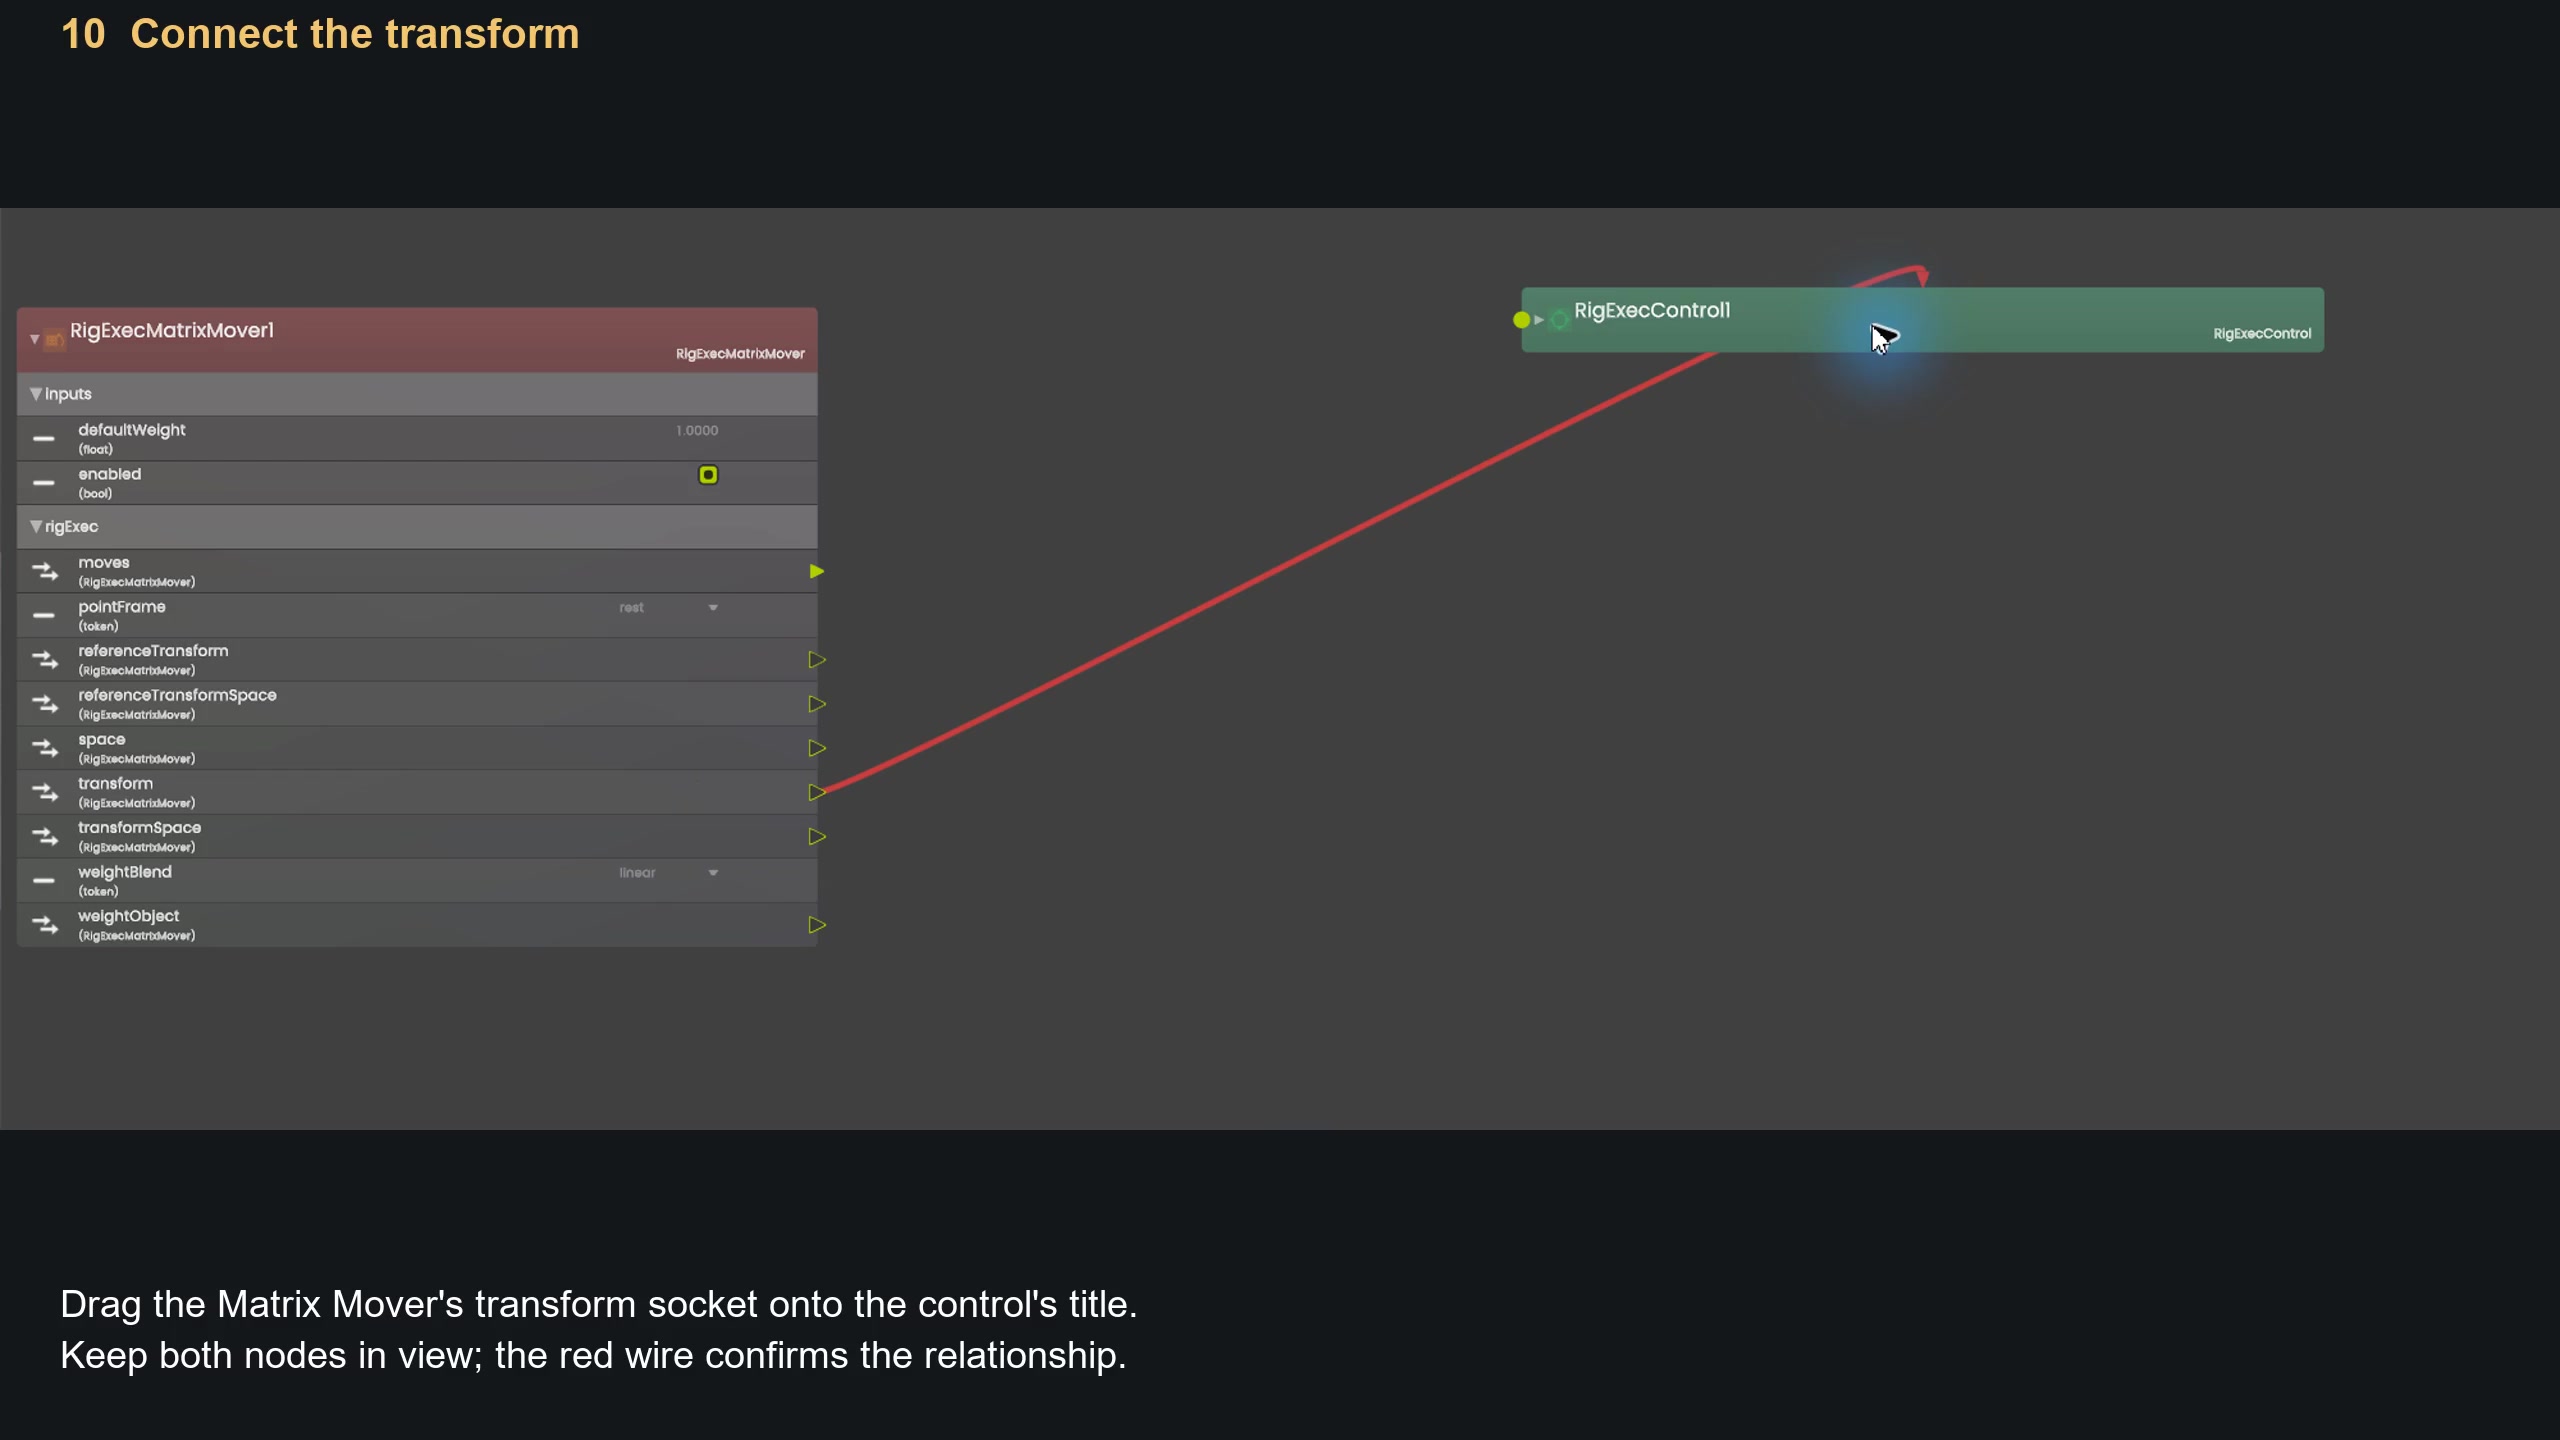
Movie frame: 1:25.
11. Bring the ball mesh into Noodles — 1:27
Select BallAsset → Geom → Ball in the prim tree. Click empty space in Noodles and press A to add that existing prim to the graph.
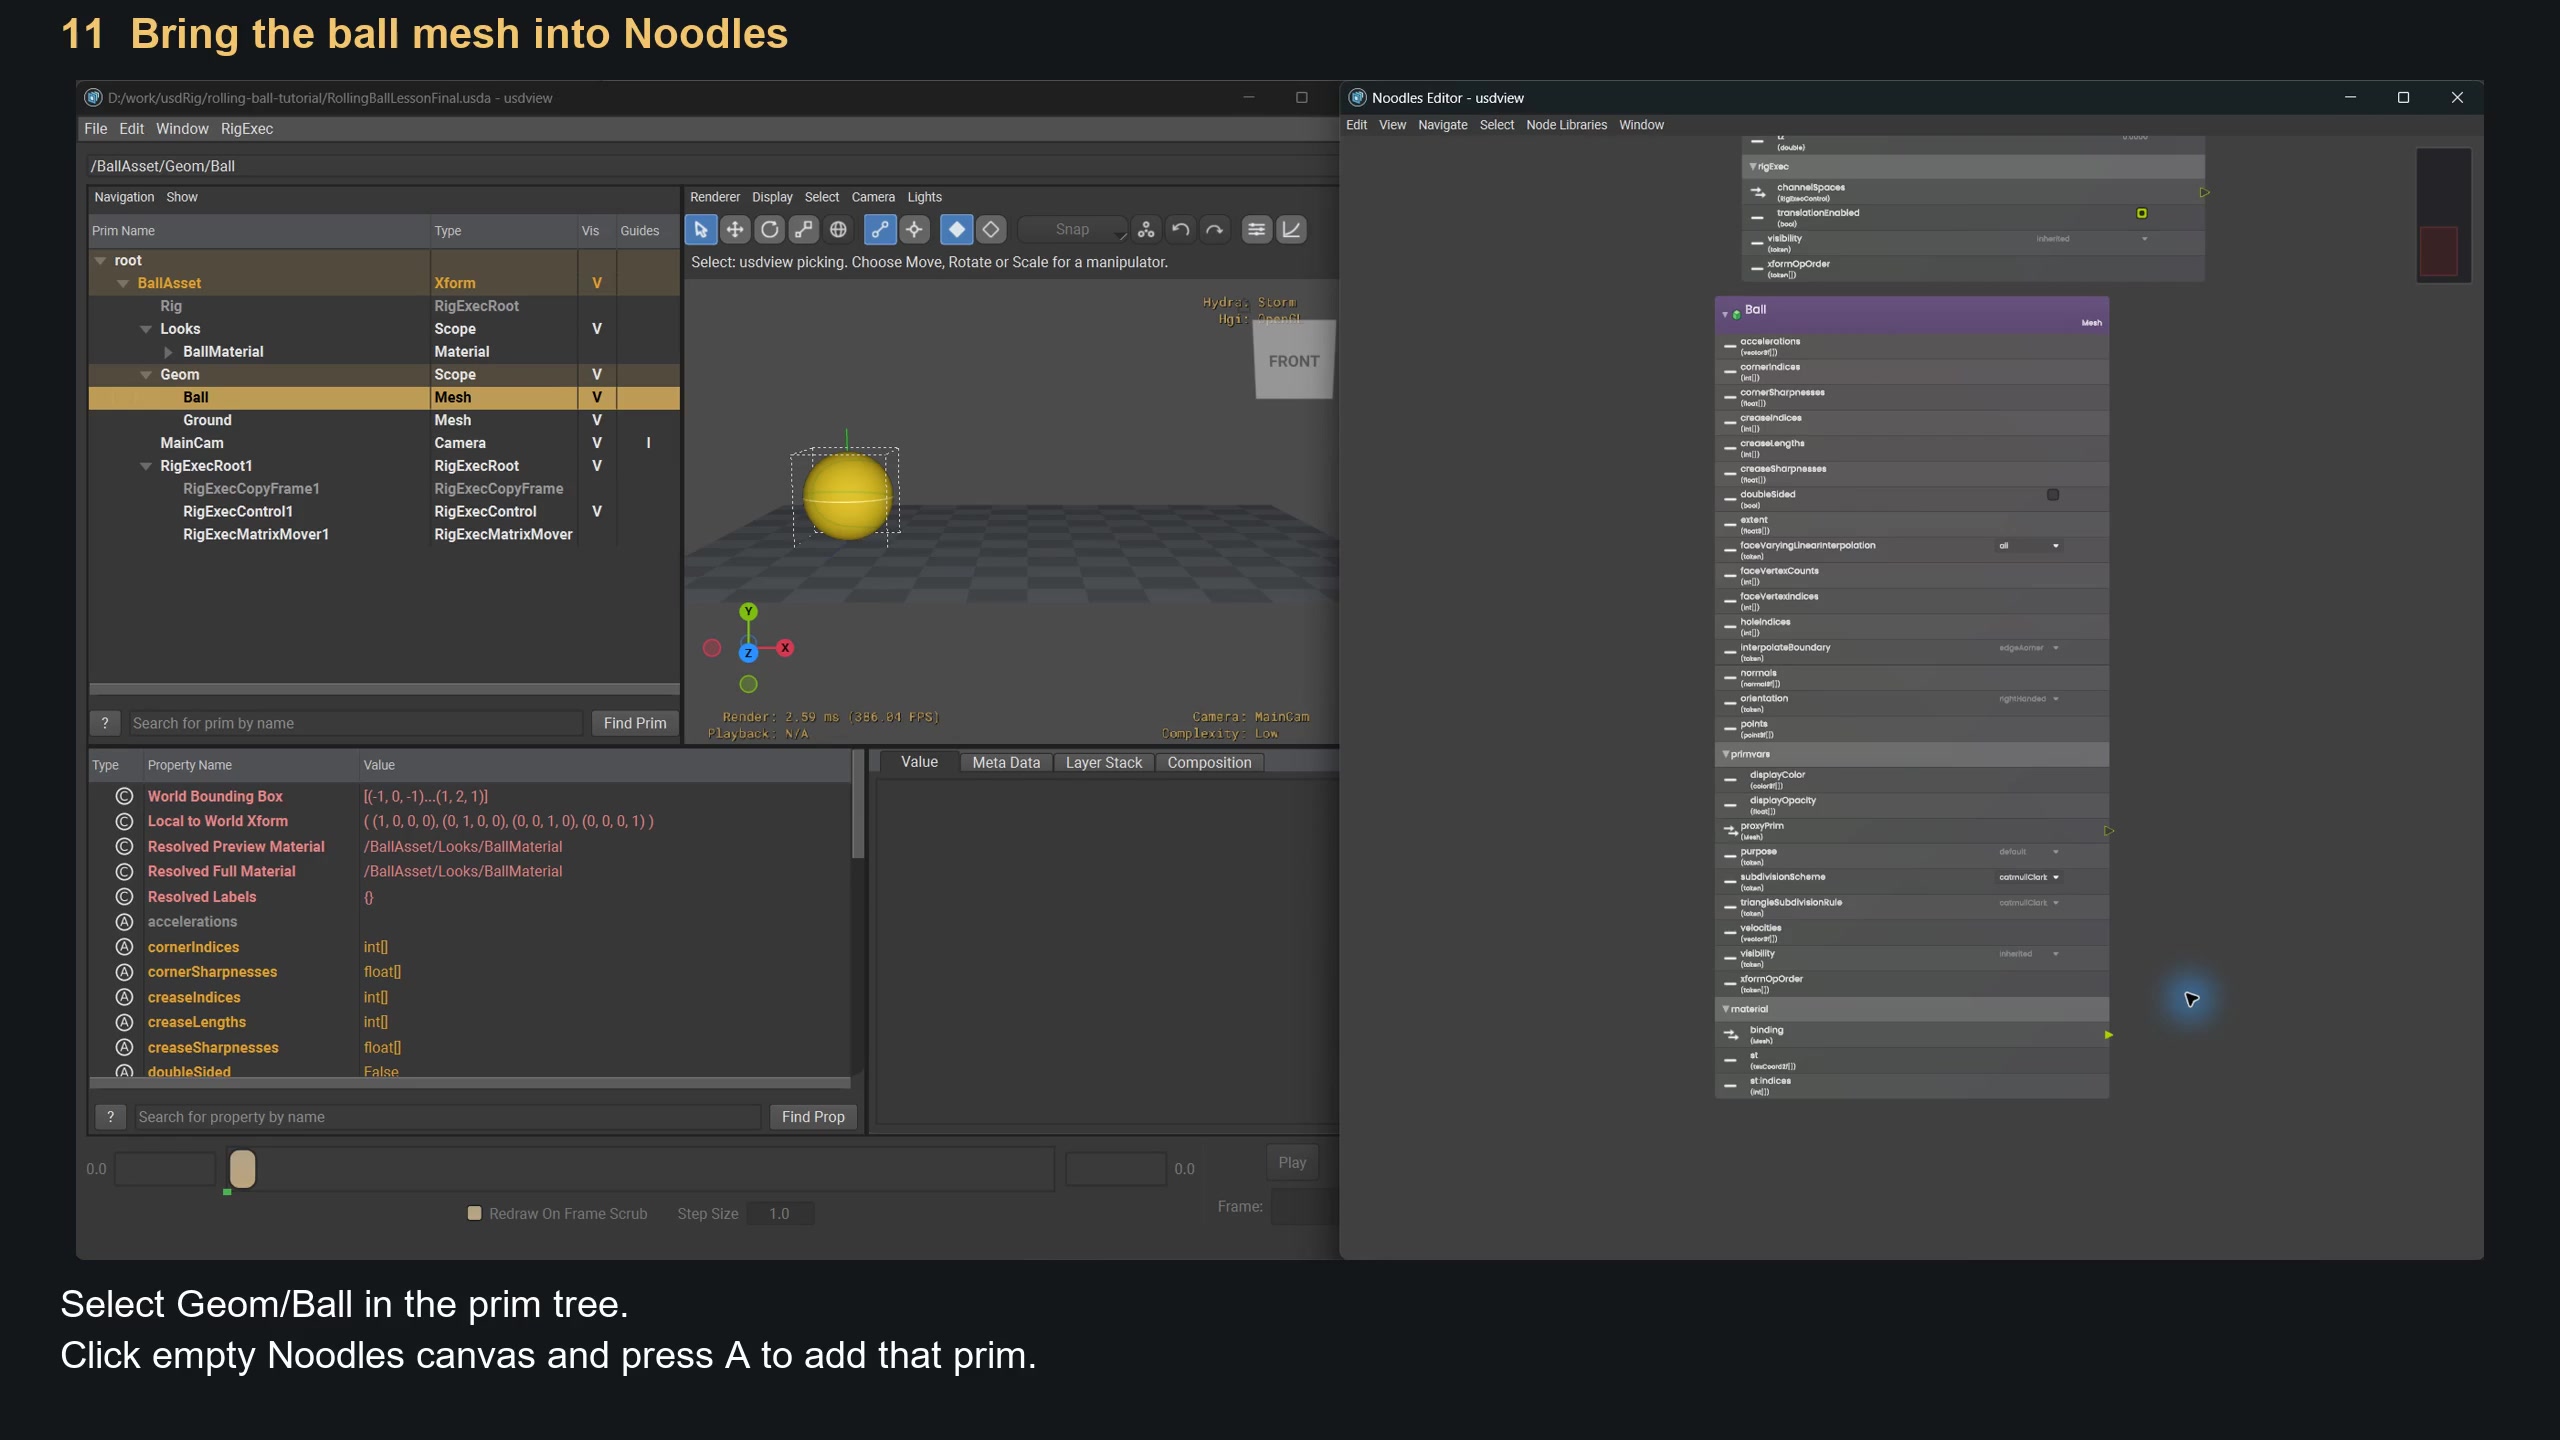
Movie frame: 1:34.
12. Target the ball's points — 1:36
Drag the Matrix Mover's rigExec:moves socket onto the Ball node's points property row. Dropping on the property tells the mover exactly which geometry to revise. Keep the floor out of this connection.
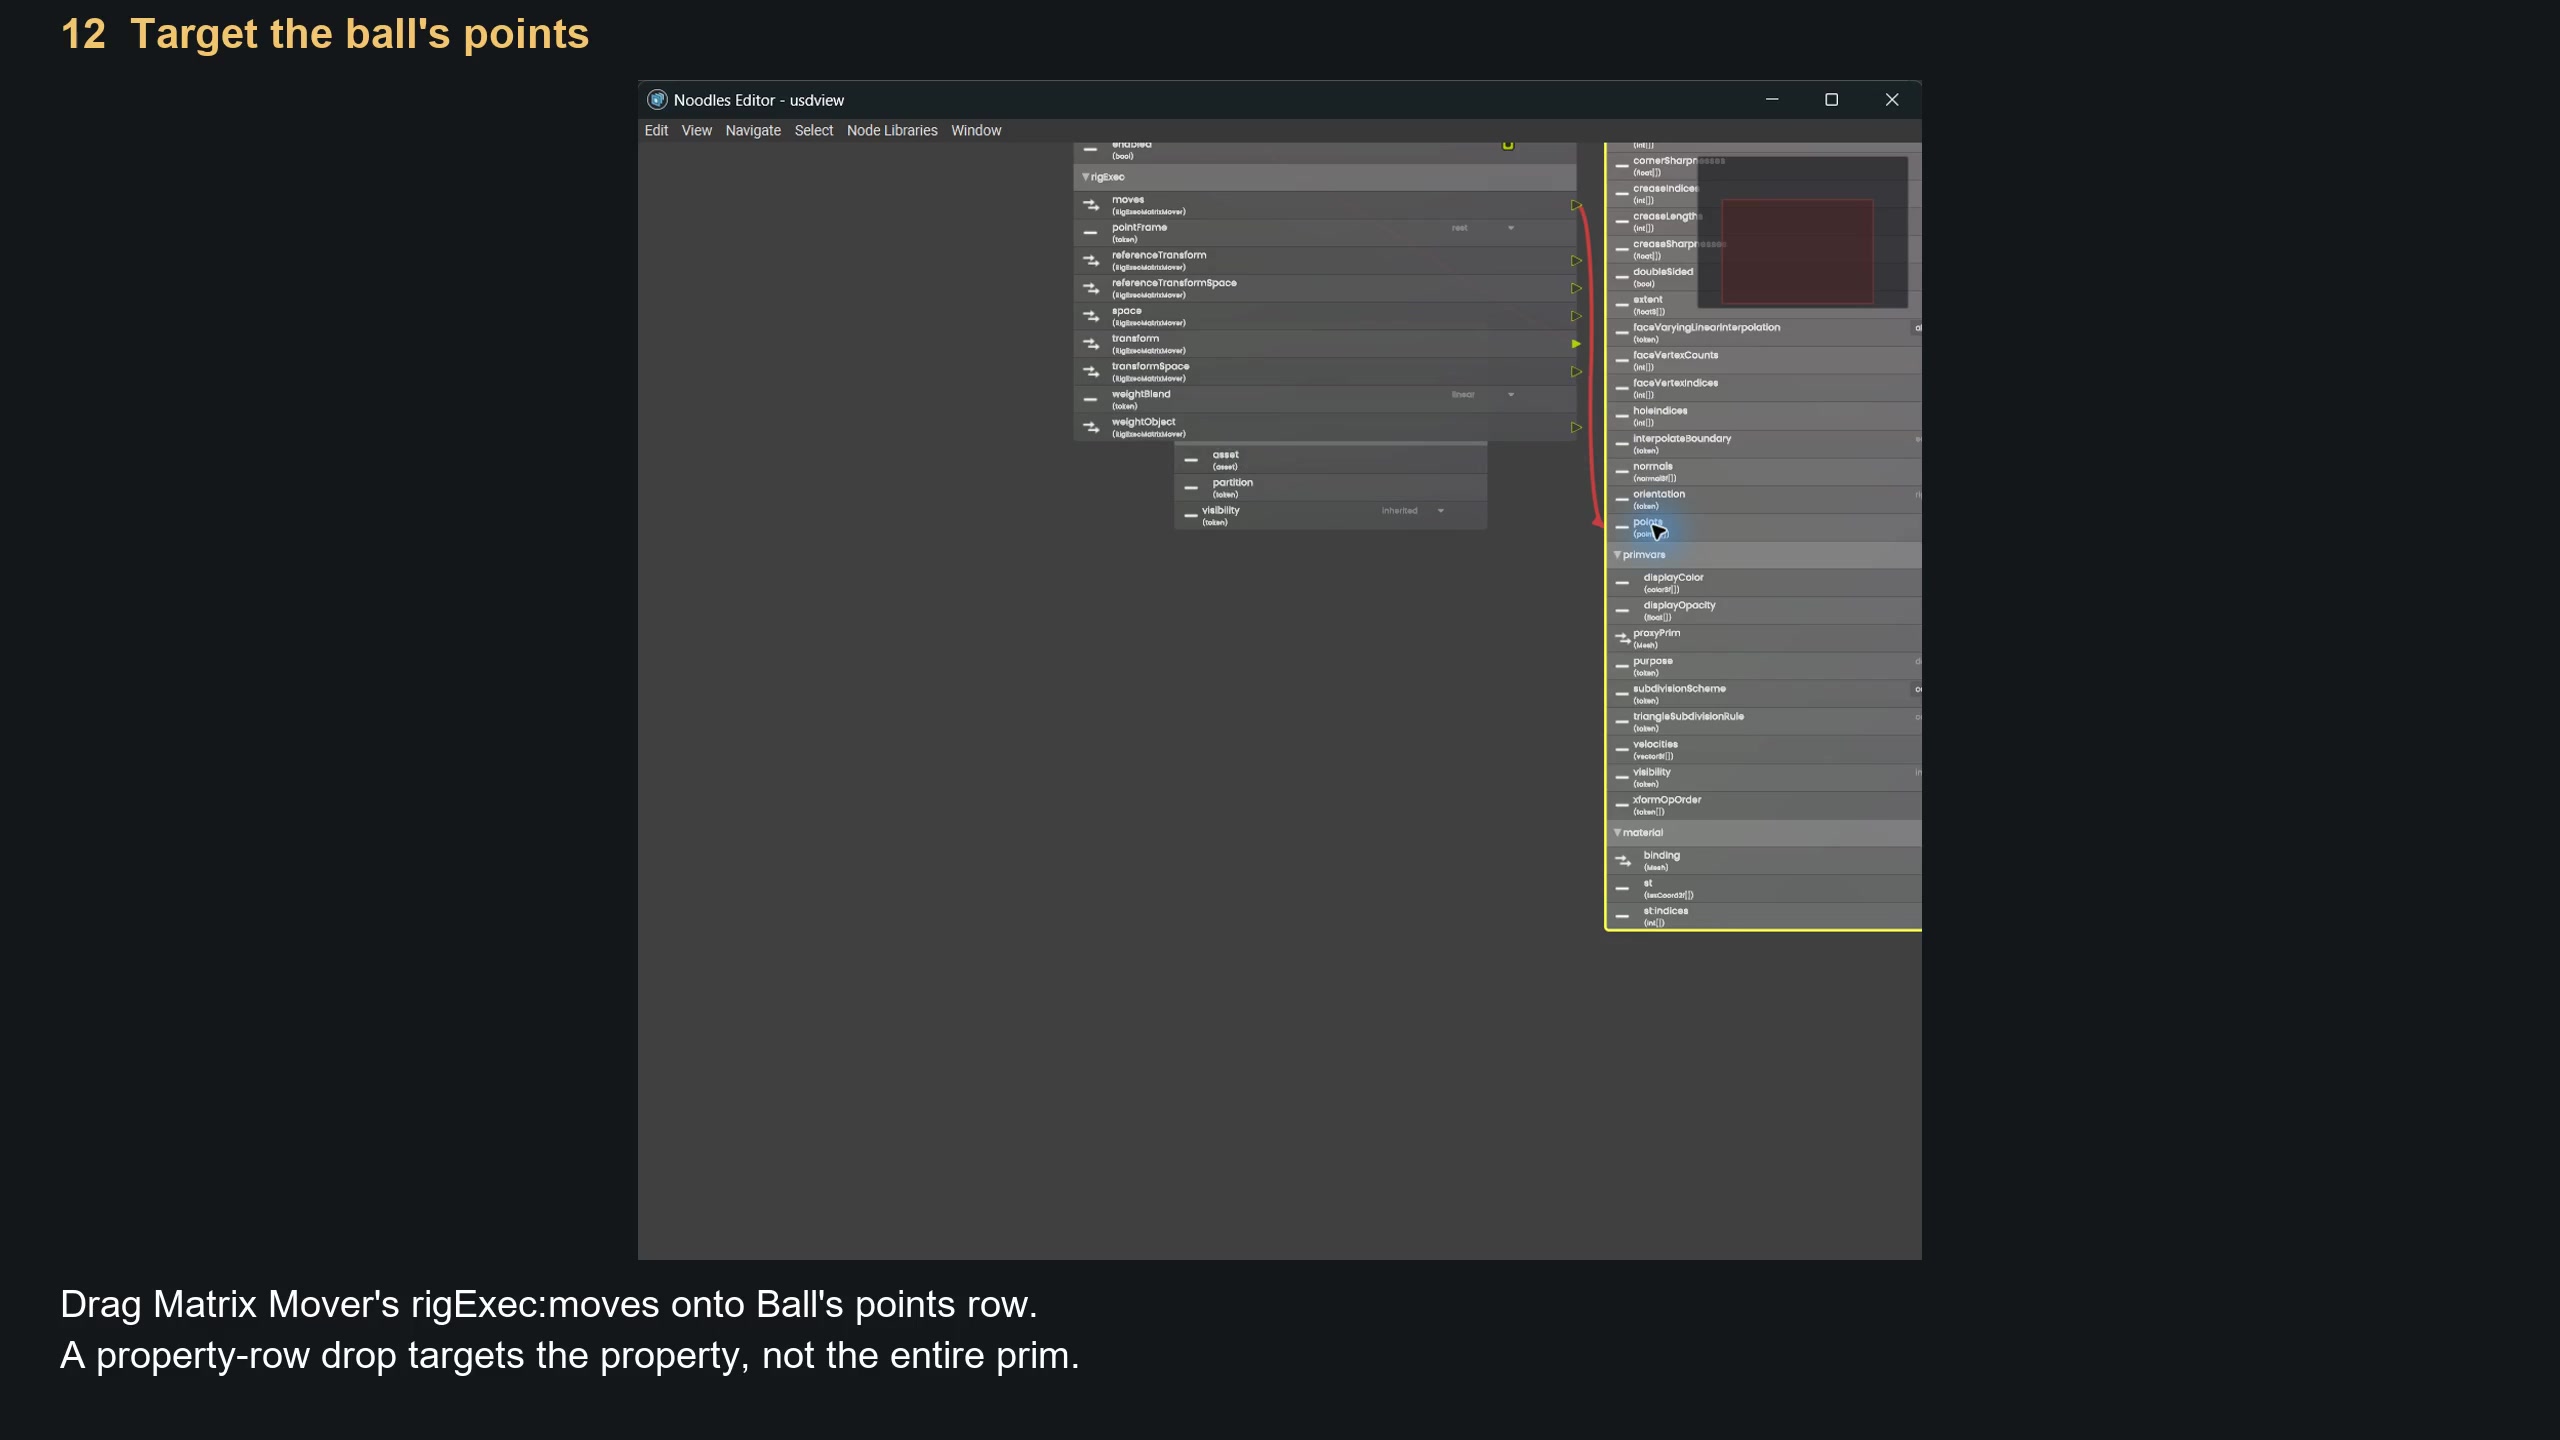
Movie frame: 1:43.
13. Create the rolling calculation — 1:45
Select RigExecRoot1 in the prim tree, focus Noodles, and choose Tab → RigExecFloatMathMover. This will turn travel distance into a rotation angle.
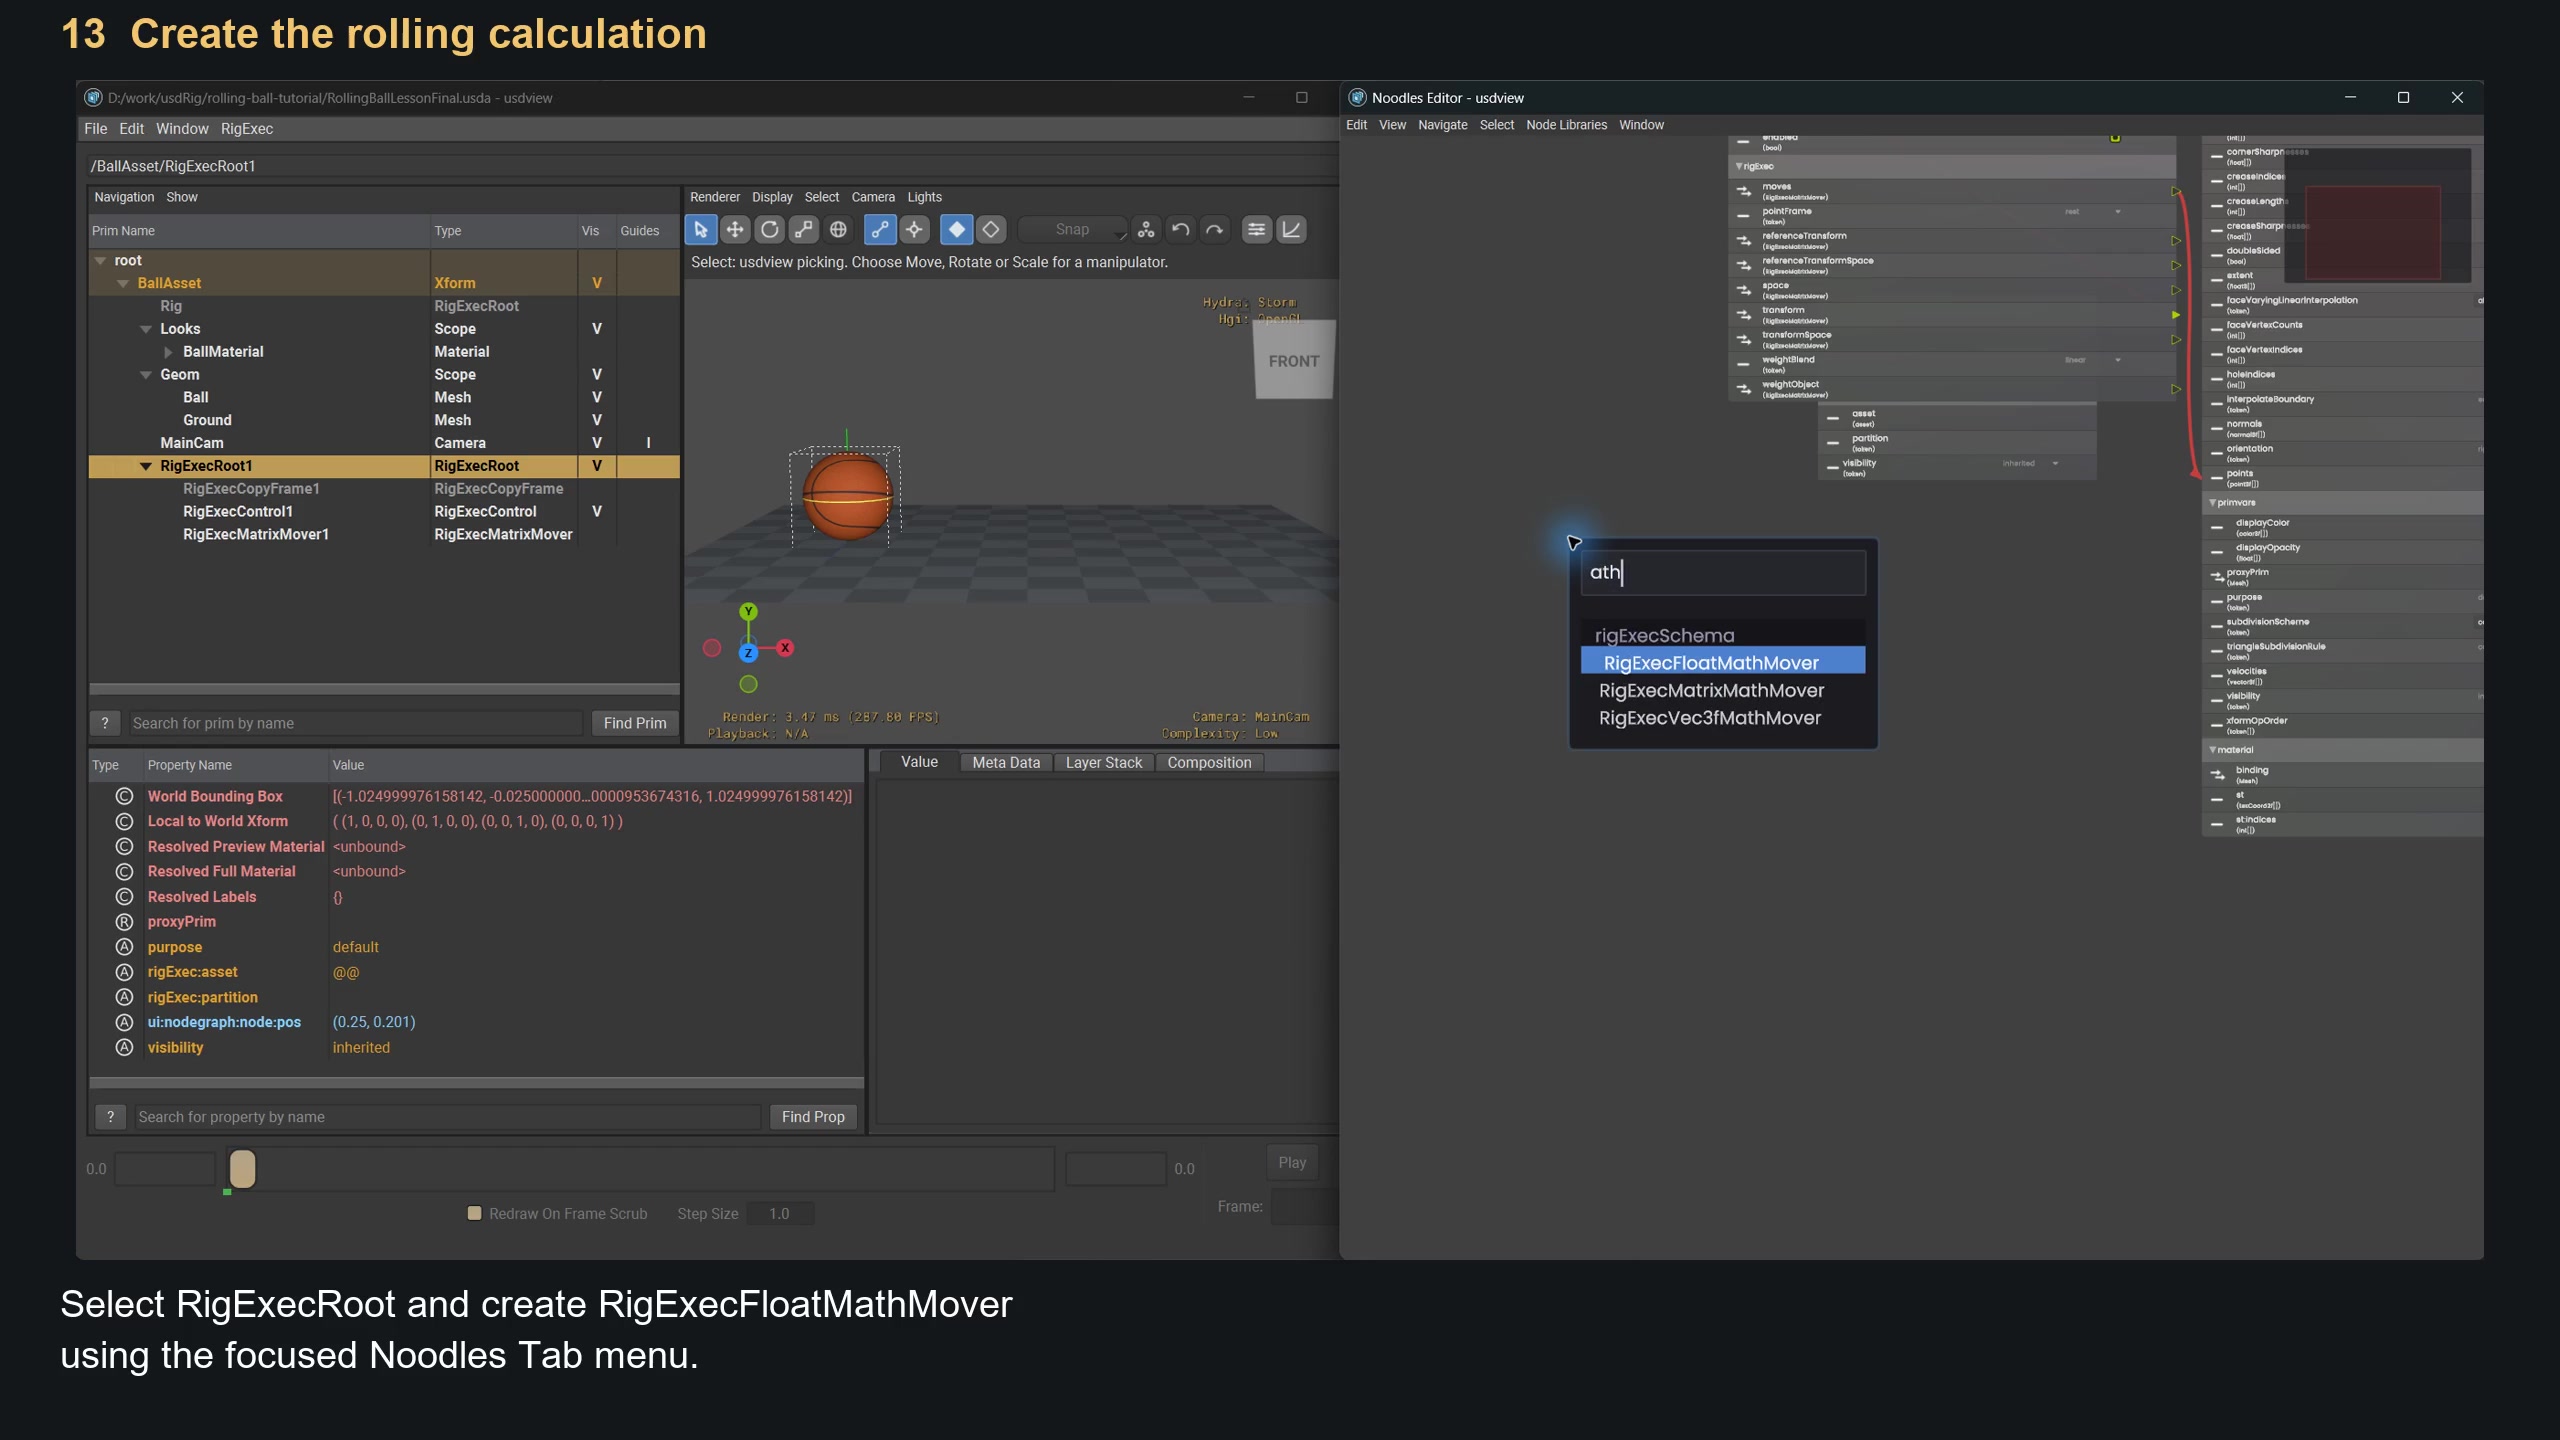
Movie frame: 1:52.
14. Apply the mover API — 1:54
Select the Float Math Mover node, then choose Tab → RigExecMoverAPI, just as you did for the Matrix Mover.
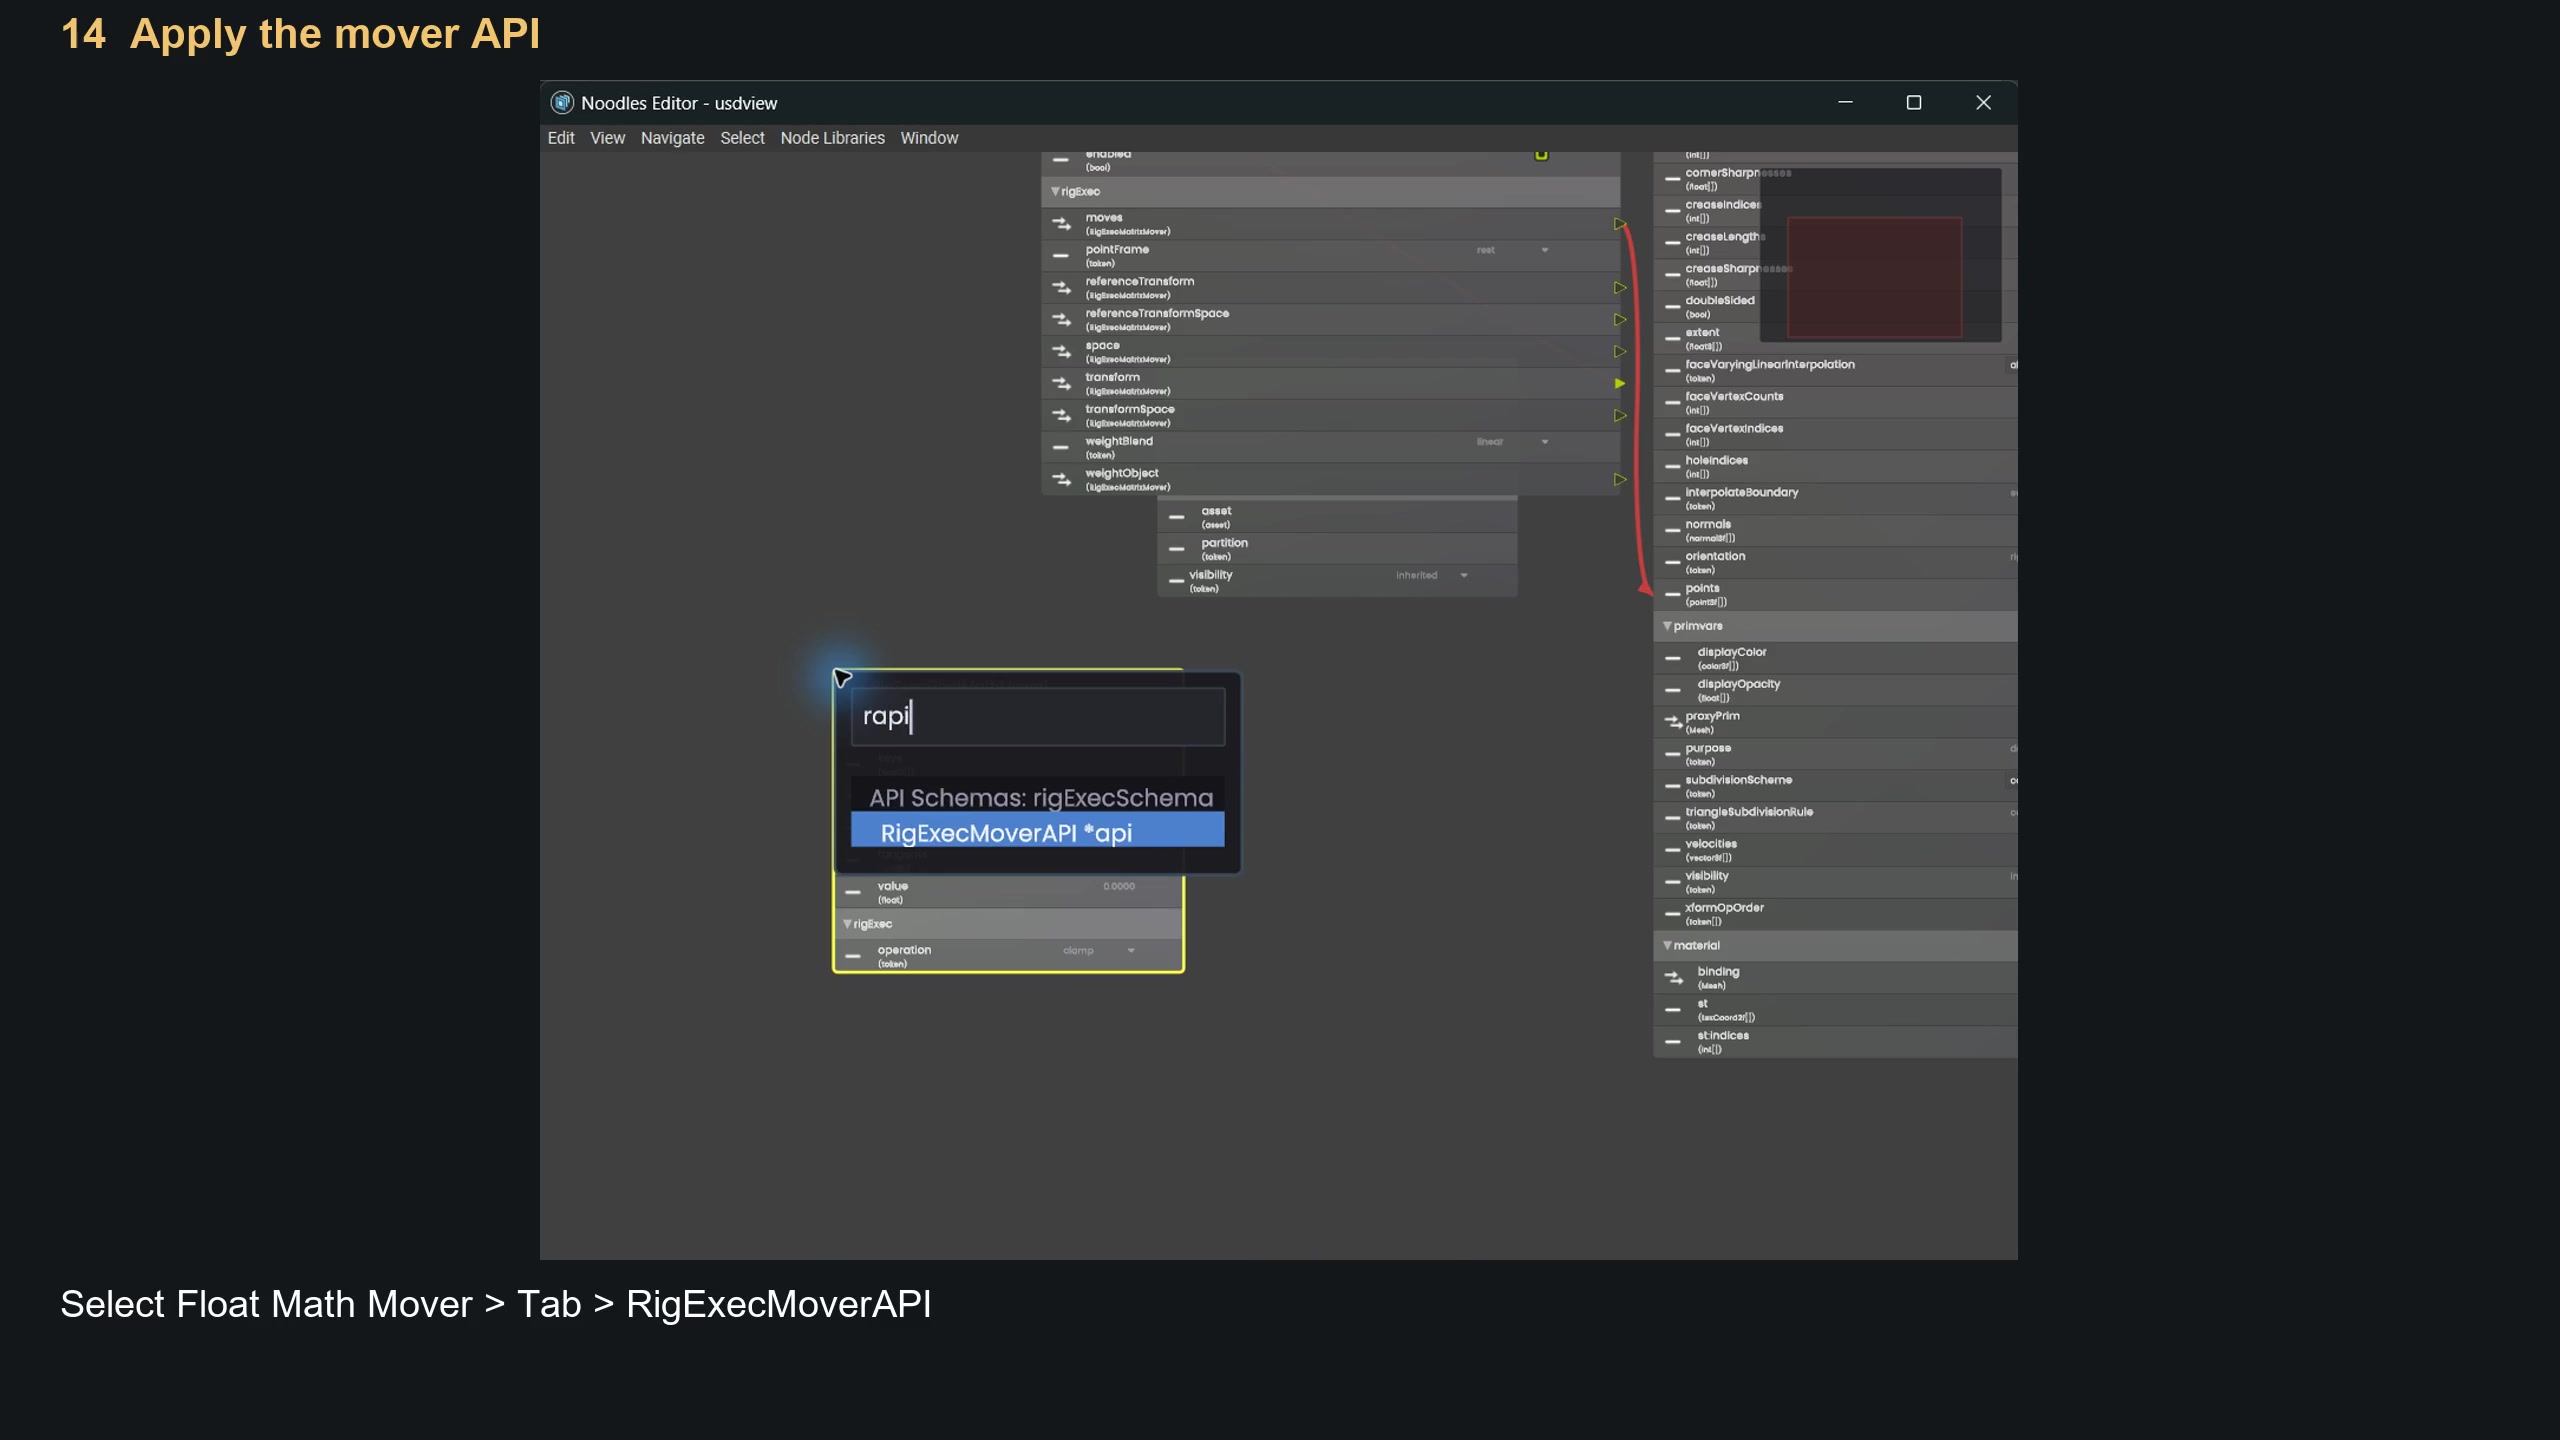
Movie frame: 1:58.
15. Use multiplication — 2:00
On the Float Math Mover, set rigExec:operation to multiply.
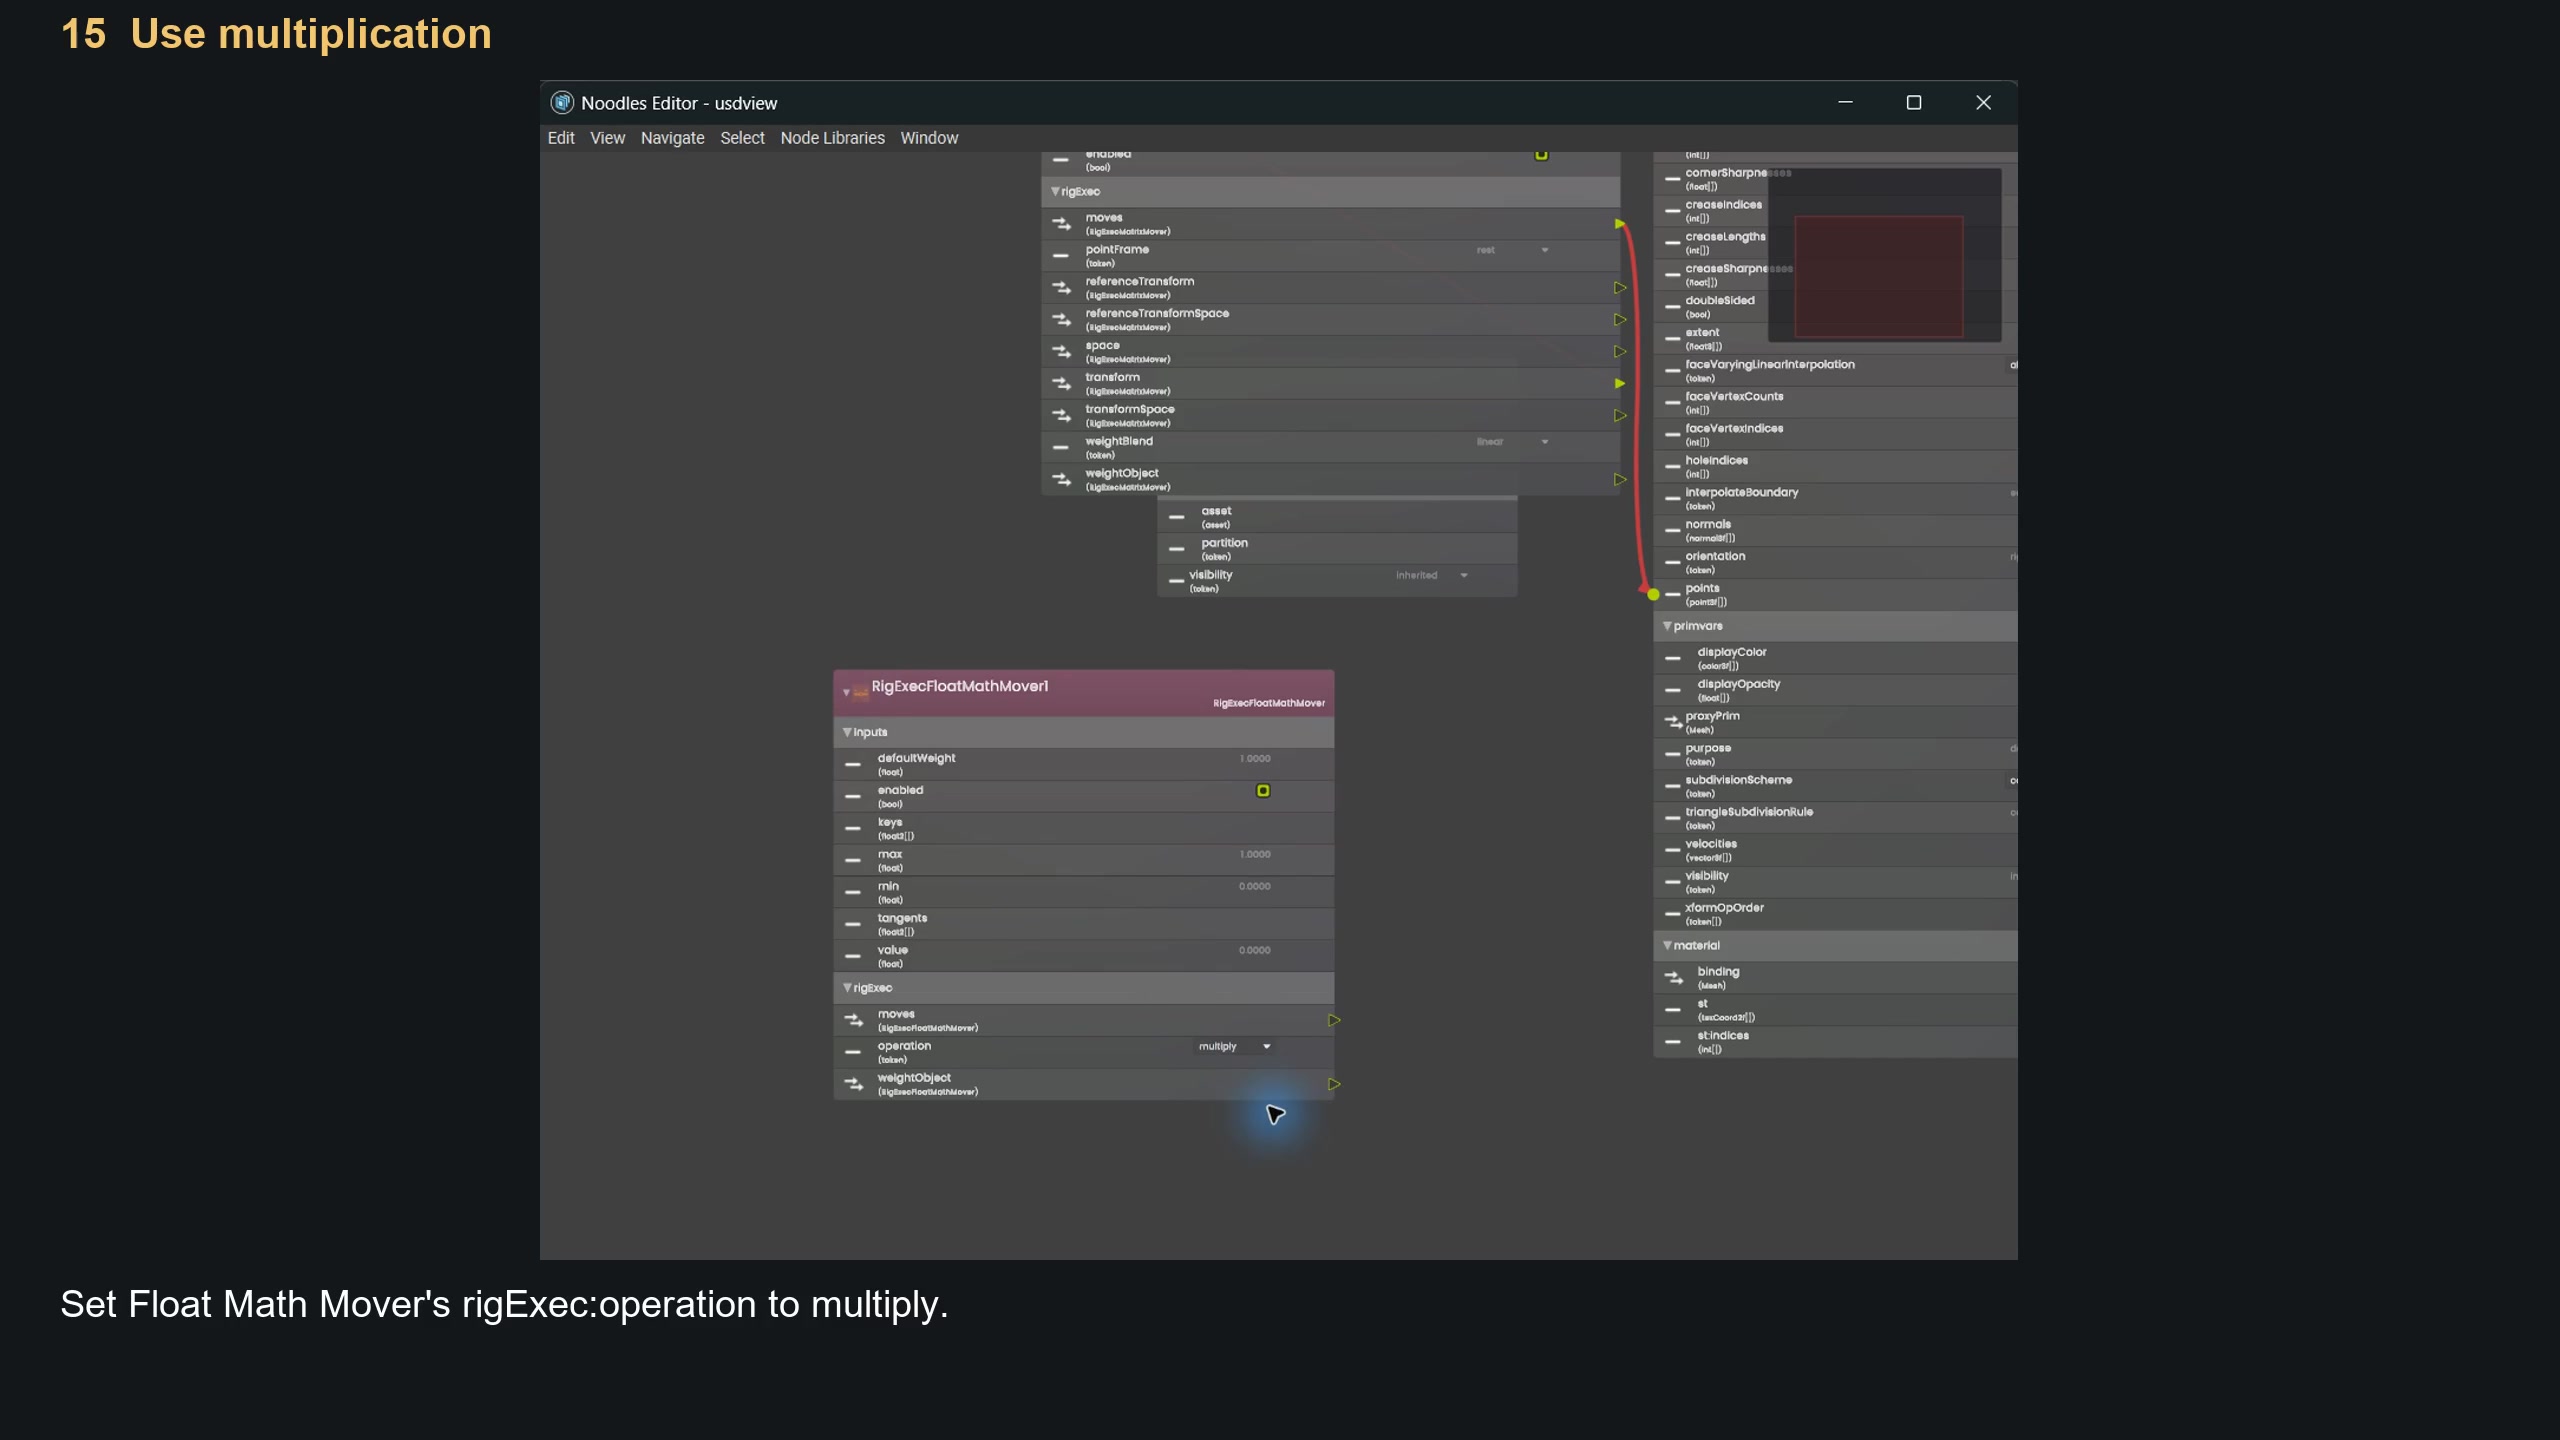
Movie frame: 2:05.
16. Target Z rotation — 2:07
Expand the control's avars group. Drag the Float Math Mover's rigExec:moves socket onto the control's avars:rz property row. This is the channel the calculation will drive.
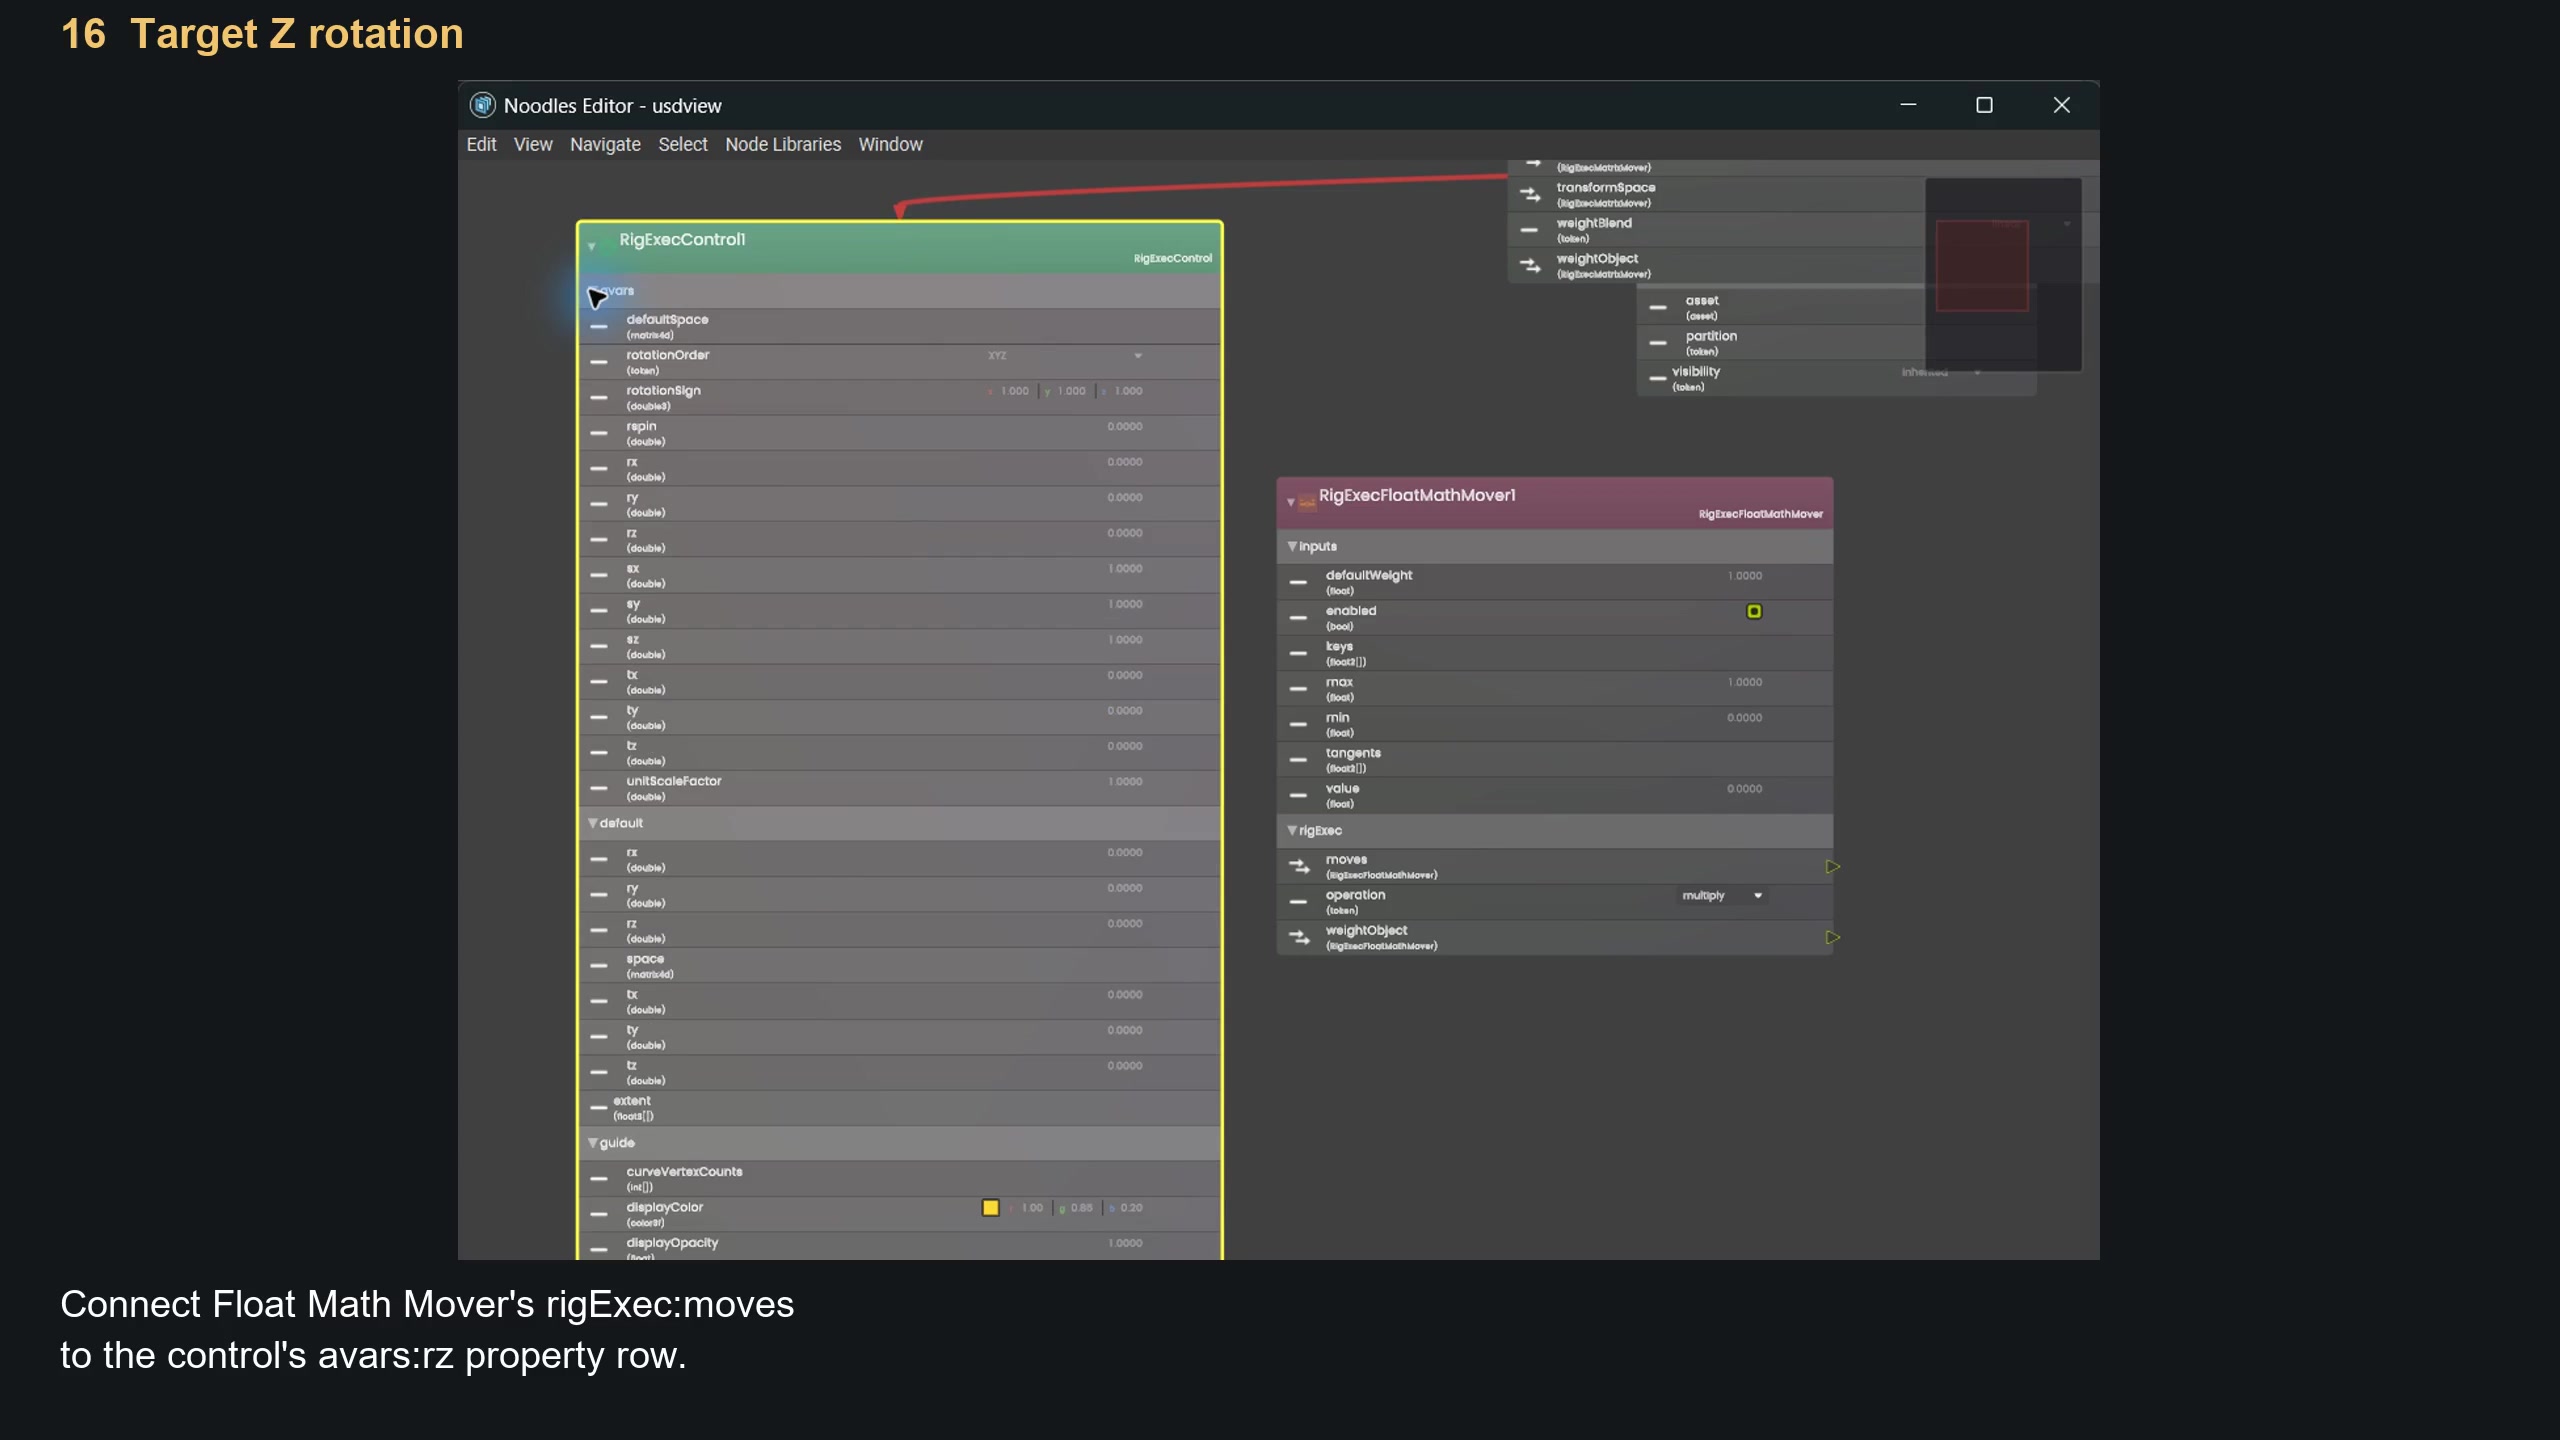
Movie frame: 2:14.
17. Set the rolling factor — 2:16
On the control, set avars:rz to -57.2958 and press Enter.
The Float Math Mover multiplies this authored base value by its input.
For a radius-one ball, that converts each unit of X travel into the right
number of degrees of Z rotation:
angle in degrees = -distance / radius × 180 / pi
The minus sign makes positive X travel roll in the correct direction. The next connection supplies the distance; you won't need to key the roll.
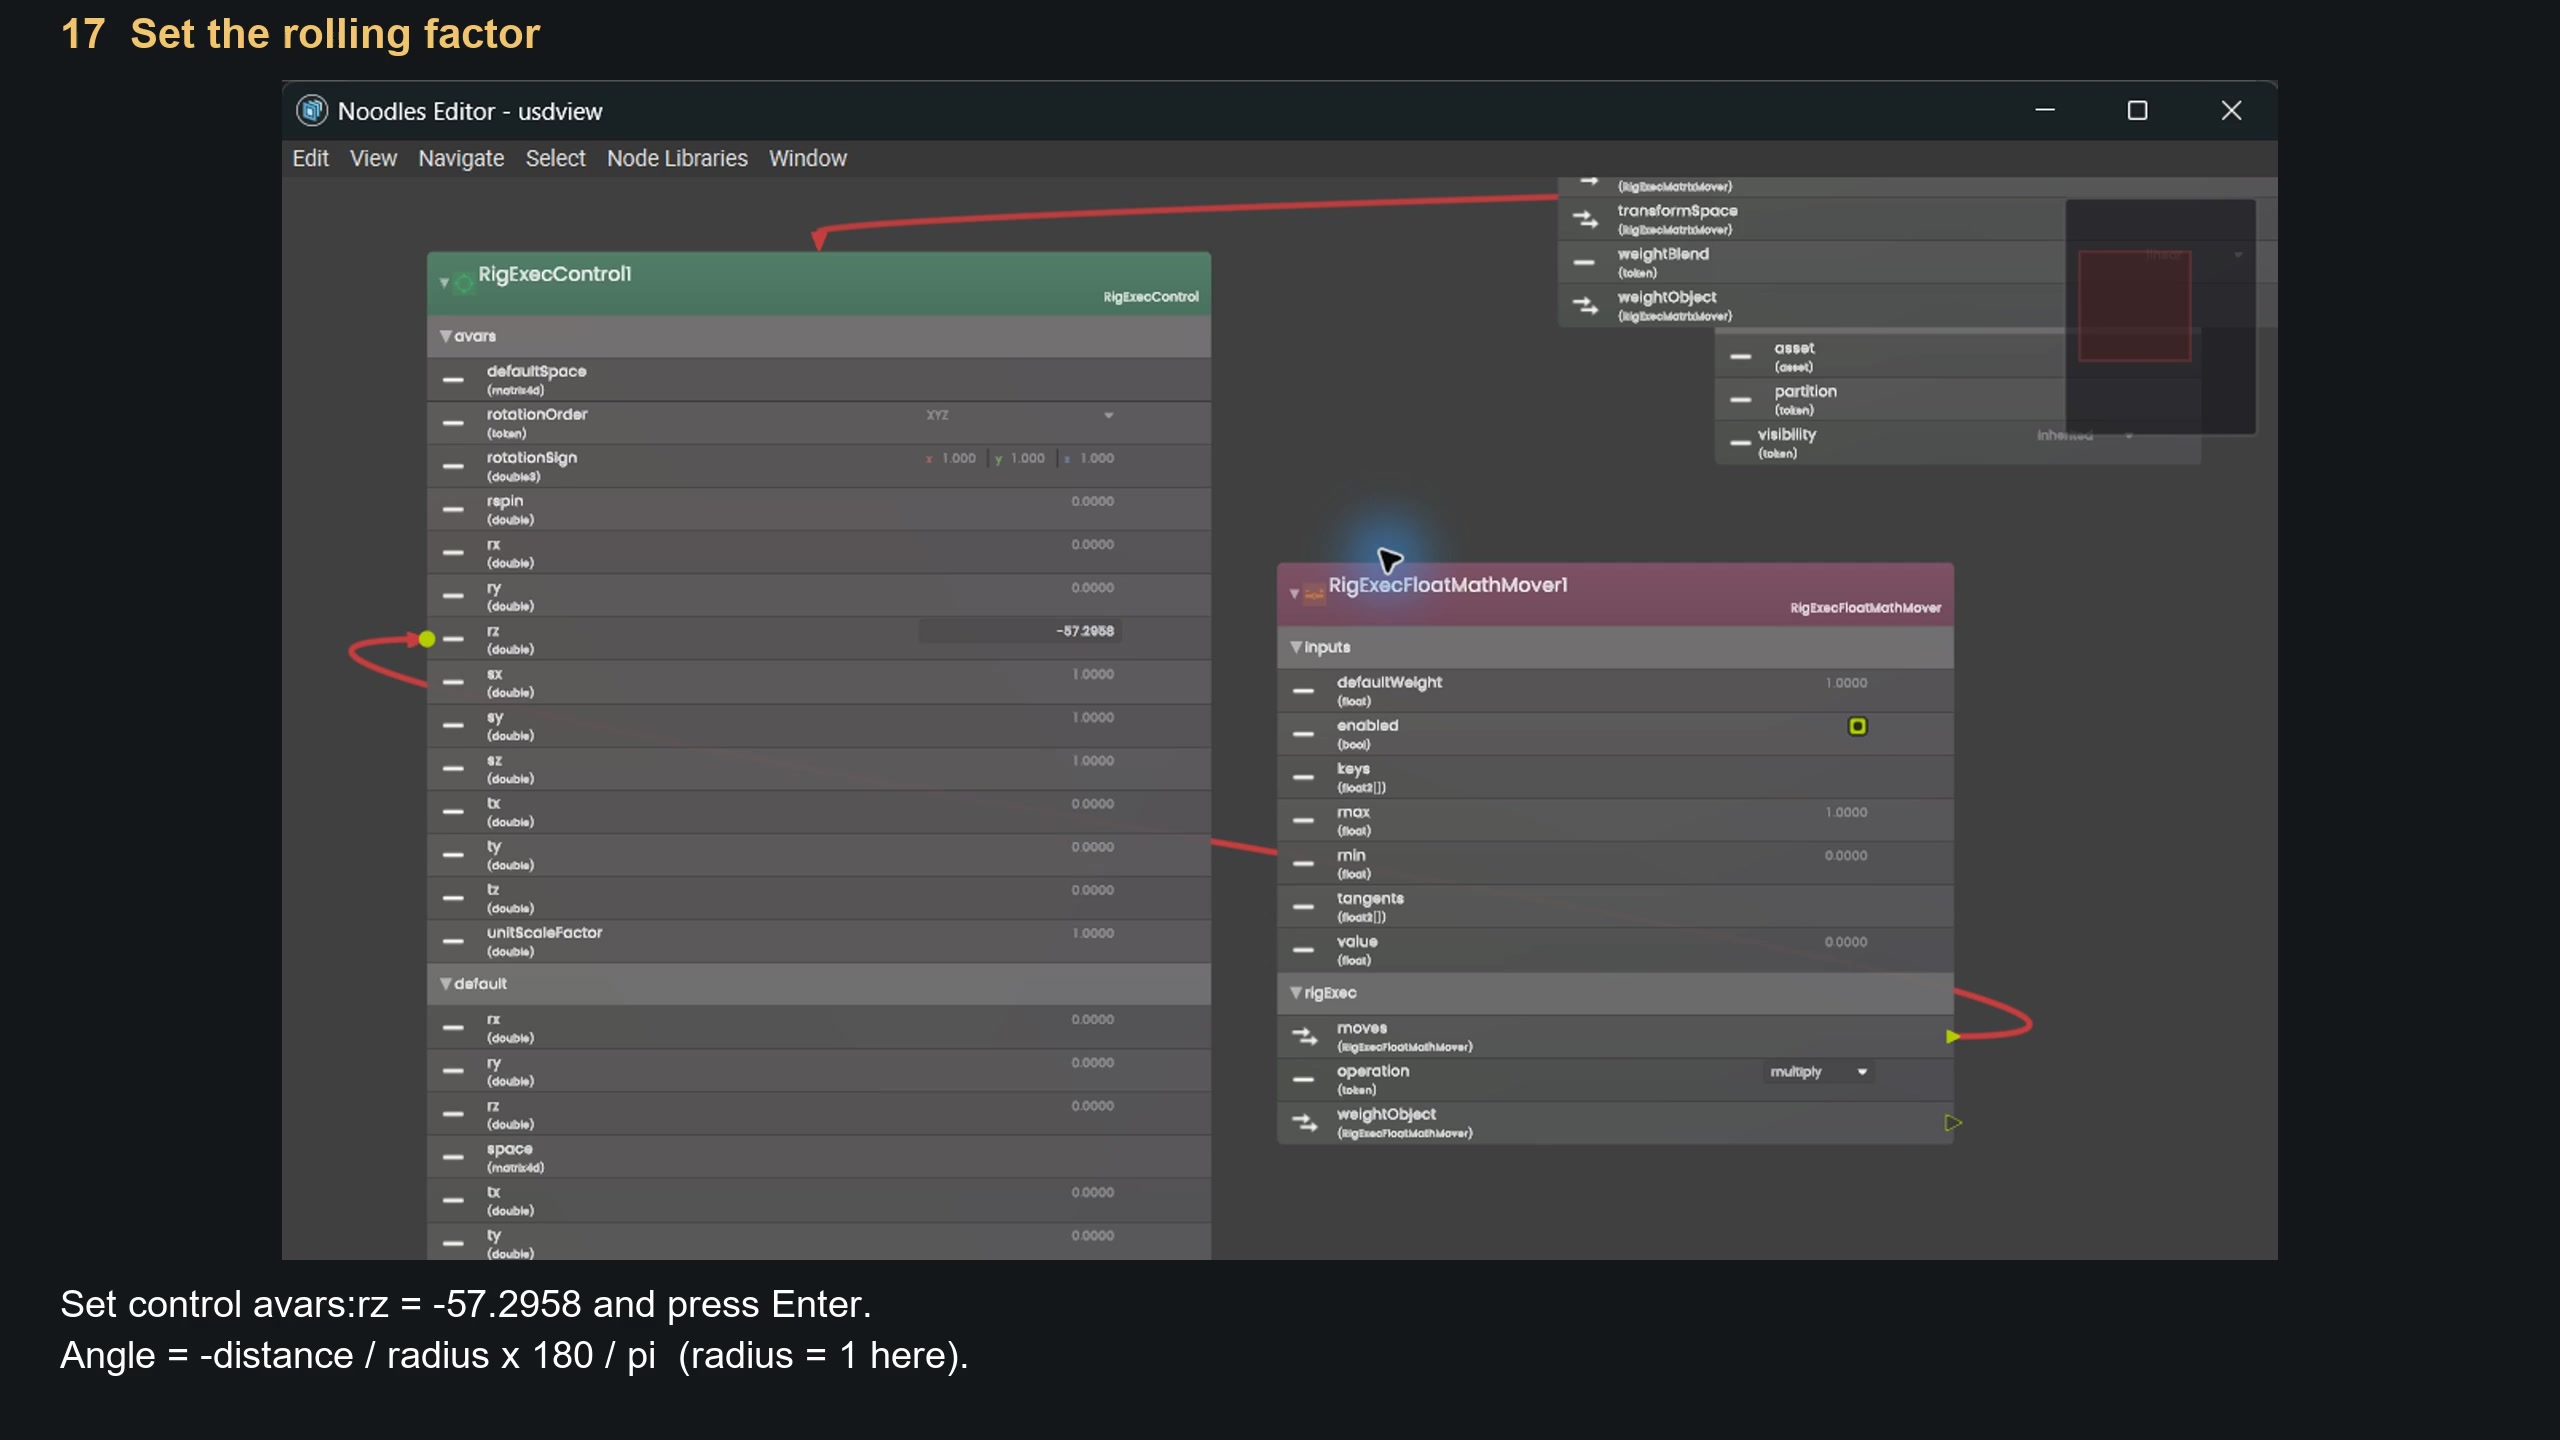
Movie frame: 2:28.
18. Feed travel into the calculation — 2:31
Drag from the Float Math Mover's inputs:value to the control's avars:tx property row. The blue wire is an attribute connection: X travel now feeds the multiplication.
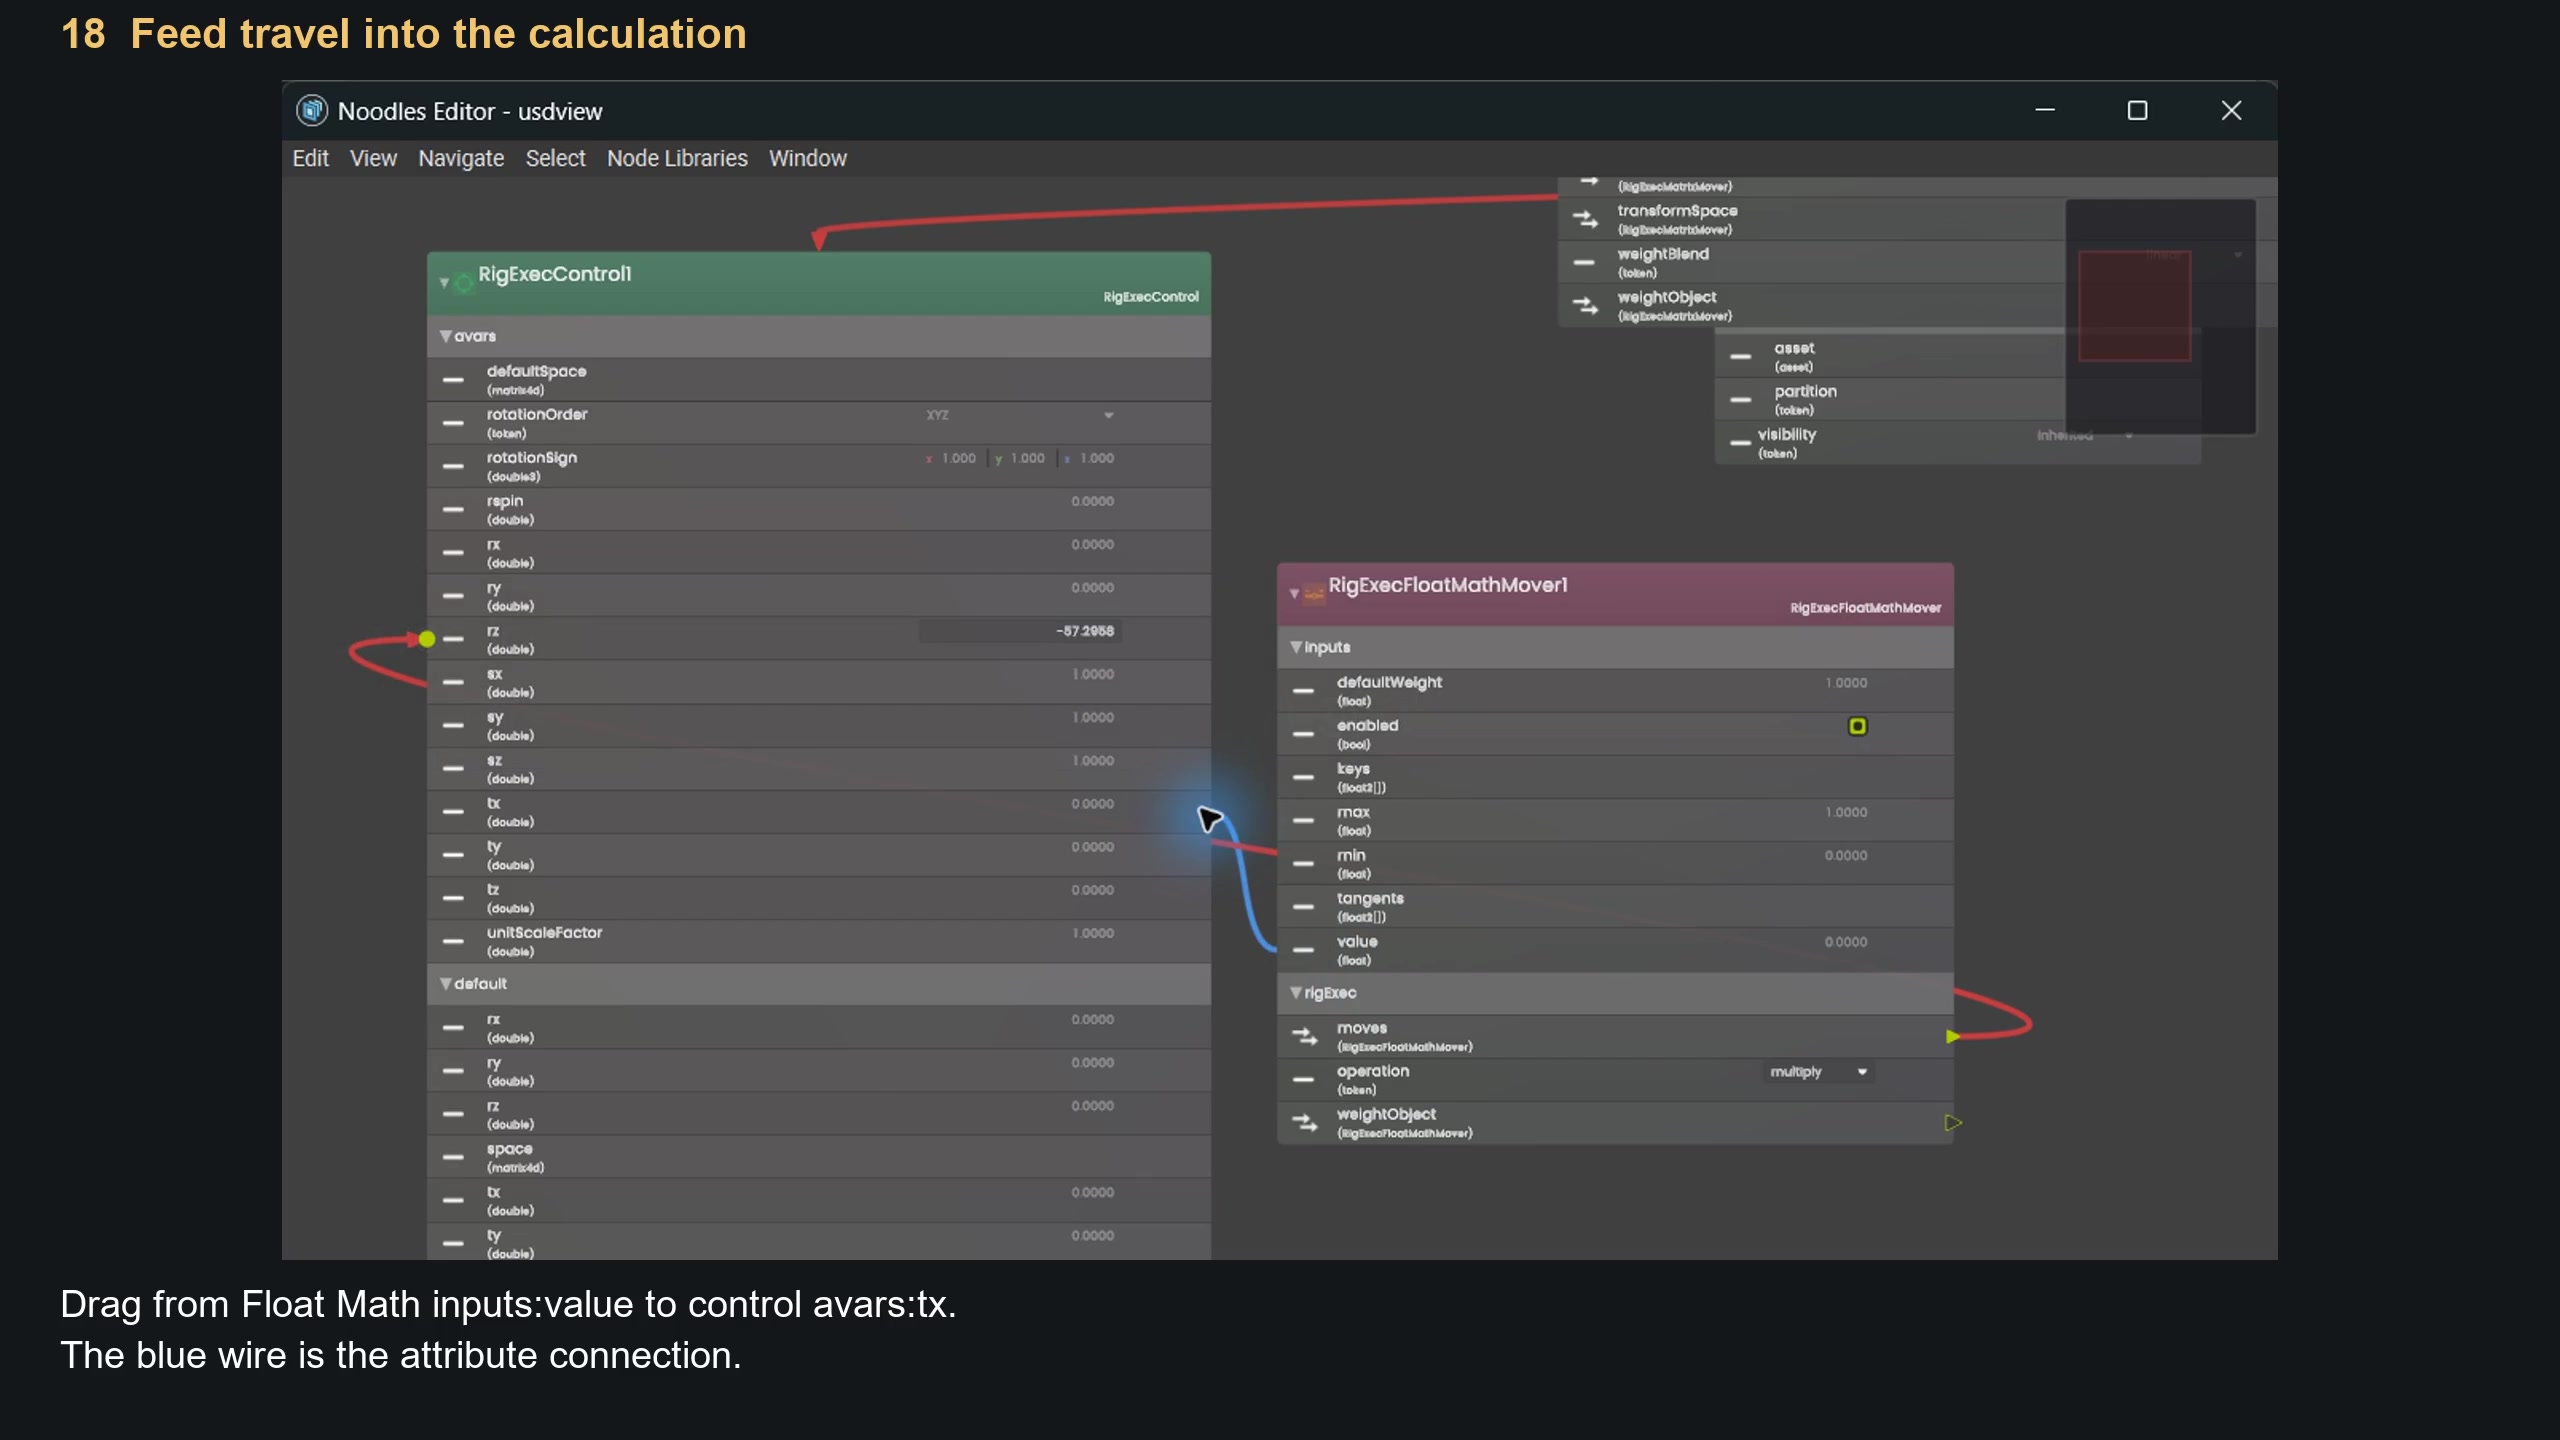
Movie frame: 2:39.
19. Test the rig interactively — 2:41
Change or drag the control's avars:tx value. The ball should move and roll together; reversing the travel reverses the rotation. Watch the seams to make the turn easy to see.
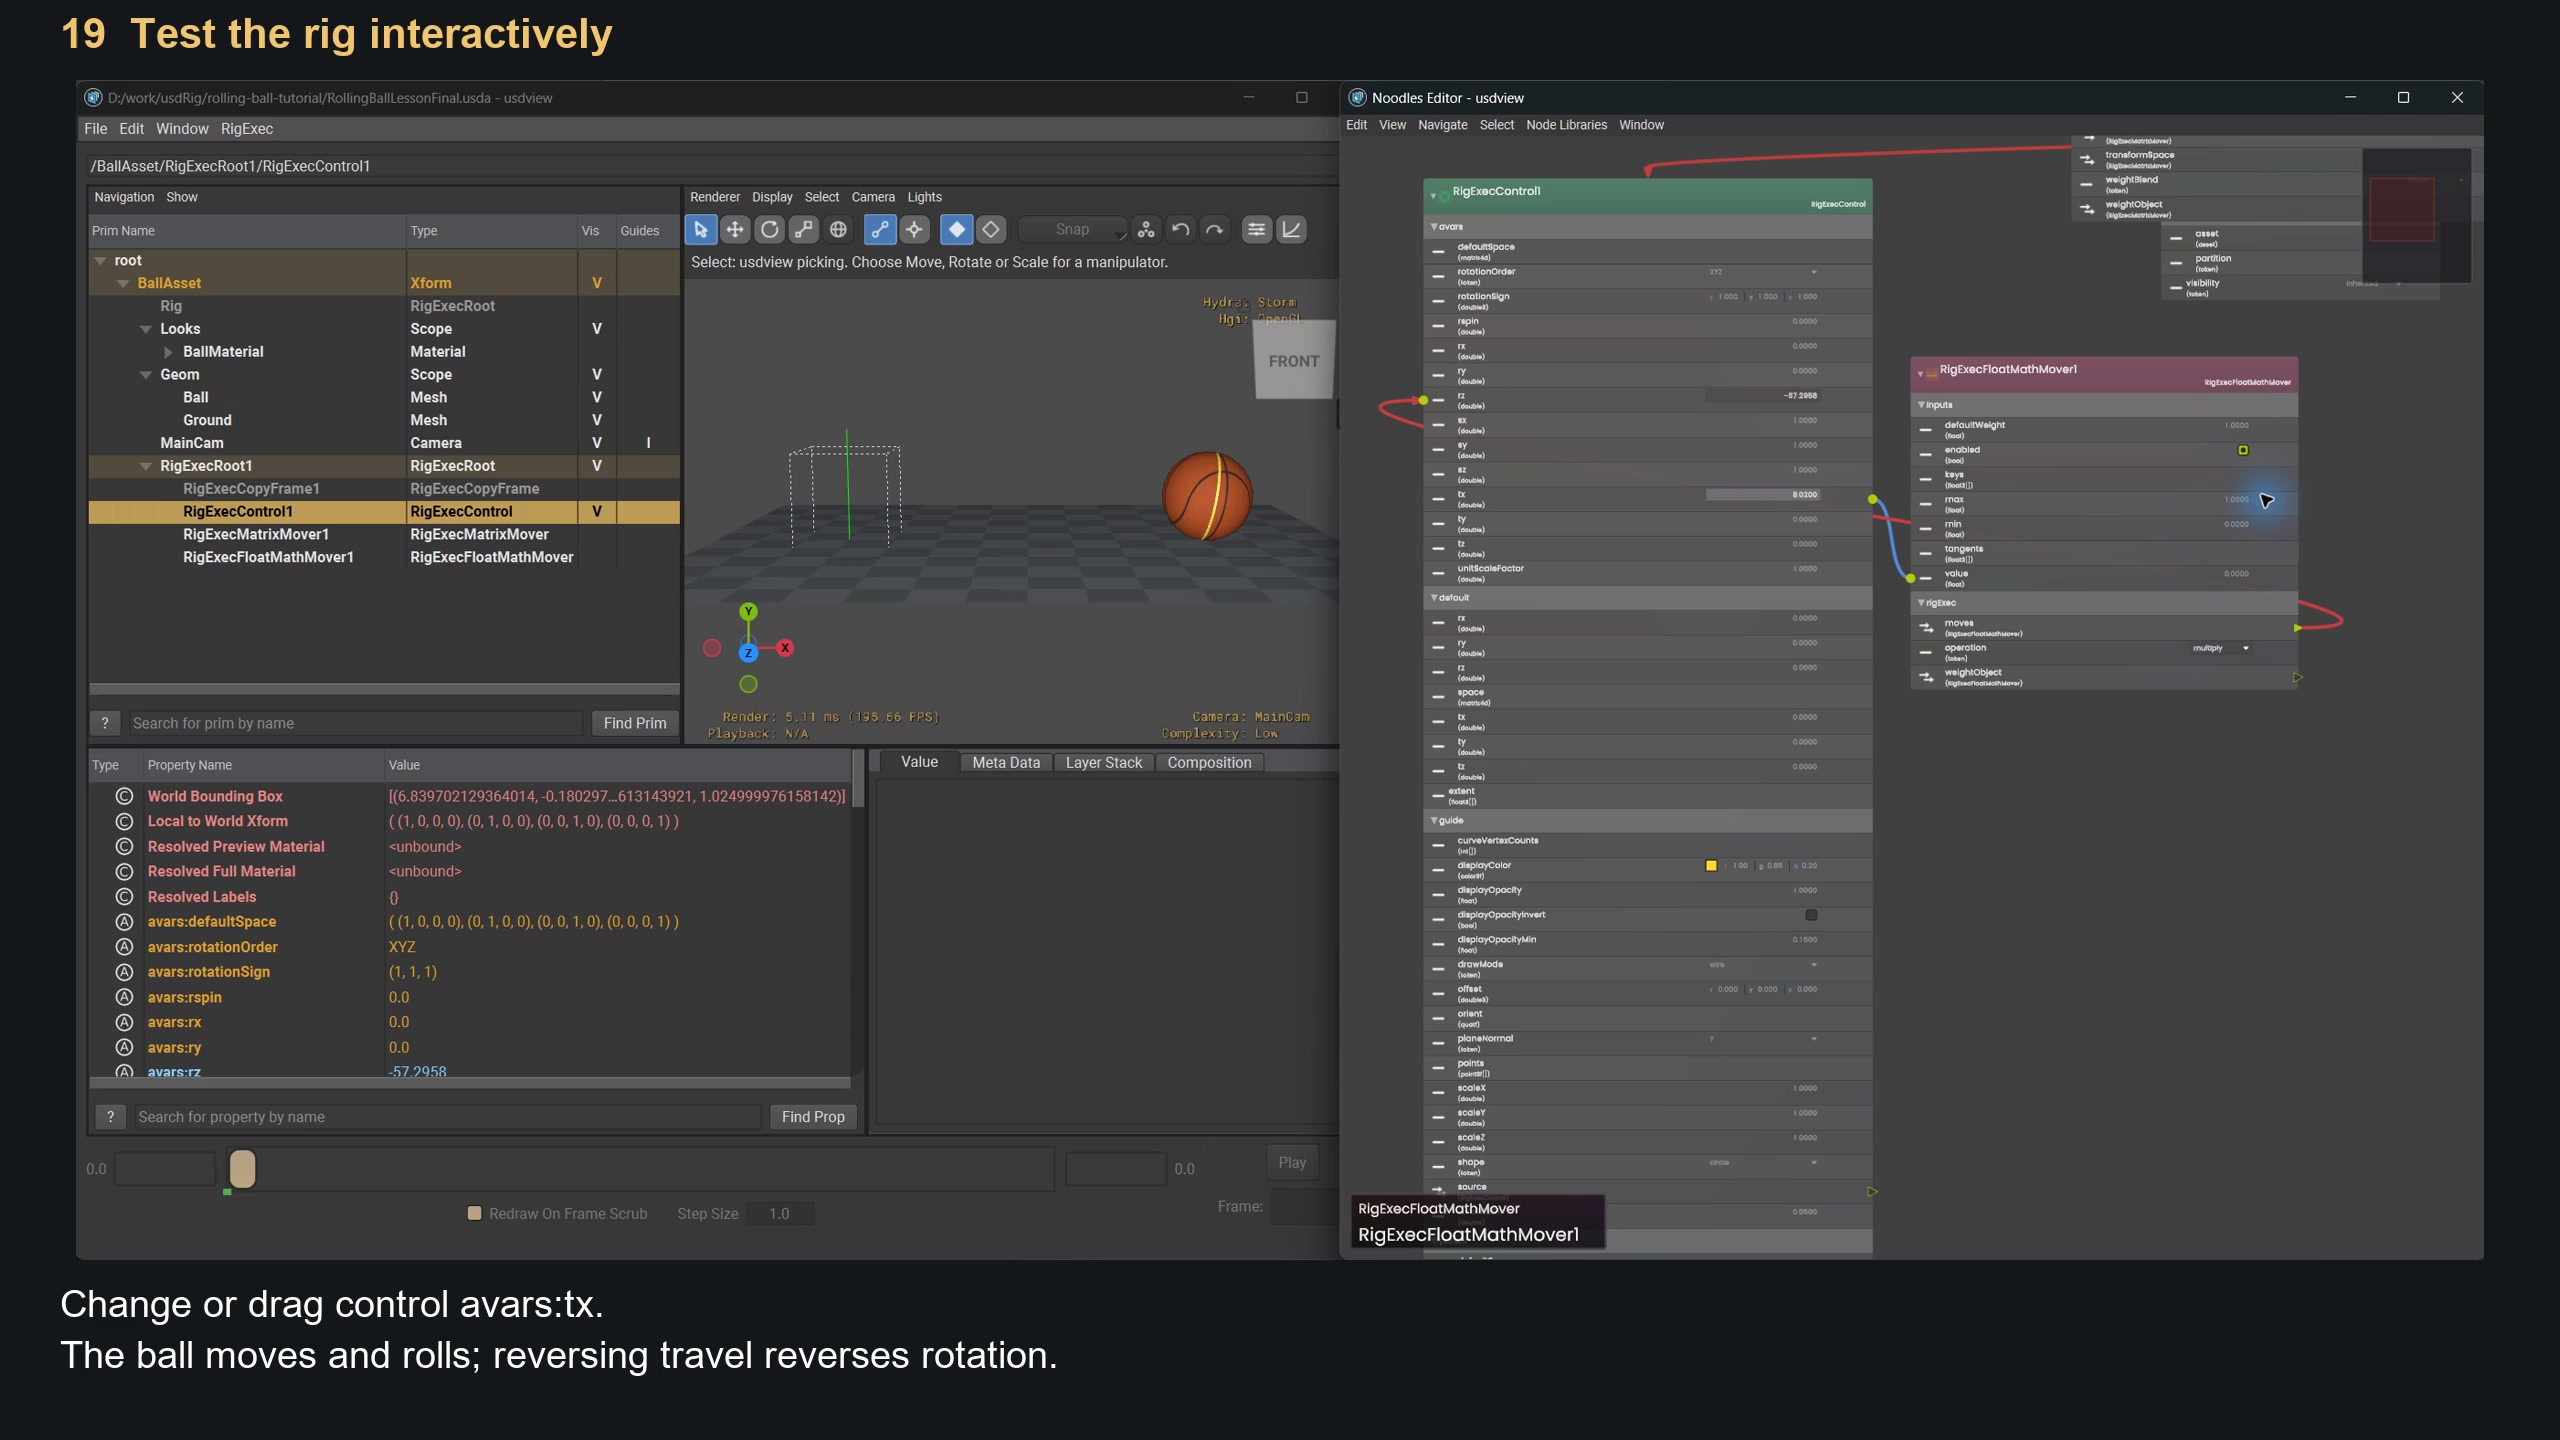
Movie frame: 2:49.
20. Roll the ball with the viewport Move tool — 2:52
Select RigExecControl1 in the prim tree, then click the viewport's Move tool. Drag the red X arrow slowly across the floor. The gizmo moves the control, and the ball rolls as you drag.
At 2:58, the movie cuts closer and shows a continuous drag at half speed. Watch the seams rotate while the control changes position. This rig maps straight-line X travel to Z rotation; it is ready for you to animate that travel channel.
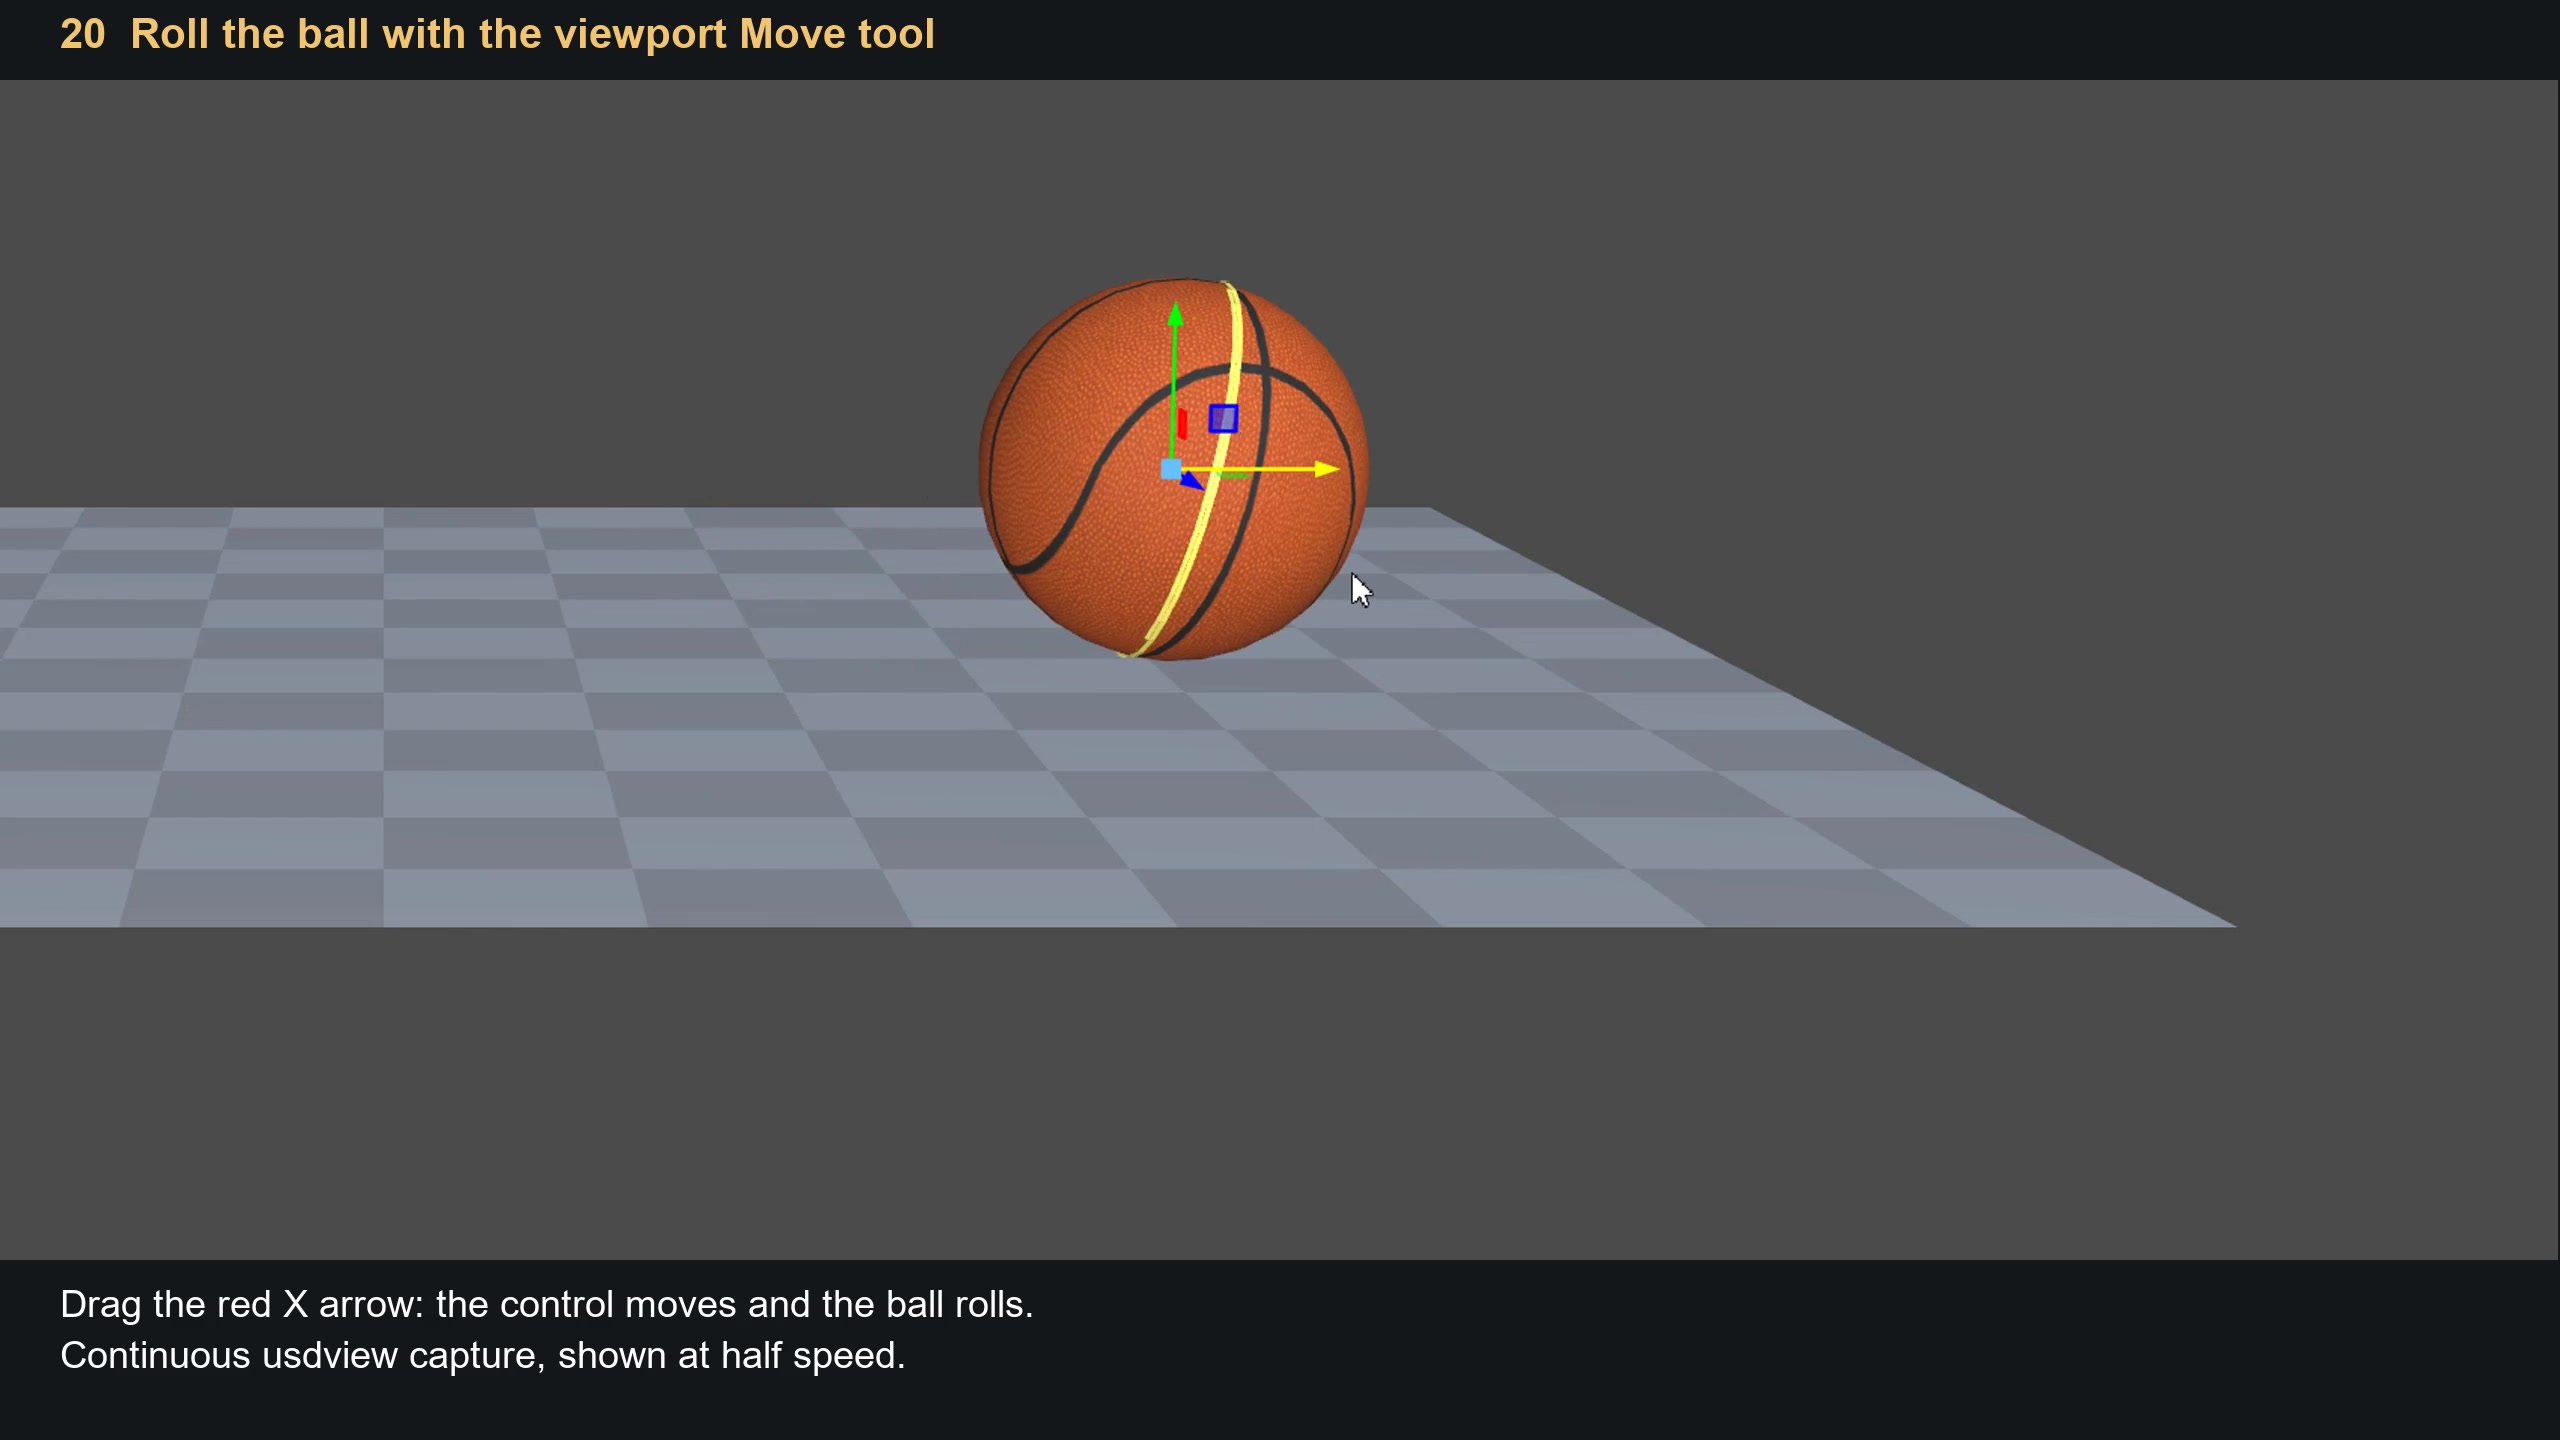
Movie frame: 3:03, during the continuous viewport drag.
21. Save the root layer — 3:06
Restore the control's avars:tx to 0. Focus Noodles and press
Ctrl+S to save. Your lesson root layer now holds the sublayer arc and
the rig you built around the ball.
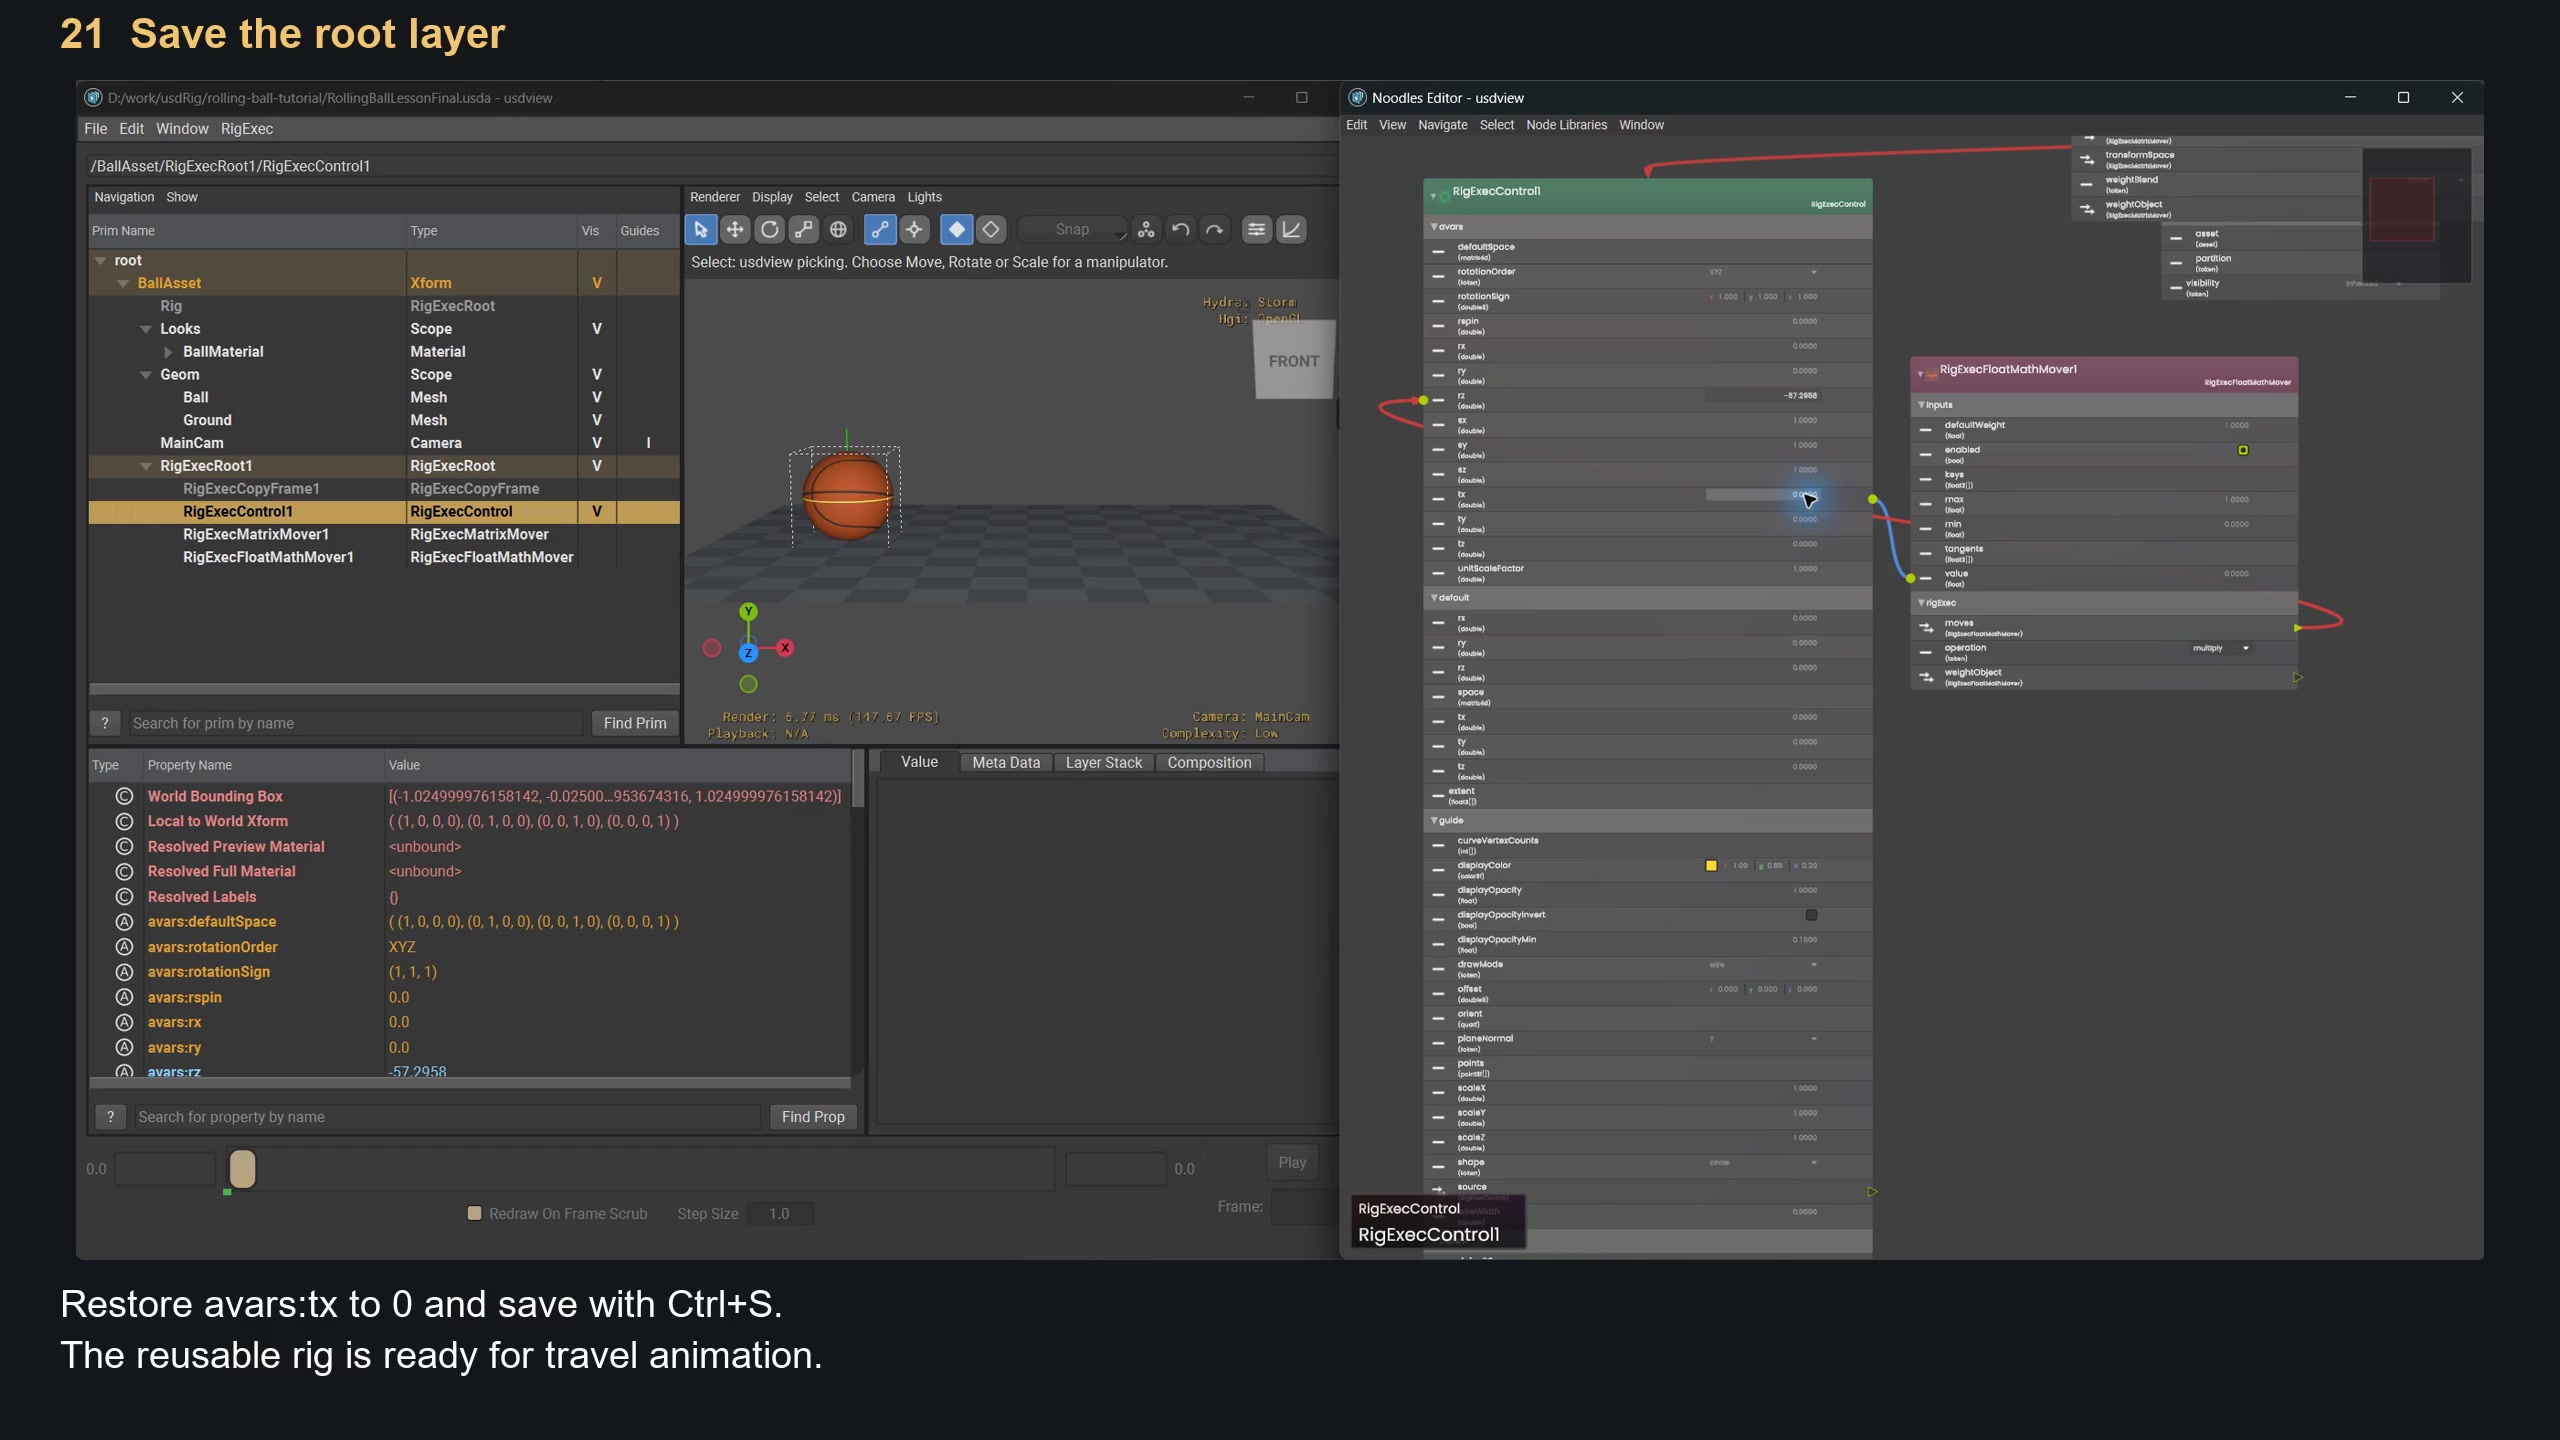
Movie frame: 3:11.
Check your connections
| Node | Property | Target or value |
|---|---|---|
| Control | rest:ty |
1 |
| Control | avars:rz |
Authored base value -57.2958 |
| Matrix Mover | rigExec:transform |
Control prim (drop on its title) |
| Matrix Mover | rigExec:moves |
Ball.points |
| Float Math Mover | rigExec:operation |
multiply |
| Float Math Mover | rigExec:moves |
Control's avars:rz |
| Float Math Mover | inputs:value |
Connected to control's avars:tx |
Both movers need RigExecMoverAPI. If a wire lands on a node title when you meant to target a channel, reconnect it to the named property row. If Tab does nothing, click inside Noodles and try again.
For more detail, see Control, Matrix Mover, and Float Math Mover. The separate Godot and baked rigs tutorial uses a more complex ball rig with joints and independent rotation controls for changing travel direction; its finished source is a different example from this lesson.